There’s something truly magical about burnt honey. It sounds a little intimidating, I know—who wants to burn their dessert? But trust me, it’s not about char or bitterness; it’s about transforming honey into a profound, complex, and deeply caramelized version of itself. This Burnt Honey Pie is the result: a silky, smooth filling in a flaky, buttery crust that will have everyone at your table asking for seconds. It’s the kind of dessert that feels both incredibly special and strangely comforting, perfect for a holiday centerpiece or a cozy weekend treat.
Why You’ll Love This Burnt Honey Pie
If you’re on the fence about trying a pie that involves “burnt” ingredients, let me put your mind at ease. This isn’t a recipe for disaster; it’s a recipe for a show-stopping dessert.
- A Flavor Adventure: The process of caramelizing the honey unlocks notes of toffee, citrus, and spice that you simply can’t get from regular honey.
- Surprisingly Simple: While it sounds fancy, the steps are straightforward. If you can make a custard, you can make this pie.
- The Ultimate Make-Ahead Dessert: This pie needs to set in the fridge, making it the perfect do-ahead dessert for parties and gatherings. No last-minute stress!
- Conversation Starter: “Burnt Honey Pie” is intriguing. Be prepared to become known as the person who made that amazing pie.
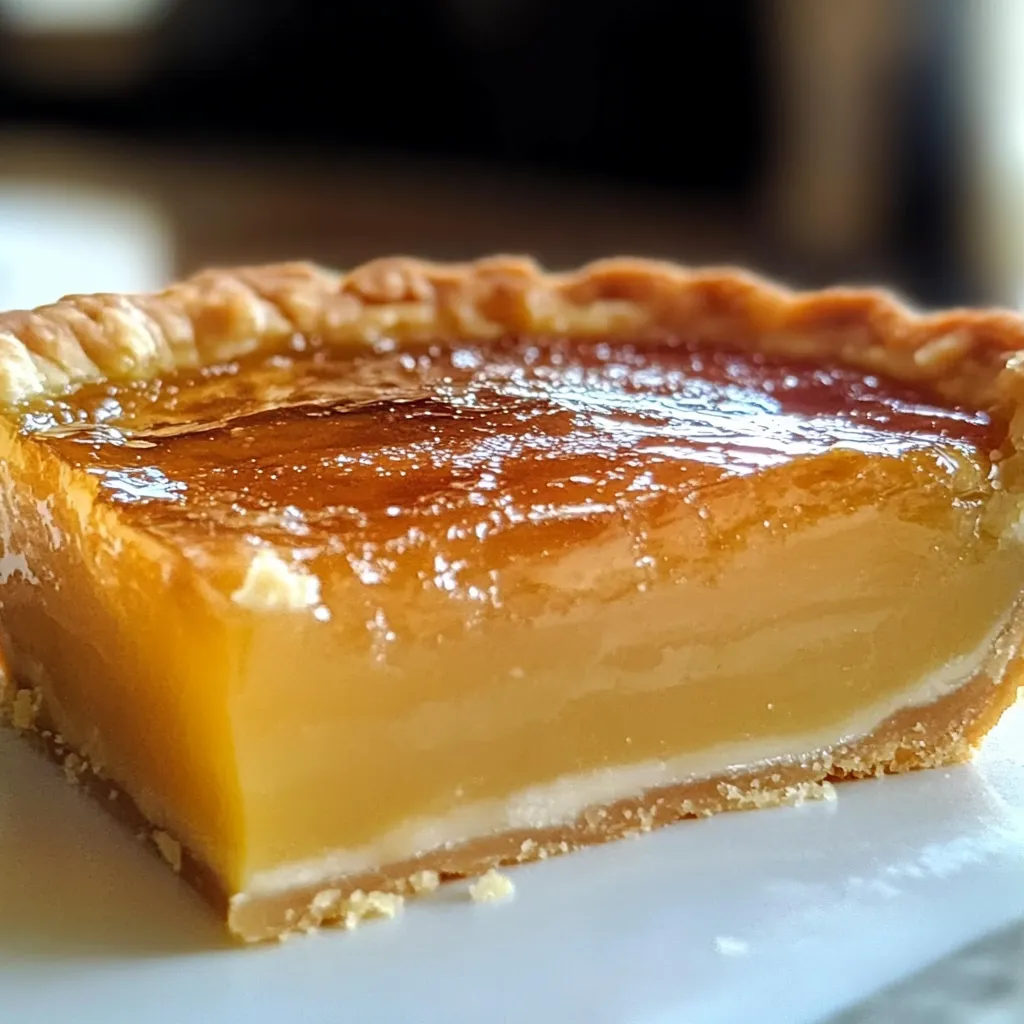
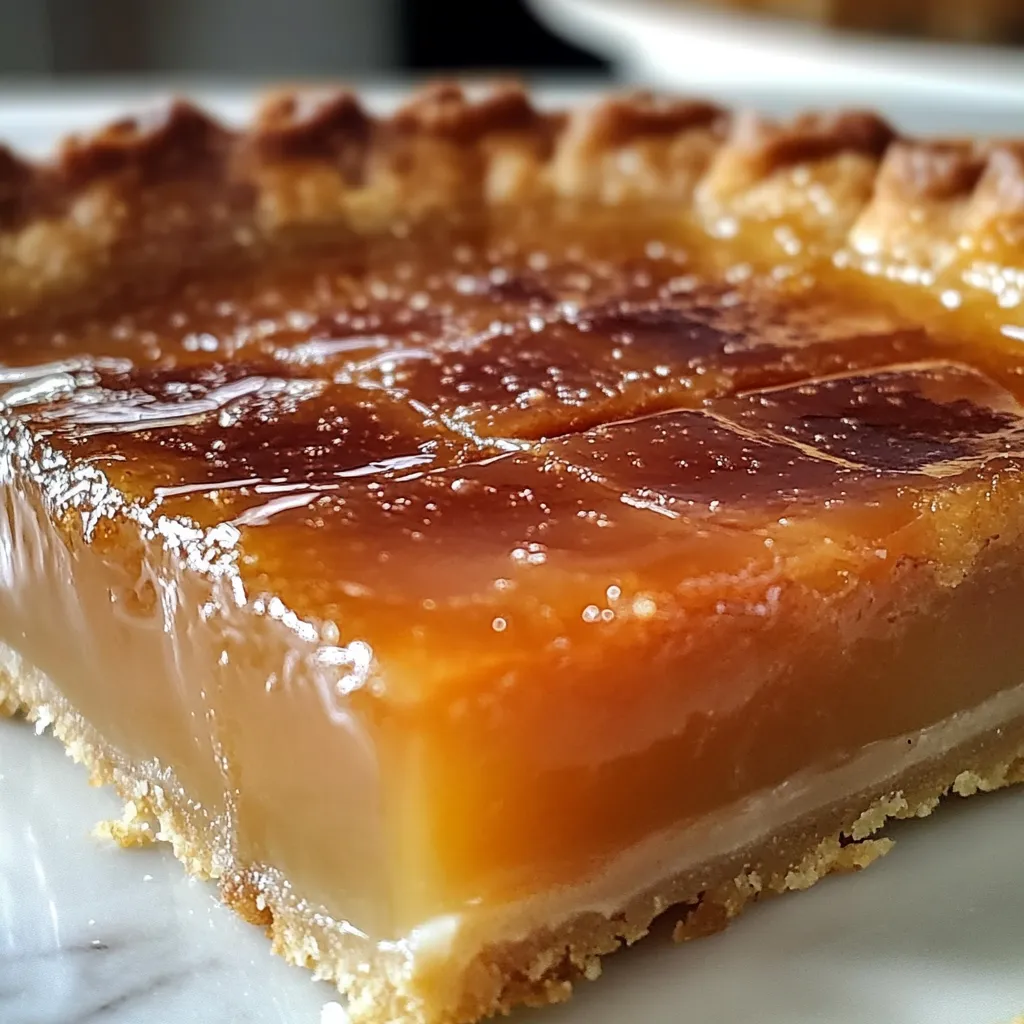
Golden Burnt Honey Pie UltraRich Decadent Slice
Savor an ultrarich decadent slice of burnt honey pie This unique golden dessert with a caramelized deep flavor profile is a musttry Perfect for any occasion
- Prep Time: 30 minutes
- Cook Time: 55 minutes
- Total Time: 5 hours 25 minutes
- Yield: 8 servings 1x
- Category: Dessert
- Cuisine: American
Ingredients
Instructions
Notes
A silky, smooth honey custard pie with a deeply caramelized flavor, set in a flaky, buttery crust. It’s the perfect make-ahead dessert that feels both special and comforting.
Nutrition
- Serving Size: 8 servings
- Calories: 480 calories
- Sugar: 40 grams
- Fat: 28 grams
- Carbohydrates: 52 grams
- Fiber: 0.5 grams
- Protein: 6 grams
Gathering Your Ingredients
This recipe relies on simple, high-quality ingredients to create its complex flavor profile.
- 1 single pie crust, unbaked (homemade or your favorite store-bought)
- 3/4 cup (255g) honey
- 1/2 cup (115g) unsalted butter
- 1 cup (240g) heavy cream
- 1/2 tsp. kosher salt
- 4 large eggs
- 1/2 cup (100g) granulated sugar
- 2 Tbsp. white cornmeal
- 2 tsp. white vinegar
- 1 tsp. vanilla extract
- Flaky sea salt, for garnish (optional)
How To Make Burnt Honey Pie
Let’s walk through the process. Don’t worry, I’ll guide you through each step.
- Prepare the Crust: Preheat your oven to 350°F (175°C). Press your pie crust into a 9-inch pie plate, crimp the edges as you like, and blind bake it until it’s just lightly golden. Set it aside to cool. For more tips on achieving the perfect flaky crust, check out my guide on how to make a foolproof pie crust.
- Brown the Butter and Honey: This is the star step! In a medium saucepan, combine the honey and butter. Cook over medium heat, stirring constantly, until the butter melts and the mixture begins to foam. Keep cooking for another 3-5 minutes. You’ll see the foam turn a deep amber color and it will smell wonderfully nutty. Immediately remove it from the heat.
- Temper the Eggs: In a medium bowl, whisk the eggs and granulated sugar until they’re pale and thick. Very slowly, drizzle a small amount of the hot honey-butter mixture into the eggs while whisking constantly. This tempers the eggs so they don’t scramble. Slowly whisk in the rest of the honey mixture.
- Finish the Filling: Whisk in the heavy cream, salt, cornmeal, vinegar, and vanilla until everything is smooth and fully combined.
- Bake: Place your par-baked pie shell on a baking sheet (to catch any potential drips). Pour the filling into the crust. Carefully transfer it to the oven and bake for 45-55 minutes. The pie is done when the edges are set but the center still has a slight jiggle—like Jell-O.
- Cool and Set: Let the pie cool completely on a wire rack. Then, transfer it to the refrigerator to chill for at least 4 hours, or preferably overnight. This setting time is non-negotiable for that perfect, sliceable texture.
- Serve: Serve chilled, with a sprinkle of flaky sea salt on top for the ultimate sweet-salty contrast.

My Go-To Pie Baking Equipment
You don’t need anything too fancy, but a few key tools make the process smoother.
- A 9-inch pie plate
- A good-quality saucepan
- A whisk
- A baking sheet (for easy transport and catching drips)
Tips & Tricks for Pie Perfection
Here are a few things I’ve learned from making this pie more times than I can count.
- Don’t Walk Away from the Honey: When browning the honey and butter, stay put! It can go from perfectly caramelized to actually burned faster than you think.
- The Jiggle is Key: The most common mistake is overbaking. You want a firm edge with a jiggly center—it will set up perfectly in the fridge.
- Cornmeal is a Textural Trick: Don’t skip the cornmeal! It’s not enough to make the pie gritty; it just gives the filling a little structure and a lovely, subtle texture. According to the experts at King Arthur Baking, it’s a classic ingredient for a reason.
- Make it a Day Ahead: This pie’s flavor actually improves after a night in the fridge. It’s the ultimate plan-ahead dessert.
The Perfect Way to Serve Your Masterpiece
This rich pie is fantastic all on its own, but a little something on the side never hurts. A dollop of freshly whipped cream or a scoop of vanilla bean ice cream provides a lovely cool contrast to the deep, spiced notes of the honey. For a festive touch, a sprinkle of flaky sea salt right before serving elevates every single bite.
Your Burnt Honey Pie Questions, Answered
Can I use a pre-made pie crust?
Absolutely! While I love a from-scratch crust, a good-quality store-bought crust works beautifully here and saves a ton of time. The real star of the show is that incredible filling.
How should I store leftovers?
Keep any leftover pie covered in the refrigerator. It will stay delicious for up to 4 days. The crust might soften a bit, but the flavor will still be incredible.
My filling puffed up a lot in the oven. Is that normal?
Yes! The eggs cause the filling to puff and rise significantly while baking. It will deflate back down as it cools into that smooth, dense texture we’re after. No need to worry.
Can I freeze this pie?
I don’t recommend it. Freezing can cause the custard filling to become watery and separate when it thaws, compromising that beautiful silky texture. It’s best enjoyed fresh from the fridge.
What does “burnt honey” actually taste like?
It loses its straightforward sweetness and gains incredible depth, with hints of toffee, molasses, and even a slight bitter note that balances the entire dessert. It’s a complex, grown-up kind of sweet that is absolutely addictive. For another dessert that plays with deep, caramelized flavors, you might enjoy my salted caramel brownies.
This Burnt Honey Pie is more than just a recipe; it’s a lesson in how a little heat can transform the ordinary into the extraordinary. It’s a testament to the fact that some of the best things in life come from taking a simple ingredient and daring to see its potential. So go ahead, embrace the burn, and get ready to make a dessert that will leave a lasting impression.