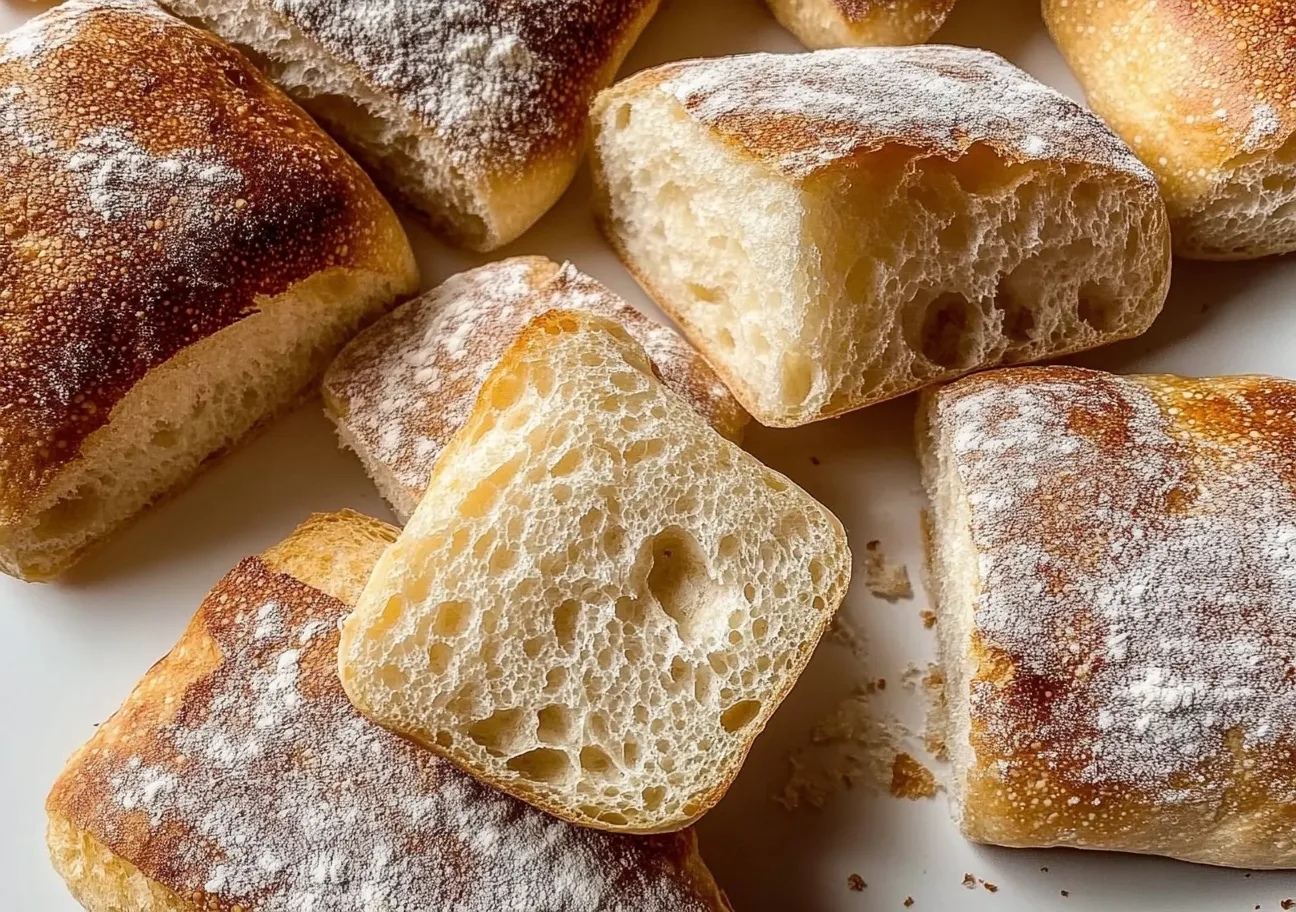
Hey there, friend. If you’ve ever felt a little pang of jealousy walking past the bakery’s crusty, cloud-like ciabatta, only to remember that gluten and you aren’t on speaking terms, I’ve been right there with you. That longing for a truly great piece of bread—with a crisp, shattering crust and those signature big, irregular holes inside—can feel a bit like a culinary ghost story. But what if I told you that dream is totally within reach? These Gluten Free Ciabatta Rolls are my kitchen-tested, family-approved answer. They’re shockingly simple to make, require no fancy equipment, and will make your kitchen smell like a professional patisserie.
Why You’ll Love This Gluten-Free Ciabatta Recipe
- Authentic Texture: We’re not making dense hockey pucks here. This recipe uses a clever blend of flours and a wet dough to achieve that coveted chewy interior and crisp crust.
- Surprisingly Simple: No need to be a bread wizard. If you can stir and let time do its thing, you can make these.
- Meal-Maker: They turn a simple soup into a feast and are the ultimate vehicle for your favorite gluten-free sandwich ideas.
- Freezer-Friendly: Make a batch, freeze them, and have artisan-style bread on demand. Your future self will thank you on a busy Tuesday.
What You’ll Need
Gathering your ingredients is the first step to bread-baking success. Here’s your shopping list for these golden beauties.
PrintGluten-Free Ciabatta Rolls Perfect Recipe
Master gluten free ciabatta rolls with our expert recipe & baking tech. Ideal texture & taste. Bake perfect GF rolls now.
- Prep Time: 15 minutes
- Cook Time: 25 minutes
- Total Time: 2 hours 30 minutes
- Yield: 6 rolls 1x
- Category: Bread
- Cuisine: Italian
Ingredients
- 300 grams gluten-free bread flour blend (about 2 ½ cups)
- 7 grams instant yeast (1 packet)
- 10 grams fine sea salt (2 teaspoons)
- 1 teaspoon cane sugar
- 350 milliliters lukewarm water (1 ½ cups)
- 2 tablespoons olive oil, plus more for greasing
- 1 tablespoon apple cider vinegar
- Extra gluten-free flour blend for dusting
Instructions
- Mix the Dough: In your large bowl, whisk together the gluten-free flour, instant yeast, salt, and sugar. Make a well in the center and pour in the warm water, olive oil, and apple cider vinegar. Stir with a rubber spatula until a very wet, sticky, and smooth batter-like dough forms.
- First Rise: Cover the bowl tightly with plastic wrap or a damp kitchen towel. Let it rise in a warm, draft-free spot for 60-90 minutes, or until it’s puffy and nearly doubled in size.
- Shape the Rolls: Heavily dust a piece of parchment paper with your gluten-free flour blend. Gently scrape the dough onto the floured parchment. With floured hands, gently pat and shape the dough into a rough rectangle. Use a floured knife to cut it into 6 equal pieces.
- Second Rise: Carefully separate the pieces on the parchment, leaving about 2 inches between them. Dust the tops lightly with more flour. Loosely cover them with the towel and let them rest for another 45 minutes. Meanwhile, preheat your oven to 425°F (220°C).
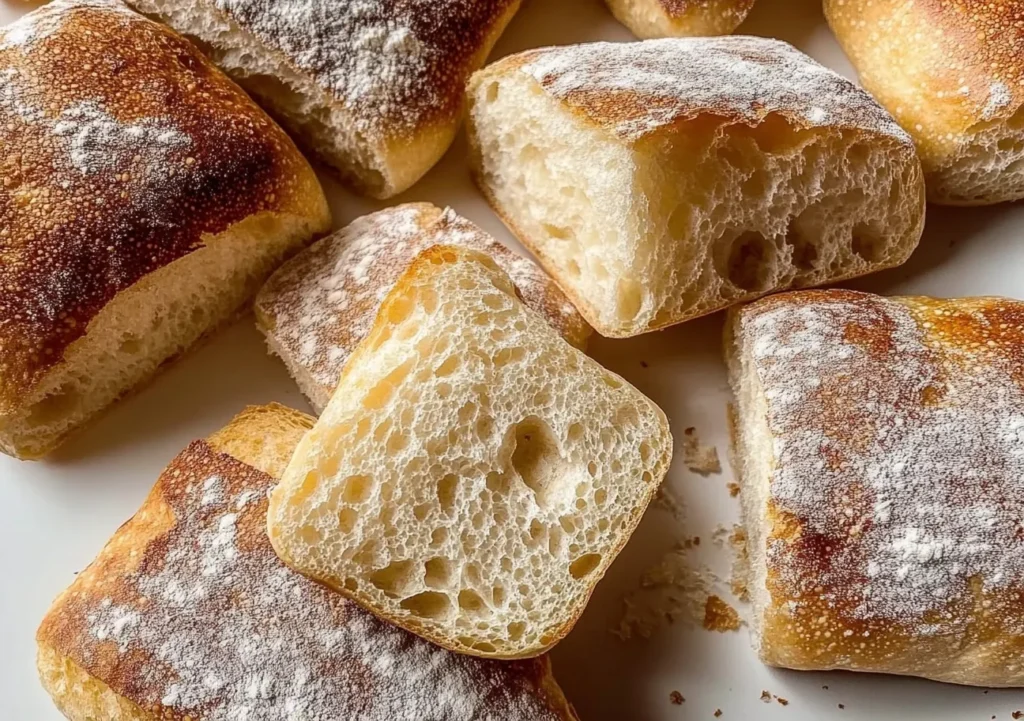
- Bake to Golden Perfection: Just before baking, you can make a shallow slash on top of each roll with your knife (optional). Slide the parchment paper directly onto your preheated baking sheet. Bake for 22-28 minutes, until the rolls are deeply golden brown and sound hollow when tapped.
- Cool: Transfer the rolls to a wire rack and let them cool completely before serving.
Notes
Learn how to make shockingly simple, airy, and artisan-style Gluten-Free Ciabatta Rolls. This recipe requires no fancy equipment and delivers a crisp crust with a chewy, hole-filled interior.
Nutrition
- Serving Size: 6 rolls
- Calories: 180 kcal
- Sugar: 1 g
- Fat: 5 g
- Carbohydrates: 30 g
- Fiber: 3 g
- Protein: 4 g
- 300g (about 2 ½ cups) gluten-free bread flour blend (I recommend one with xanthan gum already added, like Bob’s Red Mill 1-to-1 or King Arthur Measure for Measure)
- 7g (1 packet) instant yeast
- 10g (2 tsp) fine sea salt
- 1 tsp cane sugar
- 350ml (1 ½ cups) lukewarm water
- 2 tbsp olive oil, plus more for greasing
- 1 tbsp apple cider vinegar
- Extra flour blend for dusting
Essential Equipment
- Large mixing bowl
- Rubber spatula
- Baking sheet
- Parchment paper
- Sharp knife or baker’s lame for scoring
How to Make Gluten-Free Ciabatta Rolls: Step-by-Step
Ready to dive in? Don’t be intimidated by the wet dough—it’s the secret to great texture. Just follow these simple steps.
- Mix the Dough: In your large bowl, whisk together the gluten-free flour, instant yeast, salt, and sugar. Make a well in the center and pour in the warm water, olive oil, and apple cider vinegar. Stir with a rubber spatula until a very wet, sticky, and smooth batter-like dough forms. This will look different than a traditional wheat dough, and that’s perfect!
- First Rise: Cover the bowl tightly with plastic wrap or a damp kitchen towel. Let it rise in a warm, draft-free spot for 60-90 minutes, or until it’s puffy and nearly doubled in size. The warmth of your kitchen is your best friend here.
- Shape the Rolls: Heavily dust a piece of parchment paper (roughly the size of your baking sheet) with your gluten-free flour blend. Very gently scrape the dough onto the floured parchment—try to deflate it as little as possible. With floured hands, gently pat and shape the dough into a rough rectangle. Use your floured knife to cut it into 6 equal-ish pieces. Don’t worry about perfection; rustic is chic!
- Second Rise: Carefully separate the pieces on the parchment, leaving about 2 inches between them. Dust the tops lightly with more flour. Loosely cover them with the towel and let them rest for another 45 minutes. Meanwhile, preheat your oven to 425°F (220°C).
- Bake to Golden Perfection: Just before baking, you can make a shallow slash on top of each roll with your knife for a more artistic look (optional). Slide the parchment paper directly onto your preheated baking sheet. Bake for 22-28 minutes, until the rolls are deeply golden brown and sound hollow when tapped on the bottom.
- Cool (The Hardest Step!): Transfer the rolls to a wire rack and let them cool completely. I know, the aroma is torture, but cutting into them too soon will result in a gummy interior. Trust the process
My Top Tips for Ciabatta Success
I’ve made these more times than I can count, and here’s what I’ve learned. First, embrace the wet dough. Gluten-free flours need more hydration to get that open crumb, so don’t be tempted to add more flour. Second, instant yeast is your best bet for reliability, but make sure your water is just warm to the touch, not hot. Hot water will send your yeast to an early grave. Finally, for an extra-crispy crust, place a small oven-safe dish of water on the bottom rack while baking to create steam.
A quick story for you: the first time I served these at a family BBQ, my cousin, who has no dietary restrictions, ate three and asked where I bought them. The look on her face when I said, “Oh, I just whipped them up this morning,” was pure gold. That’s the magic of a great gluten-free recipe—it delights everyone.
Delicious Ways to Serve Your Homemade Rolls
These ciabatta rolls are the ultimate supporting actor. Split them and toast them for breakfast with avocado and everything bagel seasoning. Use them to sop up the last bits of a cozy hearty vegetable soup. Or, build the sandwich of your dreams with roasted turkey, cranberry sauce, and crisp greens. They’re also fantastic simply torn apart and served with a good olive oil and balsamic vinegar for dipping while dinner finishes up.
Nutrition Information (Per Roll)
Approximate values: Calories: 180 | Total Fat: 5g | Carbohydrates: 30g | Fiber: 3g | Protein: 4g
There you have it—your new favorite gluten free ciabatta rolls. They prove that going gluten-free doesn’t mean giving up on the joys of truly great, artisan-style bread. The process is soothing, the results are spectacular, and the pride you’ll feel pulling them from your own oven is unbeatable. I can’t wait for you to experience that moment. Now, go preheat that oven and get ready to fall in love with homemade bread all over again.
Your Gluten-Free Ciabatta Questions, Answered
Can I make the dough ahead of time?
Absolutely! After the first rise, you can cover the bowl tightly and pop it in the fridge for up to 24 hours. When you’re ready to bake, let the dough sit at room temperature for 30 minutes, then proceed with shaping and the second rise. The flavor actually deepens with a slow, cold ferment!
What’s the best way to store and reheat these rolls?
Store completely cooled rolls in a paper bag at room temperature for up to 2 days. For longer storage, freeze them in a zip-top bag for up to 3 months. To revive, thaw at room temperature and re-crisp in a 350°F oven for 5-10 minutes. A quick toast works wonders, too.
Can I use active dry yeast instead of instant?
You can, but it requires one extra step. Proof the active dry yeast with the sugar in the warm water for about 5-10 minutes until foamy. Then, add it with the oil and vinegar to the dry ingredients. The rest of the recipe stays the same.
My dough didn’t rise much. What went wrong?
Two likely culprits: old yeast or an environment that was too cold. Yeast has a shelf life—make sure yours is fresh. If your kitchen is chilly, try letting the dough rise in a turned-off oven with the light on, which creates a perfect warm little incubator.
What can I use if I don’t have a gluten-free bread flour blend?
While a blend is ideal, you can mix your own. A good starting point is 200g white rice flour, 75g tapioca starch, and 25g potato starch, plus 1 tsp xanthan gum. For more on the science of gluten-free flours, this guide is super helpful.