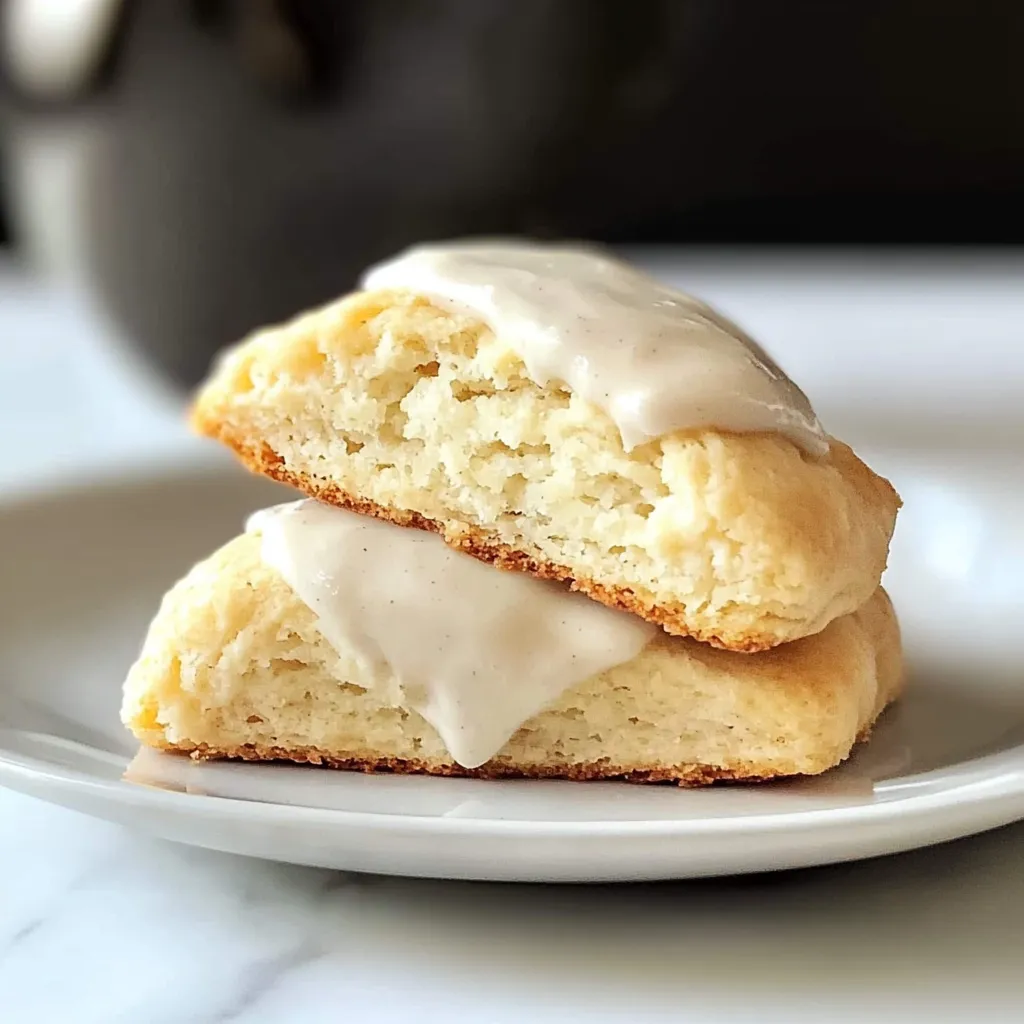
Let’s talk about a little morning miracle: a flaky, tender scone that just so happens to be gluten-free. I’m not talking about a dry, crumbly impostor. I’m talking about a bakery-quality, vanilla-kissed delight that’s perfect for your cozy weekend brunch or that mid-week “I deserve something nice” moment. As someone who believes the kitchen is where we cook up joy, I’ve fallen hard for these gluten free vanilla scones. They combine that classic scone texture with a sweet, aromatic vanilla flavor that will make your whole house smell incredible. Whether you’re navigating a gluten-free lifestyle or just love a delicious baked good, this recipe is your new best friend.
Why You’ll Love This Gluten Free Scone Recipe
This recipe is a gem, and here’s why it’s about to become a staple in your kitchen:
- Surprisingly Simple: No fancy techniques required. If you can measure and stir, you’re golden.
- One-Bowl Wonder (Mostly): We keep the cleanup to a minimum because who has time for a mountain of dishes?
- Incredibly Forgiving: Scone dough can be a bit fussy with traditional flour, but the gluten-free blend I use here is a dream to work with.
- Endlessly Customizable: Once you master this vanilla base, the flavor world is your oyster. Throw in some blueberries, chocolate chips, or a sprinkle of cinnamon.
Gathering Your Ingredients
Here’s what you’ll need to create these little pockets of happiness. I find using a good 1:1 gluten-free flour blend with xanthan gum already in it (like Bob’s Red Mill or King Arthur) works best for structure.
PrintGluten Free Vanilla Scones
Whip up soft, gluten-free vanilla scones with our simple recipe. Perfect for a quick, irresistible treat using easy techniques. No dairy options included. (150 chars)
- Prep Time: 15 minutes
- Cook Time: 18 minutes
- Total Time: 33 minutes
- Yield: 8 scones 1x
- Category: Dessert
- Cuisine: American
Ingredients
Instructions
Notes
A recipe for easy, flaky, and tender gluten-free vanilla scones with a sweet glaze. This bakery-worthy treat is perfect for brunch or a cozy snack and is surprisingly simple to make at home.
Nutrition
- Serving Size: 8 scones
- Calories: 320 calories
- Sugar: 22 g
- Fat: 16 g
- Carbohydrates: 42 g
- Fiber: 2 g
- Protein: 4 g
- 2 cups (280g) 1:1 gluten-free baking flour
- 1/3 cup (67g) granulated sugar
- 1 tbsp baking powder
- 1/2 tsp salt
- 1/2 cup (113g) cold unsalted butter, cubed
- 2 large eggs, cold
- 1/3 cup (80ml) cold heavy cream (plus extra for brushing)
- 1 ½ tsp pure vanilla extract
- 1 cup (120g) powdered sugar (for glaze)
- 2-3 tbsp milk or cream (for glaze)
- 1/2 tsp vanilla extract (for glaze)
How to Make Gluten Free Vanilla Scones

Follow these simple steps, and you’ll be rewarded with perfect scones. Remember, keeping everything cold is the secret to a flaky texture!
- Prep and Mix Dry Ingredients: Preheat your oven to 400°F (200°C) and line a baking sheet with parchment paper. In a large mixing bowl, whisk together the gluten-free flour, sugar, baking powder, and salt.
- Cut in the Butter: Add the cold, cubed butter to the flour mixture. Using a pastry cutter, two forks, or your fingertips, work the butter into the flour until the mixture resembles coarse crumbs with some pea-sized bits of butter remaining. This step is crucial for flakiness!
- Combine Wet Ingredients: In a separate small bowl or measuring cup, whisk together the cold eggs, cold heavy cream, and vanilla extract.
- Bring the Dough Together: Pour the wet ingredients into the dry ingredients. Gently stir with a fork or spatula until just combined and a shaggy dough forms. Don’t overmix!
- Shape and Cut: Turn the dough out onto a lightly floured surface (use a bit more gluten-free flour). Gently pat it into a circle about 1-inch thick. Using a sharp knife or a bench scraper, cut the circle into 8 equal wedges, like a pizza.
- Bake to Golden Perfection: Carefully transfer the wedges to your prepared baking sheet, leaving a couple of inches between them. Brush the tops lightly with a little extra heavy cream. Bake for 15-18 minutes, or until the scones are puffed and the edges are lightly golden. Let them cool on the sheet for 5 minutes before moving them to a wire rack.
- Make the Glaze: While the scones cool, whisk together the powdered sugar, milk, and vanilla extract in a small bowl until smooth. Drizzle generously over the warm scones.
Helpful Notes and Fun Variations
Here are a few tips from my kitchen to yours. First, a confession: I once tried to rush the process by using softened butter. The result? Scones that spread into one giant, flat cookie. Delicious, but not a scone! So trust me, keep it cold.
For a lovely twist, try adding the zest of one lemon to the dry ingredients for a bright, citrusy note. If you’re a fan of berries, gently fold in 3/4 cup of fresh or frozen blueberries (don’t thaw if frozen) after you cut in the butter. And for a dairy-free version, a high-quality vegan butter and canned coconut cream can work beautifully in place of the butter and heavy cream.
Serving Up the Cozy
These scones are divine served warm, when the glaze is still a little gooey. Pair them with a hot cup of coffee or your favorite tea. They’re the star of a leisurely brunch spread, but I also love wrapping one up for a special on-the-go breakfast. For a full brunch experience, they pair wonderfully with a light, fresh fruit salad or some creamy scrambled eggs.
Your Gluten Free Scone Questions, Answered
Can I make these scones ahead of time?
Absolutely! You can prepare the dough, cut it into wedges, and freeze them on the baking sheet. Once solid, transfer to a freezer bag. Bake straight from frozen, adding 2-4 extra minutes to the baking time. You can also bake them a day ahead and store in an airtight container; just glaze them the morning you plan to serve.
How should I store leftover scones?
Keep any leftover scones in an airtight container at room temperature for up to 2 days. They’re best enjoyed within 24 hours. You can also gently re-warm them in a 300°F oven for 5-10 minutes to revive that fresh-baked feel.
What can I use instead of heavy cream?
Full-fat canned coconut milk is a great non-dairy substitute. For a dairy-based swap, you can use full-fat sour cream thinned with a splash of milk to reach a similar consistency. The fat content is important for richness and texture.
My dough seems too wet/sticky. What did I do wrong?
Different gluten-free flour blends absorb liquid differently. If your dough is too sticky to handle, sprinkle a tablespoon more flour onto your hands and the dough surface as you pat it out. It should be workable but not dry. Conversely, if it seems too dry and crumbly, add a teaspoon of cold cream at a time until it comes together.
A Few Final, Sweet Crumbs of Advice
Baking should feel like a hug, not a test. This recipe for gluten free vanilla scones is designed to be approachable and joyful. Don’t stress if your wedges aren’t picture-perfect; they’ll taste fantastic regardless. The real magic is in sharing them—seeing the smile on someone’s face when they bite into a warm, homemade treat. That’s the heart of tastydwell.com. So, preheat that oven, grab your favorite mixing bowl, and let’s bake something wonderful today. If you loved this recipe, you might want to explore my other gluten-free baking adventures, like these cozy Gluten Free Banana Muffins or this decadent Flourless Chocolate Cake. Happy baking