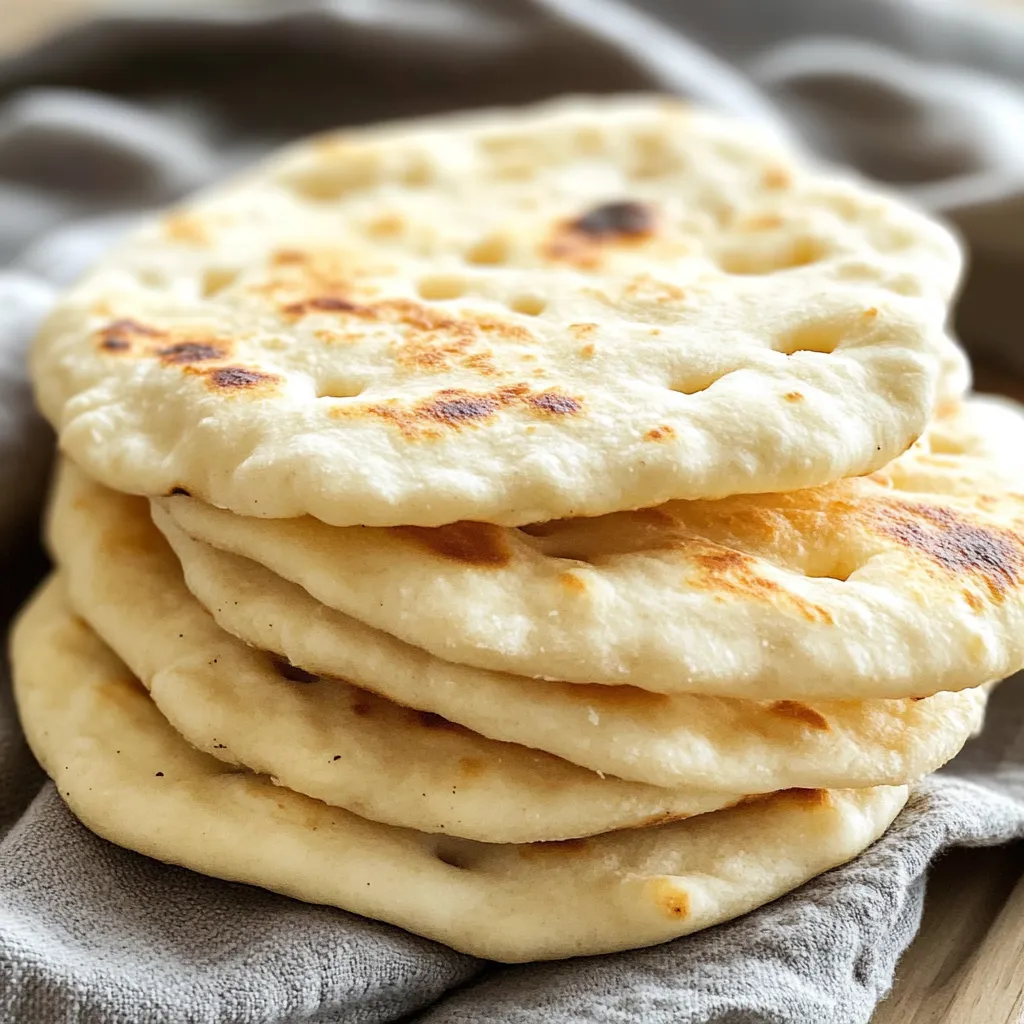
Ever tried to find a good gluten free pita bread at the store and been, well, disappointed? I get it. So many are either crumbly, dry, or taste a little too much like cardboard for my liking. That’s why I took it upon myself to create a recipe for Gluten Free Pita Bread that’s soft, pillowy, and actually has that glorious pocket we all crave. Perfect for stuffing with your favorite fillings, dipping into hummus, or just eating warm from the skillet. This recipe is a total game-changer for anyone missing the real deal.
Why You’ll Love This Gluten Free Pita Bread
- Surprisingly Simple: No fancy techniques here. This dough comes together in minutes with a stand mixer, but a little elbow grease works too!
- The Perfect Pocket: Yes, you read that right. These beauties puff up like a dream, creating the perfect vessel for your favorite sandwich fillings.
- Incredibly Versatile: Serve them with my favorite Creamy Hummus Dip, use them as a base for personal pizzas, or make killer gyros.
- Freezer-Friendly: Make a big batch and freeze them for later. Your future self will thank you on a busy weeknight.
Ingredients for Your Gluten-Free Pita Bread
Grab your favorite gluten-free flour blend! The right mix is key for that perfect texture. The brand I use contains xanthan gum, which is our secret weapon for elasticity.
PrintGluten Free Pita Bread

Master gluten-free pita bread with our perfect pocket technique. Discover recipes & expert baking tips for flexible, soft pita every time. 155 chars
- Prep Time: 15 minutes
- Cook Time: 15 minutes
- Total Time: 90 minutes
- Yield: 6 pitas 1x
- Category: Bread
- Cuisine: Mediterranean
Ingredients
Instructions
Notes
A recipe for soft, pillowy gluten free pita bread with a perfect pocket. This easy recipe is a game-changer for anyone missing the real deal, and it’s perfect for sandwiches, dipping, or personal pizzas.
Nutrition
- Serving Size: 6 pitas
- Calories: 180 calories
- Sugar: 1 g
- Fat: 6 g
- Carbohydrates: 28 g
- Fiber: 3 g
- Protein: 4 g
- 2 cups (280g) gluten free 1:1 baking flour (I recommend Bob’s Red Mill or King Arthur)
- 1 tsp instant yeast
- 1 tsp granulated sugar
- 1 tsp salt
- ¾ cup warm water (around 110°F)
- 1 large egg, at room temperature
- 2 tbsp olive oil, plus more for brushing
How to Make Gluten Free Pita Bread
Don’t be intimidated by yeast breads! This process is much easier than you think. Just follow these simple steps for pita perfection.
- Activate the Yeast: In the bowl of your stand mixer, whisk together the warm water, sugar, and yeast. Let it sit for about 5-7 minutes until it gets foamy. This little science experiment means your yeast is alive and ready to make your bread rise!
- Make the Dough: Add the egg, olive oil, gluten-free flour, and salt to the bowl. Using the dough hook attachment, mix on medium-low speed for about 3-4 minutes. The dough will be sticky and more like a very thick batter than a traditional bread dough. Resist the urge to add more flour! Scrape down the sides as needed.
- First Rise: Brush the top of the dough lightly with a little olive oil. Cover the bowl with plastic wrap and let it rise in a warm, draft-free spot for 60-90 minutes. It won’t double in size like regular dough, but it should look puffy.
- Shape the Pitas: Lightly flour a piece of parchment paper. Turn the dough out onto it and divide it into 6 equal pieces. With well-floured hands, gently shape each piece into a ball and then flatten it into a disk about ¼-inch thick. Don’t use a rolling pin, just your hands—this helps keep the air in the dough.
- Cook to Puffy Perfection: Heat a cast-iron skillet or non-stick griddle over medium-high heat. Carefully transfer one dough disk to the hot, dry skillet. Cook for 2-3 minutes until the bottom is golden brown and bubbles form on top. Flip and cook for another 1-2 minutes. The pita should puff up beautifully! Transfer to a plate and cover with a clean kitchen towel to keep them soft. Repeat with the remaining dough.
Essential Tools You’ll Need
- Stand Mixer (or a strong arm and a mixing bowl!)
- Cast-Iron Skillet or Non-Stick Griddle
- Kitchen Scale (for measuring flour accurately)
Tips & Tricks for the Best Pitas
Making gluten-free bread is a bit different, but these tips will set you up for success every single time.
- Dough Too Sticky? This is normal! Gluten-free dough is much sticker and more like a batter. Trust the process and use well-floured hands for shaping.
- No Pocket? If your pita doesn’t puff, your skillet might not be hot enough. Make sure it’s properly preheated before adding the first disk.
- Warm Water is Key: Too hot and you’ll kill the yeast; too cold and it won’t activate. Aim for water that feels warm to the touch, like a pleasant bath.
- Keep Them Soft: Covering the cooked pitas with a towel traps steam and keeps them from getting hard as they cool.
Can I make these dairy-free?
Absolutely! This recipe is naturally dairy-free as written, making it a great option for multiple dietary needs.
How should I store leftover pita bread?
Once completely cool, store them in an airtight bag at room temperature for 2 days. For longer storage, I highly recommend freezing them. Separate each pita with a small piece of parchment paper, pop them in a freezer bag, and freeze for up to 3 months. Reheat straight from the freezer in a toaster or warm skillet.
My dough didn’t rise much. Is that okay?
Yes! Gluten-free dough doesn’t have the same elastic gluten network to trap gas, so it won’t double in size like traditional wheat dough. You’re looking for it to become puffy and full of air bubbles, which is a sign the yeast is doing its job. The real magic happens in the hot skillet.
What’s the best way to reheat them?
The very best way to bring back that soft, fresh-from-the-skillet texture is to reheat them for a minute in a dry, hot skillet. The microwave can work in a pinch, but it might make them a little chewy.
What to Serve With Your Homemade Pita
Now for the best part: eating! These pitas are incredibly versatile. Tear them apart and dive into a bowl of creamy homemade hummus. Stuff them with grilled chicken, crisp veggies, and a dollop of tzatziki for a quick lunch. Or, get creative and use them as a base for mini personal pizzas—just add sauce, cheese, and your favorite toppings and pop them under the broiler. For a full Mediterranean feast, pair them with a simple refreshing cucumber salad.
There’s something so satisfying about pulling a warm, puffy pita bread right off the skillet. It’s one of those simple kitchen miracles that never gets old. This gluten free pita bread recipe proves that going gluten-free doesn’t mean giving up on the foods you love. It just means getting a little more creative in the kitchen. So, grab your flour and get ready to bake some joy!