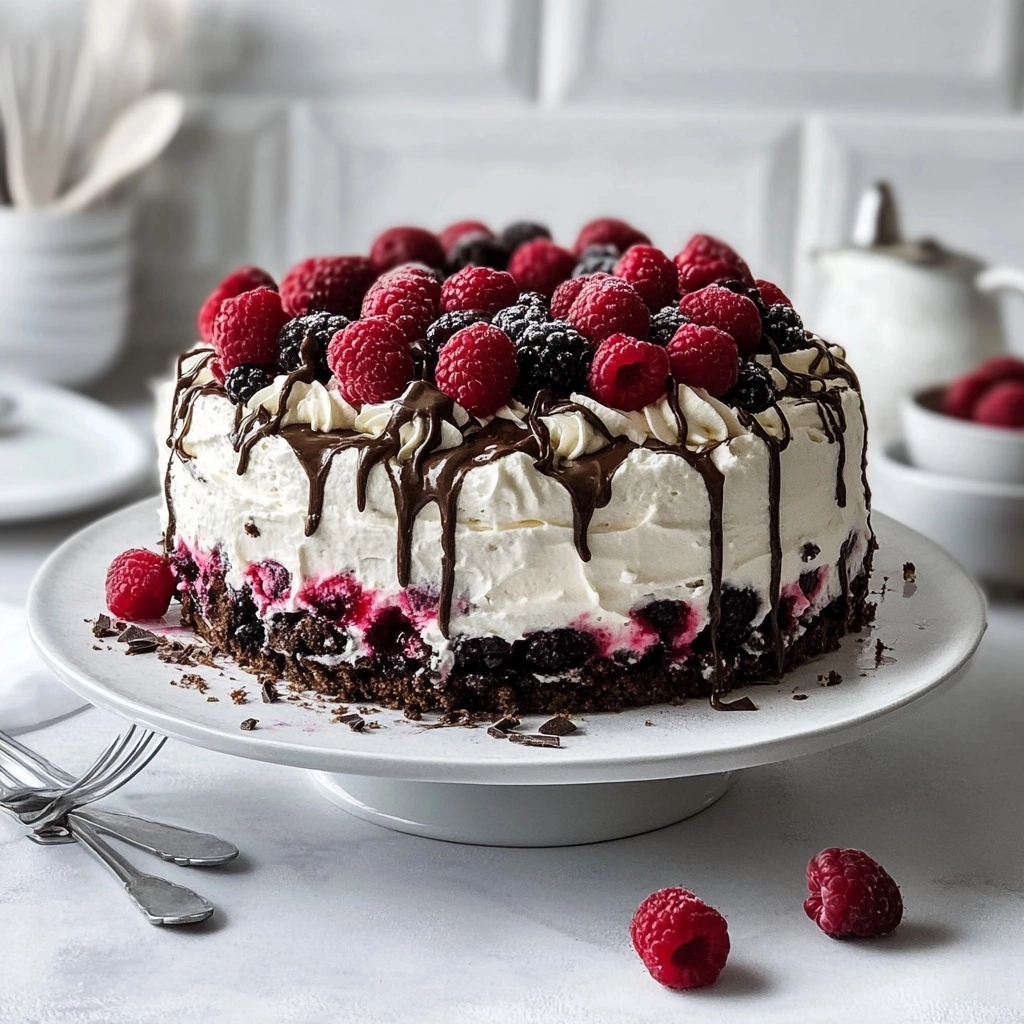
The Gluten-Free Chocolate Berry Icebox Cake is a no-bake frozen dessert featuring layers of creamy ice cream, crushed gluten-free chocolate cookies, and bright berry flavors. This easy-to-make treat offers a delightful contrast of textures and tastes, perfect for any celebration.
Recipe Overview
| Prep Time | Cook Time | Total Time | Servings | Difficulty | Cuisine |
|---|---|---|---|---|---|
| 30 minutes | 0 minutes | 6 hours 30 minutes (includes freezing) | 8-10 | Easy | American |
Why This Recipe Works
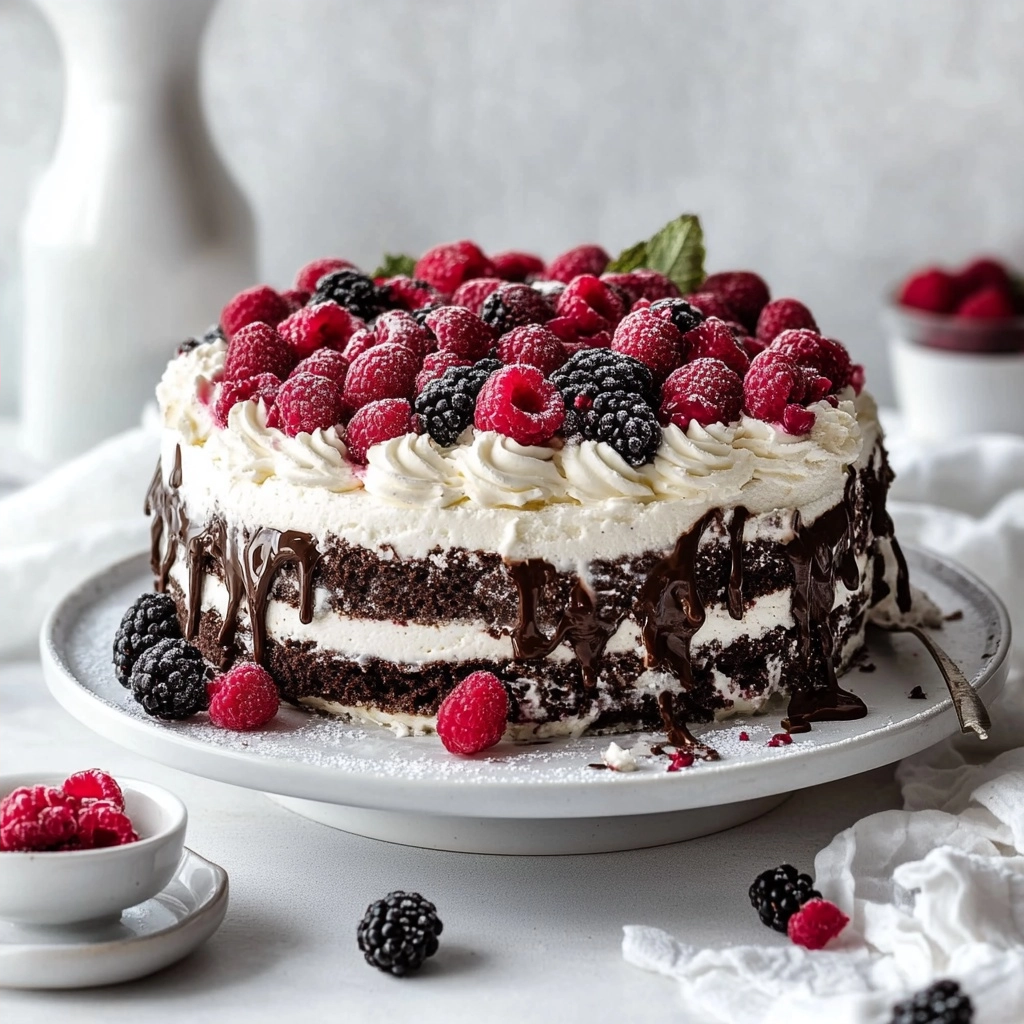
As a recipe developer who adores creating desserts that cater to everyone, this Gluten-Free Chocolate Berry Icebox Cake is a standout. It achieves a remarkable balance between rich chocolate and tart berries without any baking whatsoever. The use of ice cream directly as the main component simplifies the process immensely, allowing busy home cooks to assemble a stunning dessert in under an hour of active time. The distinct layers are key; they provide both visual appeal and a delightful textural experience with every bite.
The magic truly happens during the freezing process. It allows the flavors to meld and the cake to firm up into a sliceable, yet still soft, confection. I’ve found that using a good quality gluten-free chocolate sandwich cookie, like those from Goodie Girl or Glutino, provides the perfect crumbly texture and chocolatey base. Freeze-dried raspberries are indispensable here; they offer an intense berry flavor and vibrant color that doesn’t add excess moisture, preventing the cake from becoming icy. This recipe is a testament to how simple ingredients can create a show-stopping dessert that’s also entirely gluten-free.
Ingredients
PrintGluten-Free Chocolate Berry Icebox Cake
A no-bake frozen dessert with layers of creamy ice cream, gluten-free chocolate cookies, freeze-dried raspberries, fudge sauce, and whipped cream. This halal-compliant, gluten-free cake offers a rich and tangy contrast in every bite.
- Prep Time: 30
- Total Time: 390
- Yield: 8-10 servings 1x
- Category: Gluten-Free
- Method: No-Bake
- Cuisine: American
- Diet: Vegetarian
Ingredients
3 quarts ice cream
10 gluten-free chocolate sandwich cookies (certified gluten-free, e.g., GF Oreos, Goodie Girl, or Glutino)
½ cup freeze-dried raspberries (approx. half a 1.25 oz bag)
⅓ cup fudge sauce (non-alcoholic)
3 cups whipped cream (Cool Whip recommended for holding shape)
Instructions
Line a 9×13-inch dish with parchment paper for easy slicing.
Crush 8 gluten-free chocolate cookies into coarse crumbs (reserve 2 for garnish).
Mix in 1 Tbs fudge sauce for moisture and press half the mixture into the dish as the base.
Pour 1 quart of chocolate ice cream over the base and smooth the top.
Sprinkle ¼ cup freeze-dried raspberries and mix with the remaining 2 Tbs fudge sauce. Spread this mixture evenly over the ice cream layer.
Pour the second quart of vanilla ice cream over the raspberry-fudge layer and smooth.
Chill for 4 hours or until firm. Freeze for up to 24 hours before serving.
Frost with whipped cream layer and garnish with reserved cookies and raspberries before slicing.
Notes
Ensure all cookies are certified gluten-free to avoid cross-contamination.
Use dairy-free or halal-certified ice cream for stricter dietary needs.
Fudge sauce should be spreadable and not warm to prevent softening.
Freezing beyond 4 hours increases firmness but avoid longer than 24 hours for optimal texture.
Nutrition
- Serving Size: 1 slice
- Calories: 350
- Sugar: 22g
- Sodium: 180mg
- Fat: 16g
- Saturated Fat: 10g
- Carbohydrates: 38g
- Fiber: 2g
- Protein: 4g
- Cholesterol: 30mg
| Ingredient | Quantity | Notes |
|---|---|---|
| Ice Cream | 3 quarts | Any flavor or combination like vanilla and chocolate. Dairy-free options are suitable. |
| Gluten-Free Chocolate Sandwich Cookies | 10 cookies | Such as GF Oreos, Goodie Girl, or Glutino. Reserve 2 for garnish. |
| Freeze-Dried Raspberries | ½ cup | Approximately half of a 1.25 oz bag. Target carries them. Save a small amount for garnish. |
| Fudge Sauce | ⅓ cup | Plus extra for garnish if desired. Ensure it’s spreadable, not hot. |
| Whipped Cream (topping) | 3 cups | Cool Whip holds its shape best for frosting. |
| Fresh Raspberries | 10 | For final garnish. |
Step-by-Step Instructions
Prepare the Pan and First Ice Cream Layer
Thaw the first 1.5 quarts of ice cream in a large mixing bowl at room temperature, stirring every 10 minutes until creamy and spreadable, akin to soft-serve consistency. This process can take around 45 minutes depending on your kitchen’s temperature.
Prepare Cookie and Berry Crumbles
Crumble 8 of the gluten-free chocolate sandwich cookies into small, bite-sized pieces into a small bowl. Gently crumble the freeze-dried raspberries into a separate bowl, reserving a small portion for garnish.
Assemble the First Layer
Line an 8 or 9-inch springform pan with plastic wrap, ensuring about 6 inches of excess overhang. If using a standard cake pan, line it similarly. Transfer the softened ice cream to the prepared pan, spreading it evenly to the edges and applying gentle pressure to eliminate air pockets.
Add First Layer Toppings
Sprinkle most of the freeze-dried raspberry crumbles over the ice cream layer. Swirl them lightly into the ice cream using a fork. Sprinkle the crumbled cookies evenly over the top and gently press them into the ice cream to help them adhere.
First Freeze
Place the pan in the freezer for a minimum of 2 hours, or until firm. overnight freezing is also acceptable.
Prepare the Second Ice Cream Layer
About 75 minutes before the first layer is scheduled to be frozen, thaw the remaining 1.5 quarts of ice cream using the same method described in step 1. Ensure it reaches a soft-serve, spreadable consistency.
Add Fudge Layer
Once the first ice cream layer is frozen solid, warm the fudge sauce slightly until it is spreadable but not hot. Spread a layer of fudge sauce over the frozen ice cream, leaving about a ¼ inch border around the edge.
Assemble the Second Layer
Transfer the softened second ice cream flavor to the pan, spreading it evenly as a top layer over the fudge sauce.
Second Freeze
Return the cake to the freezer for at least 4 hours, or preferably overnight, until completely firm.
Unmold the Cake
If using a springform pan, run a sharp knife around the inside edge to loosen. Carefully release the outer ring of the springform pan. If using a lined cake pan, pull gently on the plastic wrap to lift the cake out. You may need to invert it onto a serving plate and tap the pan.
Frost and Decorate
If the cake sides appear melty, return it to the freezer for 20 minutes to firm up. Frost the top and sides evenly with whipped cream. Garnish with the reserved crumbled cookies and freeze-dried raspberries.
Final Chill and Serve
Freeze the decorated cake for another 20 minutes to set the frosting. Remove the cake from the freezer 15-30 minutes before serving, depending on room temperature. Garnish with fresh raspberries just before serving.
Chef Tips for Perfect Results
-
Use quality gluten-free cookies: The texture and flavor of your gluten-free chocolate sandwich cookies significantly impact the final cake. Choose brands known for good taste and that don’t become excessively crumbly when crushed.
-
Even thawing is key: For the ice cream, resist the urge to microwave or rush the thawing process. Consistent room temperature thawing ensures a smooth, easily spreadable consistency without melting the entire carton.
-
Don’t over-swirl: When swirling the freeze-dried raspberries into the ice cream, do so gently. Over-mixing can cause the color to bleed too much and may break down the cookie crumbles.
-
Chill adequately: Ensure each freezing stage is complete. A firmly frozen first layer prevents the fudge sauce and second ice cream layer from sinking or mixing prematurely, leading to distinct layers.
-
Proper unmolding: If using plastic wrap, ensure it overhangs sufficiently. Gentle handling during the unmolding process prevents the cake from breaking or distorting.
Common Mistakes to Avoid
-
Using regular cookies: This negates the gluten-free nature of the recipe and is unsuitable for individuals with celiac disease or gluten sensitivity. Always verify your cookies are certified gluten-free.
-
Freezing ice cream too hard: If ice cream is frozen solid before spreading, it becomes difficult to work with and can lead to an uneven, icy texture in the final cake. Thaw it sufficiently to a manageable, soft-serve consistency.
-
Incorrect fudge sauce temperature: Using hot fudge sauce will melt the frozen ice cream layer, causing undesirable mixing and a less defined appearance. Warm it only to a spreadable, slightly viscous state.
-
Skipping the pre-chill after frosting: Not freezing the cake adequately after adding the whipped cream can result in melting or smearing when serving, especially in warmer environments. This final chill sets the frosting.
-
Serving too cold: An icebox cake is best served slightly softened, not rock solid. Allowing it to sit at room temperature for 15-30 minutes before slicing allows for easier cutting and a creamier mouthfeel.
Variations and Substitutions
| Ingredient | Substitution | Impact on Flavor |
|---|---|---|
| Gluten-Free Chocolate Sandwich Cookies | Gluten-free vanilla wafers, shortbread cookies, or even graham crackers | Less intense chocolate flavor, potentially milder sweetness. |
| Freeze-Dried Raspberries | Freeze-dried strawberries, blueberries, or a mixed berry blend | Changes the specific berry flavor profile and color. |
| Fudge Sauce | Caramel sauce, hot fudge topping (ensure dairy-free if needed), or a fruit coulis | Introduces caramel, coffee, or fruit notes instead of chocolate. |
| Whipped Cream | Homemade stabilized whipped cream (using gelatin or xanthan gum), coconut cream (for dairy-free) | Homemade can offer a fresher, less sweet flavor. Coconut cream adds a subtle tropical note. |
| Ice Cream Flavor | Mint chocolate chip, cookie dough, strawberry, coffee, etc. | Completely alters the base flavor profile of the cake. |
Serving Suggestions and Pairings
This Gluten-Free Chocolate Berry Icebox Cake is a perfect centerpiece for birthdays, summer gatherings, or any special occasion. Serve individual slices on dessert plates for a refined presentation. Its richness pairs wonderfully with a hot beverage, such as coffee or a decaf option, providing a comforting contrast to the cold dessert. For a truly decadent experience, a small drizzle of extra fudge sauce or a dusting of cocoa powder can enhance its visual appeal and flavor depth.
Consider serving it after a light meal, like grilled chicken or a fresh salad, allowing the dessert to be the star. For holiday celebrations, perhaps a Fourth of July picnic or a summer solstice party, its vibrant colors and refreshing nature make it an ideal choice. It also complements lighter desserts like fruit salads if you are offering a dessert buffet, providing a more indulgent option.
Storage and Reheating
| Method | Duration | Instructions |
|---|---|---|
| Freezer Storage | Up to 2 weeks | Wrap the entire cake tightly in plastic wrap, then in aluminum foil. Store in the freezer. Ensure it is well-covered to prevent freezer burn. |
| Thawing for Serving | 15-30 minutes | Remove cake from the freezer and place it on its serving plate. Allow it to sit at room temperature for the specified time before slicing. Adjust time based on ambient temperature. |
| Leftovers | 1-2 days | Store any leftover slices in an airtight container in the freezer. Wrap individually if possible for best freshness. |
Nutritional Information
| Nutrient | Amount per Serving (Approximate values) |
|---|---|
| Calories | 450-550 kcal |
| Protein | 4-6 g |
| Fat | 25-35 g |
| Carbohydrates | 50-65 g |
| Fiber | 2-4 g |
| Sugar | 35-50 g |
| Sodium | 150-300 mg |
Frequently Asked Questions
Can I substitute fresh berries for freeze-dried?
Fresh berries contain too much moisture and will make the cake icy. Always use freeze-dried berries for this recipe to maintain texture and flavor intensity without adding excess liquid.
How do I know if the ice cream is thawed enough?
The ice cream should be creamy and spreadable, similar to a soft-serve consistency. It should hold its shape slightly but be easily manipulated with a spoon or spatula, not runny or excessively melted.
My layers are mixing, what went wrong?
This typically happens if the first layer was not frozen firm enough before adding the fudge sauce and second ice cream layer. Ensure adequate freezing time between steps. Using hot fudge sauce will also cause melting and mixing.
Can I make this icebox cake ahead of time?
Yes, this icebox cake is ideal for making ahead. It requires significant freezing time and actually benefits from resting in the freezer for at least 4 hours, or ideally overnight, before serving.
How long before serving should I take the cake out of the freezer?
Remove the cake from the freezer 15 to 30 minutes before serving. The exact time depends on the temperature of your room; warmer environments require less thawing time. This brief thawing period allows for easier slicing and a creamier texture.
Conclusion
This Gluten-Free Chocolate Berry Icebox Cake is a spectacular no-bake dessert that proves you don’t need an oven to create something truly memorable. The combination of rich chocolate, tart berries, and creamy ice cream, all within a gluten-free framework, makes this cake a crowd-pleaser. Effortlessly elegant and wonderfully delicious, it’s the perfect treat to end any meal with a flourish of berry-chocolate bliss.