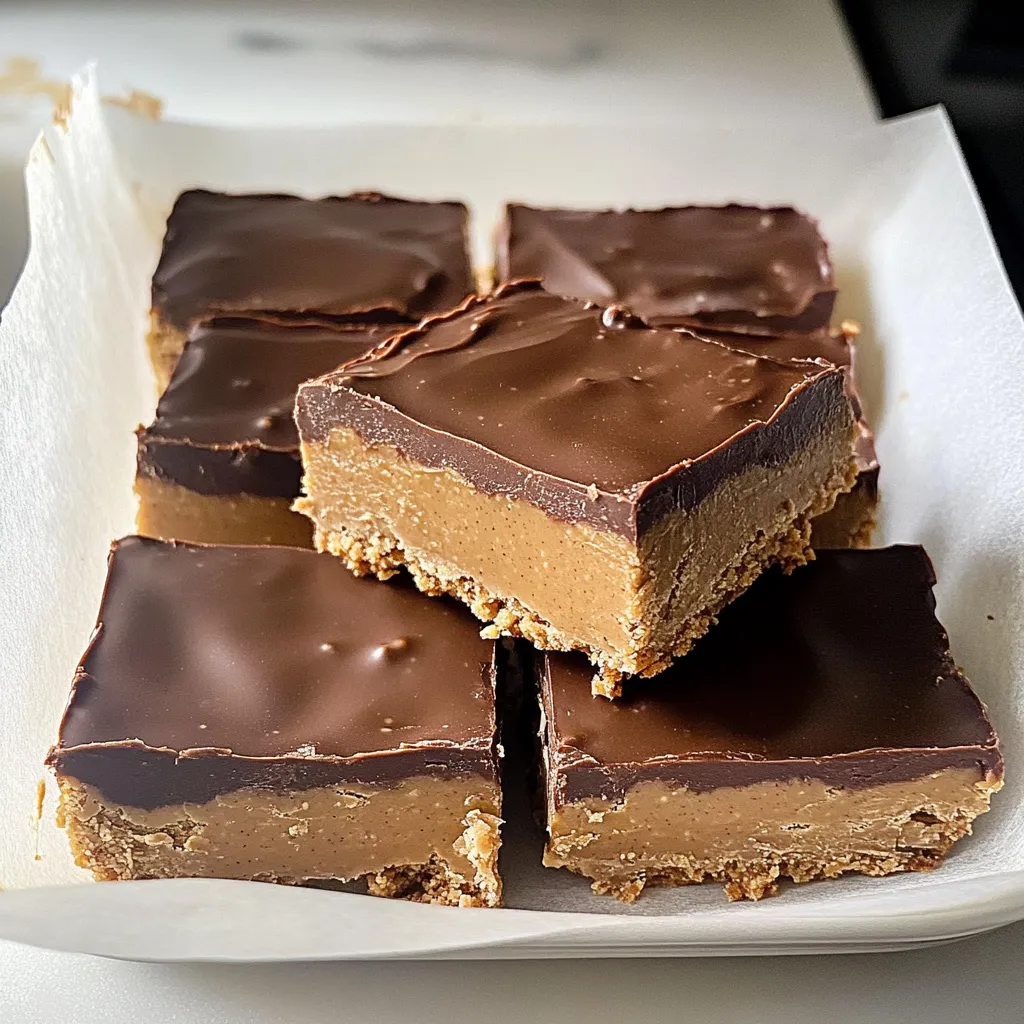
You know those days when you need a little something sweet, but turning on the oven feels like a monumental task? I’ve been there more times than I can count. That’s where these miraculous Chocolate Peanut Butter No Bake Bars come in. They’re the sweet hug you need at the end of a long day, combining creamy peanut butter and rich chocolate into a bar that’s blissfully simple to make. No oven, no fuss, just pure, unadulterated joy. They’re perfect for busy weeknights, last-minute potlucks, or satisfying that 3 PM sugar crash. Trust me, this is one recipe you’ll want to keep on speed dial.
Table of Contents
Table of Contents
Why You’ll Love These No Bake Bars
If you need a little more convincing to clear off a spot on your counter, let me break it down for you.
- Incredibly Easy: If you can melt butter and stir, you’ve got this. It’s virtually foolproof.
- Crazy Delicious: It’s the classic combo of chocolate and peanut butter. Need I say more?
- Perfect for Making Ahead: Whip up a batch on Sunday and enjoy them all week long.
- Family-Friendly: This is a treat that both kids and adults will fight over.
Gathering Your Ingredients
One of the best parts of this recipe is the short and sweet ingredient list. You probably have most of this in your pantry right now :
Print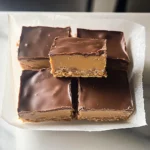
Chocolate Peanut Butter No Bake Bars
- Total Time: 2 hours 20 minutes
- Yield: 16 bars 1x
Description
Chocolate Peanut Butter No Bake Bars with rich cocoa & creamy peanut butter. Simple no-oven recipe requiring just 6 ingredients. A quick, delicious fix!
Ingredients
- 1 cup (2 sticks) unsalted butter
- 1 cup creamy peanut butter
- 2 cups graham cracker crumbs
- 2 cups powdered sugar
- 1 ½ cups semisweet chocolate chips
- ½ cup creamy peanut butter
Instructions
- Prepare the Pan: Line an 8×8 or 9×9 inch square baking pan with parchment paper, leaving some overhang on the sides.
- Melt the Base: In a medium saucepan over low heat, melt the 1 cup of butter and 1 cup of peanut butter together, stirring until smooth and combined.
- Combine Dry Ingredients: Remove from heat. Stir in the graham cracker crumbs and powdered sugar until a thick, uniform dough forms.
- Press it Down: Transfer the dough into the prepared pan and press it down firmly into a smooth, even layer.
- Create the Topping: In a microwave-safe bowl, combine the chocolate chips and the remaining ½ cup of peanut butter. Heat in 30-second bursts, stirring after each, until melted and smooth.
- Chill and Set: Pour the chocolate peanut butter topping over the base and spread it evenly. Refrigerate for at least 2 hours, or until completely set.
- Slice and Serve: Once set, lift the block out of the pan using the parchment paper. Place on a cutting board and slice into bars.
Notes
An incredibly easy, no-bake dessert combining creamy peanut butter and rich chocolate into a blissfully simple bar. Perfect for a quick, family-friendly treat without turning on the oven.
- Prep Time: 15 minutes
- Cook Time: 5 minutes
- Category: Dessert
- Cuisine: American
Nutrition
- Serving Size: 16 bars
- Calories: 320 calories
- Sugar: 21 grams
- Fat: 22 grams
- Carbohydrates: 28 grams
- Fiber: 2 grams
- Protein: 5 grams
- 1 cup (2 sticks) unsalted butter
- 1 cup creamy peanut butter
- 2 cups graham cracker crumbs (about 15 full sheets)
- 2 cups powdered sugar
- 1 ½ cups semisweet chocolate chips
- ½ cup creamy peanut butter (for the topping)
How To Make Chocolate Peanut Butter No Bake Bars
Ready to create some magic? Let’s get started. It comes together in just a few simple steps.
- Prepare the Pan: Line an 8×8 or 9×9 inch square baking pan with parchment paper, leaving some overhang on the sides. This will make it super easy to lift the bars out later.
- Melt the Base: In a medium saucepan over low heat, melt the 1 cup of butter and 1 cup of peanut butter together, stirring until they’re smooth and completely combined.
- Combine Dry Ingredients: Remove the saucepan from the heat. Stir in the graham cracker crumbs and powdered sugar until a thick, uniform dough forms.
- Press it Down: Transfer this tasty dough into your prepared pan and press it down firmly into a smooth, even layer. I like to use the bottom of a measuring cup to really pack it down.
- Create the Topping: Now for the good stuff! In a microwave-safe bowl, combine the chocolate chips and the remaining ½ cup of peanut butter. Heat in 30-second bursts, stirring after each, until melted and smooth.
- Chill and Set: Pour the chocolate peanut butter topping over the base and spread it evenly. Pop the pan into the refrigerator for at least 2 hours, or until the bars are completely set.
- Slice and Serve: Once set, use the parchment paper to lift the entire block out of the pan. Place it on a cutting board and slice it into bars. Enjoy your no-bake masterpiece!
My Go-To Kitchen Tools
You don’t need any fancy equipment for this one! Here’s what will help:
- 8×8 or 9×9 inch square baking pan
- Parchment paper
- Medium saucepan
- Mixing bowls
- Measuring cups and spoons
Tips & Tricks for the Best Bars
I’ve made these more times than I can count, and here’s what I’ve learned along the way.
- Press Firmly: Don’t be shy when pressing the base layer into the pan. A firm pack is the secret to bars that don’t crumble when you slice them.
- Graham Cracker Shortcut: No crumbs? No problem! You can easily make your own by pulsing whole graham crackers in a food processor or by placing them in a zip-top bag and rolling them with a rolling pin. It’s a great way to release a little stress!
- Cutting Clean Bars: For picture-perfect slices, dip a sharp knife in hot water, wipe it dry, and then cut. The clean cuts are worth the extra second.
Serving Your Sweet Creation
These bars are fantastic all on their own, but if you’re feeling fancy, a little flaky sea salt sprinkled on top of the chocolate layer before it sets is absolutely divine. They pair perfectly with a cold glass of milk for the kiddos or a hot cup of coffee for the adults. They’re also a huge hit on dessert platters at parties—just be prepared to hand out the recipe!
A Few Questions You Might Have
Can I use natural peanut butter?
I recommend sticking with a conventional creamy peanut butter like Jif or Skippy for this recipe. Natural peanut butters often have a different oil content and can make the bars too soft or greasy.
How should I store these no-bake bars?
Because of the chocolate topping, these bars need to be stored in an airtight container in the refrigerator. They’ll keep beautifully for up to a week… if they last that long!
Can I freeze them?
Absolutely! These bars freeze wonderfully. Place them in a single layer in an airtight container, separated by parchment paper, and freeze for up to 3 months. Thaw in the fridge before serving.
My chocolate topping is too thick. What can I do?
If your chocolate-PB topping mixture is too thick to pour easily, you can add a tiny teaspoon of coconut oil to thin it out and make it more spreadable.
There you have it! A decadent, easy dessert that requires zero baking and delivers maximum flavor. This is the kind of recipe that becomes a cherished part of your routine, a reliable treat you can always count on. I hope these bars bring as much happiness to your kitchen as they have to mine. For another fantastic no-bake treat, you have to try my No Bake Cheesecake. And if you’re curious about the science behind why these set so perfectly, Bon Appétit has a great article on the dos and don’ts of no-bake desserts. Now, go forth and create something delicious!