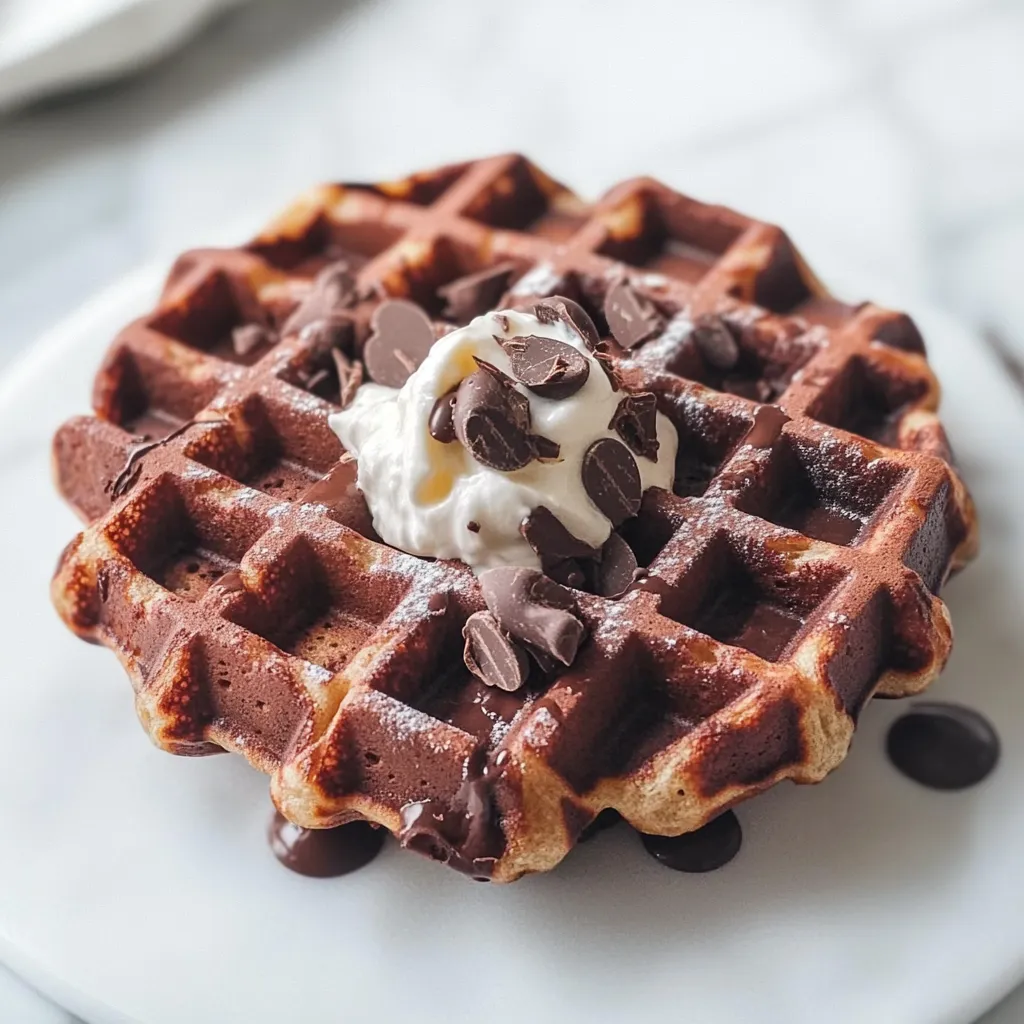
Is there anything better than the smell of chocolate wafting through your kitchen on a sleepy weekend morning? I think not. These gluten-free chocolate waffles are my secret weapon for turning an ordinary day into a celebration. They’re crispy on the outside, delightfully fluffy on the inside, and packed with rich chocolate flavor that will have everyone rushing to the breakfast table. Whether you’re catering to gluten sensitivities or just love a decadent, feel-good breakfast, this recipe is about to become your new favorite. It’s the kind of simple, joyful cooking that reminds me why I fell in love with my kitchen in the first place.
Why You’ll Love These Gluten-Free Chocolate Waffles
These aren’t just any waffles. They’re a game-changer for your brunch routine, and here’s why:
- Surprisingly Simple: Made with common gluten-free pantry staples, you can whip these up in no time.
- Family Approved: I’ve yet to meet a kid (or adult) who can resist a chocolate breakfast. They’re a guaranteed hit.
- Naturally Dairy-Free Option: Easily made dairy-free with a simple plant-based milk and oil swap, so everyone can enjoy.
- Perfect for Meal Prep: They freeze beautifully, giving you a quick and delicious breakfast on those hectic weekday mornings.
Gathering Your Ingredients
This recipe keeps things simple with a blend of gluten-free flours you can find at any major grocery store.
PrintGluten-Free Chocolate Waffle Recipe
Make perfect GF chocolate waffles w/ step-by-step guide. Try this easy gluten-free recipe for a delicious breakfast or dessert treat.
- Prep Time: 10 minutes
- Cook Time: 20 minutes
- Total Time: 30 minutes
- Yield: 4 servings 1x
- Category: Breakfast
- Cuisine: American
Ingredients
- 1 cup gluten-free all-purpose flour blend
- 1/4 cup unsweetened cocoa powder
- 2 teaspoons baking powder
- 1/2 teaspoon salt
- 2 large eggs
- 3/4 cup milk
- 1/4 cup melted coconut oil
- 1/4 cup pure maple syrup
- 1 teaspoon vanilla extract
- 1/2 cup dairy-free chocolate chips
Instructions
- Preheat your waffle iron according to its manufacturer’s instructions.
- In a large bowl, whisk together the gluten-free flour, cocoa powder, baking powder, and salt.
- In a separate medium bowl, beat the eggs. Then, whisk in the milk, melted coconut oil, maple syrup, and vanilla extract until smooth.
- Pour the wet ingredients into the dry ingredients. Gently stir until just combined. Fold in the chocolate chips.
- Lightly grease the preheated waffle iron. Pour about 1/2 cup of batter onto the iron and close the lid.
- Cook for 4-5 minutes, until the steam significantly slows down and the waffles are crisp.
- Carefully remove the waffle and repeat with the remaining batter. Serve immediately.
Notes
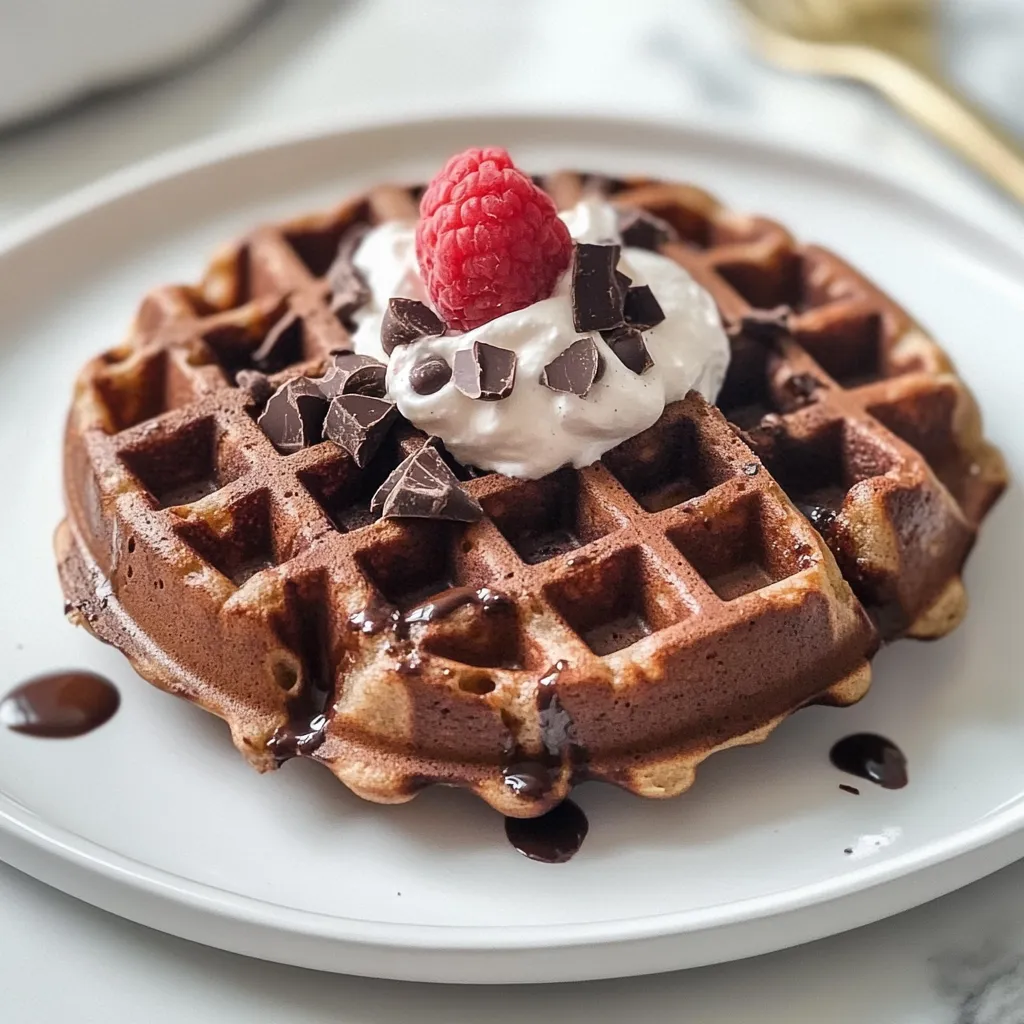
Crispy on the outside and fluffy on the inside, these gluten-free chocolate waffles are a decadent and feel-good breakfast treat that’s simple to make and perfect for the whole family.
Nutrition
- Serving Size: 4 servings
- Calories: 380 calories
- Sugar: 22 grams
- Fat: 18 grams
- Carbohydrates: 52 grams
- Fiber: 4 grams
- Protein: 8 grams
- 1 cup gluten-free all-purpose flour blend (I love Bob’s Red Mill 1-to-1)
- 1/4 cup unsweetened cocoa powder
- 2 tsp baking powder
- 1/2 tsp salt
- 2 large eggs
- 3/4 cup milk (dairy or unsweetened almond milk)
- 1/4 cup melted coconut oil (or vegetable oil)
- 1/4 cup pure maple syrup
- 1 tsp vanilla extract
- 1/2 cup dairy-free chocolate chips (optional, but highly recommended!)
How to Make Gluten-Free Chocolate Waffles
Follow these easy steps for perfect waffles every single time. No fancy skills required!
- Preheat your waffle iron according to its manufacturer’s instructions. A hot iron is key for that perfect crispy exterior.
- In a large bowl, whisk together the gluten-free flour, cocoa powder, baking powder, and salt. This ensures there are no lumps and everything is well combined.
- In a separate medium bowl, beat the eggs. Then, whisk in the milk, melted coconut oil, maple syrup, and vanilla extract until the mixture is smooth.
- Pour the wet ingredients into the dry ingredients. Gently stir until just combined. A few lumps are totally okay—overmixing can make the waffles tough. Fold in the chocolate chips if you’re using them.
- Lightly grease the preheated waffle iron with a little oil or non-stick spray. Pour the recommended amount of batter onto the iron (usually about 1/2 cup) and close the lid.
- Cook until the steam significantly slows down and the waffles are crisp. This usually takes about 4-5 minutes, but all irons vary.
- Carefully remove the waffle and repeat with the remaining batter. Serve immediately with your favorite toppings!
My Top Tips for Waffle Success
After making approximately a million waffles for my family, I’ve picked up a few tricks.
- Don’t Peek! Resist the urge to open the waffle iron early. You’ll let the steam out and might end up with a half-stuck mess.
- Keep ‘Em Warm: To keep waffles crispy while you cook the whole batch, place them in a single layer on a baking sheet in a 200°F (95°C) oven.
- Batter Too Thick? Gluten-free flours can vary. If your batter seems too thick to pour, add a tablespoon or two more milk until it reaches a pourable but still thick consistency.
- For a fun twist, try adding a pinch of cinnamon or a handful of fresh berries into the batter. It’s your kitchen—get creative!
The Perfect Way to Serve Your Waffles
This is where the real fun begins. I love setting up a waffle bar for my family on lazy Sundays. Here are some of our favorite ways to top these chocolatey delights:
- A classic drizzle of maple syrup and a pat of melted butter.
- A mountain of fresh berries like raspberries or strawberries for a pop of freshness.
- A dollop of whipped cream or a scoop of vanilla ice cream for a truly decadent dessert-for-breakfast situation.
- A sprinkle of chopped nuts for a satisfying crunch.
They also pair wonderfully with a side of crispy bacon or sausage to balance the sweetness.
Your Gluten-Free Chocolate Waffle Questions, Answered
Can I make the batter ahead of time?
You can! While best fresh, you can mix the dry and wet ingredients separately the night before. In the morning, just combine them and cook. The baking powder will still be active, so you’ll get fluffy waffles.
How should I store and reheat leftovers?
Let the waffles cool completely, then store them in an airtight container or zip-top bag in the fridge for up to 3 days or the freezer for up to 3 months. To reheat, pop them straight into the toaster or toaster oven—this brings back their wonderful crispness.
Can I make these waffles vegan?
Absolutely! For a vegan version, use a flax egg (1 tbsp ground flaxseed mixed with 3 tbsp water per egg) and make sure your chocolate chips are dairy-free. The results are just as fantastic.
My waffles stuck to the iron! What did I do wrong?
Oh, we’ve all been there! The two most common culprits are not greasing the iron enough (even if it’s non-stick, a little oil helps) or trying to open it before the waffle is fully cooked and released naturally. Give it a good clean, re-grease, and try again.
What’s the best gluten-free flour to use?
I highly recommend a 1:1 gluten-free baking blend that includes xanthan gum. It acts most similarly to all-purpose wheat flour and provides the perfect structure for these waffles.
More Breakfast Favorites You’ll Adore
If you loved starting your day with these chocolate waffles, you have to try some of my other popular breakfast recipes. For another make-ahead gem, my Easy Overnight Oats are a lifesaver on busy mornings. And if you’re craving more gluten-free goodness, these Fluffy Gluten-Free Pancakes are always a winner.
There’s something special about a homemade breakfast that brings everyone together. These gluten-free chocolate waffles are more than just a meal; they’re a little moment of indulgence and joy. I hope this recipe finds its way to your table and becomes a part of your family’s story, creating happy, chocolate-smudged memories for years to come. Happy cooking!