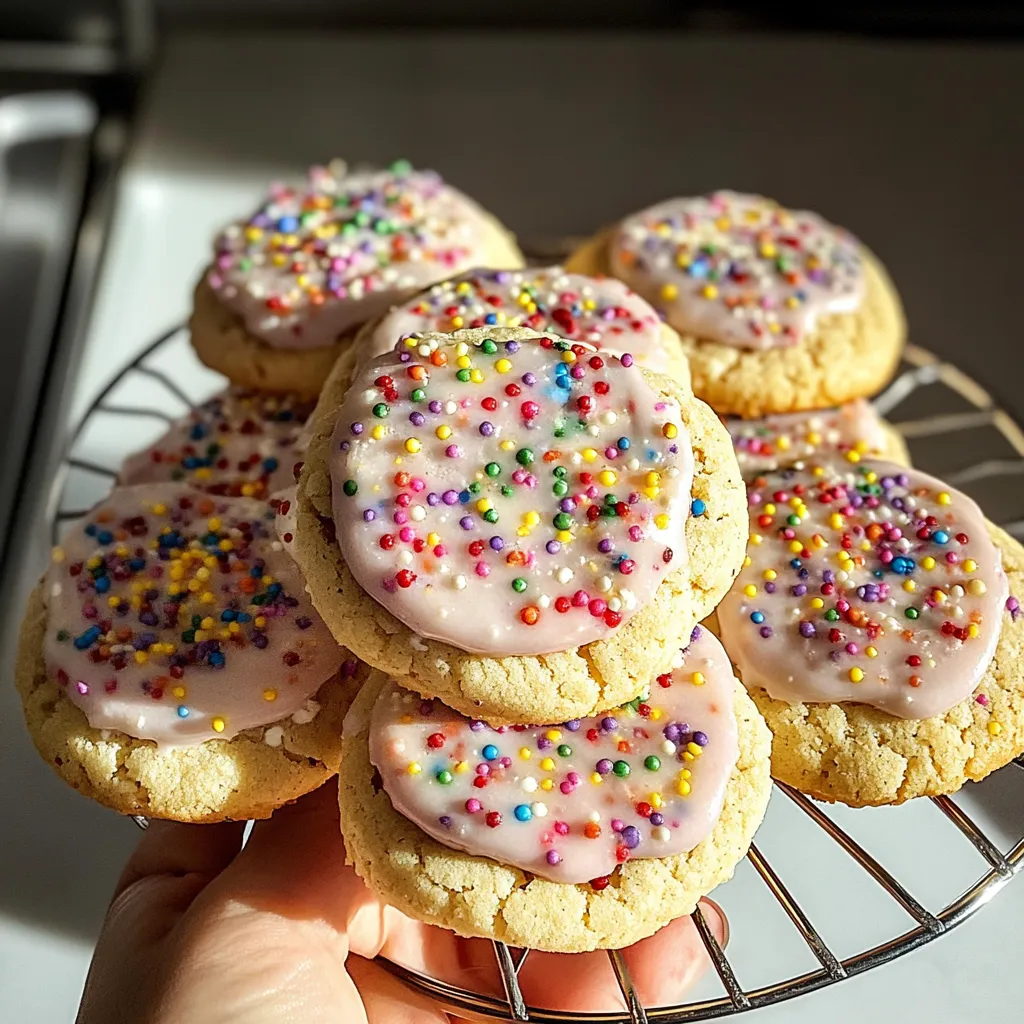
You know those irresistibly soft, cake-like cookies with a thick layer of frosting and colorful sprinkles you see in every grocery store bakery? Those are Lofthouse cookies, and if you thought they were off-limits on a gluten-free diet, I have fantastic news for you! Today, we’re making the ultimate Gluten-free Lofthouse Cookies that are every bit as tender, sweet, and delightfully fun as the original. My kitchen smelled like a birthday party all afternoon, and honestly, I wouldn’t have it any other way.
As someone who believes that dietary restrictions shouldn’t mean missing out on life’s little joys, I’ve perfected this recipe to bring that nostalgic treat right to your table. Whether you’re baking for a kid’s school party, a holiday gathering, or just because it’s Tuesday, these cookies are the perfect project. They’re softer than a cloud and sweet enough to make any day feel special.
Table of Contents
Table of Contents
Why You’ll Love These Gluten-Free Lofthouse Cookies
- Perfectly Soft & Cake-Like: We’re using a clever combination of ingredients to achieve that signature soft-baked texture without any gluten.
- No Weird Ingredients: Forget hard-to-find flours! This recipe uses a common, trusted gluten-free flour blend to keep things simple.
- Fun for the Whole Family: Decorating these is a blast. It’s the perfect activity to get the kids involved in the kitchen.
- Make-Ahead Friendly: You can bake the cookies ahead of time and frost them when you’re ready to serve, making party prep a breeze.
Gathering Your Ingredients
Here’s what you’ll need to create these little circles of joy. The key to success here is using a 1-to-1 gluten-free flour blend that contains xanthan gum. If your blend doesn’t include it, you’ll need to add about 1/2 teaspoon.
Print
Gluten-Free Lofthouse Cookies
- Total Time: 2 hours 40 minutes
- Yield: 24 cookies 1x
Description
Make perfect gluten-free Lofthouse cookies with our soft, frosted recipe. Get the best copycat cookie baking tips & techniques here.
Ingredients
- 2 ½ cups (315g) 1-to-1 gluten-free flour blend
- 1 teaspoon baking powder
- ½ teaspoon baking soda
- ½ teaspoon salt
- ½ cup (113g) unsalted butter, softened
- ¾ cup (150g) granulated sugar
- 2 large eggs
- 1 teaspoon vanilla extract
- ½ cup (120g) sour cream
- ½ cup (113g) unsalted butter, softened
- 2 cups (240g) powdered sugar, sifted
- 1 teaspoon vanilla extract
- 2–3 tablespoons milk or heavy cream
- Pinch of salt
- Food coloring and sprinkles for decorating
Instructions
- Combine the dry ingredients: In a medium bowl, whisk together the gluten-free flour blend, baking powder, baking soda, and salt.
- Cream the butter and sugar: In a large bowl using a hand mixer or stand mixer, beat the softened butter and granulated sugar together on medium-high speed for 2-3 minutes until light and fluffy.
- Add wet ingredients: Beat in the eggs one at a time, then add the vanilla extract. Mix in the sour cream on low speed until just combined.
- Combine dough: Gradually add the dry ingredients to the wet ingredients, mixing on low speed until a soft dough forms. Divide dough in half, shape into disks, wrap in plastic wrap, and refrigerate for at least 2 hours or overnight.
- Roll and cut: Preheat oven to 350°F (175°C). On a floured surface, roll one disk of dough to ¼-inch thickness. Use a 2.5-inch round cookie cutter to cut out circles and place them 2 inches apart on parchment-lined baking sheets.
- Bake: Bake for 8-10 minutes until bottoms are lightly golden but tops are still pale. Cool on baking sheet for 5 minutes before transferring to a wire rack to cool completely.
- Make frosting: Beat softened butter until smooth. Gradually add sifted powdered sugar, vanilla, and a pinch of salt. Beat until fluffy, adding milk as needed for spreadable consistency. Tint with food coloring if desired.
- Frost and decorate: Once cookies are completely cool, frost generously and top with sprinkles. Let set before storing.
Notes
Soft, sweet, and simple gluten-free Lofthouse cookies that are every bit as tender and delightful as the original. Perfect for parties, gifts, or any day that needs a sweet treat.
- Prep Time: 30 minutes
- Cook Time: 10 minutes
- Category: Dessert
- Cuisine: American
Nutrition
- Serving Size: 24 cookies
- Calories: 210 calories
- Sugar: 19 grams
- Fat: 10 grams
- Carbohydrates: 29 grams
- Fiber: 1 gram
- Protein: 2 grams
For the Cookies:
- 2 ½ cups (315g) 1-to-1 gluten-free flour blend (like Bob’s Red Mill)
- 1 tsp baking powder
- ½ tsp baking soda
- ½ tsp salt
- ½ cup (1 stick / 113g) unsalted butter, softened to room temperature
- ¾ cup (150g) granulated sugar
- 2 large eggs, at room temperature
- 1 tsp vanilla extract
- ½ cup (120g) sour cream, at room temperature
For the Buttercream Frosting:
- ½ cup (1 stick / 113g) unsalted butter, softened
- 2 cups (240g) powdered sugar, sifted
- 1 tsp vanilla extract
- 2-3 tbsp milk or heavy cream
- Pinch of salt
- Food coloring and sprinkles, for decorating
Essential Equipment
You don’t need anything too fancy for this recipe! A good stand mixer or hand mixer will make creaming the butter and sugar a snap. You’ll also need baking sheets, parchment paper, a rolling pin, and a 2.5-inch round cookie cutter.
How to Make Gluten-Free Lofthouse Cookies: A Step-by-Step Guide
Ready to bake? Follow these simple steps for cookie perfection. And remember, the secret to that wonderfully soft texture is to not overwork the dough!
Step 1: Combine the Dry Ingredients
In a medium bowl, whisk together the gluten-free flour blend, baking powder, baking soda, and salt. This ensures all the leaveners are evenly distributed, giving you a consistent rise in every cookie.
Step 2: Cream the Butter and Sugar
In a large bowl using a hand mixer or a stand mixer fitted with the paddle attachment, beat the softened butter and granulated sugar together on medium-high speed for about 2-3 minutes. You want it to be light, fluffy, and pale in color. This step is crucial for creating a tender cookie crumb.
Step 3: Add the Wet Ingredients
Beat in the eggs, one at a time, followed by the vanilla extract. Scrape down the sides of the bowl as needed. Then, mix in the sour cream on low speed until just combined. The dough might look a little curdled at this point—that’s totally normal!
Step 4: Bring the Dough Together
Gradually add the dry ingredients to the wet ingredients, mixing on low speed until a soft, slightly sticky dough forms. Avoid overmixing! Divide the dough in half, shape each half into a disk, and wrap them tightly in plastic wrap. Here’s the important part: refrigerate the dough for at least 2 hours, or up to overnight. This firming-up step is non-negotiable for cookies that hold their shape.
Step 5: Roll, Cut, and Bake
Preheat your oven to 350°F (175°C) and line baking sheets with parchment paper. On a surface lightly dusted with gluten-free flour, roll one disk of dough to about ¼-inch thickness. Use your round cookie cutter to cut out circles and place them about 2 inches apart on the prepared baking sheets. Bake for 8-10 minutes, or until the bottoms are just lightly golden. The tops should still look pale and soft. Let them cool on the baking sheet for 5 minutes before transferring to a wire rack to cool completely.
Step 6: Whip Up the Frosting
While the cookies cool, make the buttercream. Beat the softened butter until smooth. Gradually add the sifted powdered sugar, vanilla, and a pinch of salt. Beat on low speed until combined, then increase to high and beat for 2-3 minutes until fluffy. Add milk, one tablespoon at a time, until you reach a spreadable consistency. Tint with food coloring if you like!
Step 7: Frost and Decorate!
Once the cookies are completely cool, frost them generously and top with your favorite sprinkles. Let the frosting set for a bit before stacking or storing.
My Best Tips for Perfect Cookies Every Time
I’ve made these more times than I can count, and here are my top tricks. First, do not skip the chilling time. This dough is soft, and chilling it prevents the cookies from spreading into puddles in the oven. Second, make sure all your refrigerated ingredients (eggs, sour cream, butter) are truly at room temperature. This helps everything emulsify into a smooth, happy dough. And finally, don’t overbake them! You want them to be set but still soft in the center for that classic Lofthouse texture.
Serving Suggestions
These cookies are a star all on their own, especially when paired with a tall glass of cold milk or a hot cup of coffee. They’re the perfect sweet treat to bring to a potluck or to package up as a thoughtful homemade gift. For a festive dessert spread, pair them with my popular Decadent Chocolate Truffles.
Storing Your Gluten-Free Lofthouse Cookies
Because of the soft frosting, these cookies are best stored in a single layer in an airtight container at room temperature. You can place a piece of parchment paper between layers if you need to stack them. They’ll stay fresh for about 2-3 days. The unfrosted cookies freeze beautifully for up to 3 months—just frost them after thawing.
Your Gluten-Free Lofthouse Cookie Questions, Answered!
Can I make these cookies dairy-free?
Absolutely! You can substitute the butter with a plant-based alternative (like Earth Balance sticks) and use a dairy-free sour cream and milk. The texture should be very similar.
Why is my dough so sticky?
Gluten-free flours can vary in absorbency. If your dough is too sticky to roll after chilling, gently work in a little more flour, one tablespoon at a time, until it’s manageable.
Can I use a different type of frosting?
Of course! A simple cream cheese frosting would be delicious. If you’re looking for other inspiration, check out the frosting on my Favorite Carrot Cake.
How can I prevent my cookies from spreading?
The main culprits for spreading are dough that isn’t chilled enough or an oven that’s too cool. Make sure you chill the dough for the full 2 hours and let your oven preheat completely.
More Recipes You’ll Love
If you enjoyed baking these gluten-free treats, you might also want to try my Chewy Gluten-Free Chocolate Chip Cookies or this stunning Gluten-Free Lemon Raspberry Cake for your next celebration.
Baking these Gluten-free Lofthouse Cookies is such a joyful experience. It proves that you don’t have to give up the treats you love. So go ahead, preheat that oven, and get ready to create something wonderful that everyone can enjoy. Happy baking!