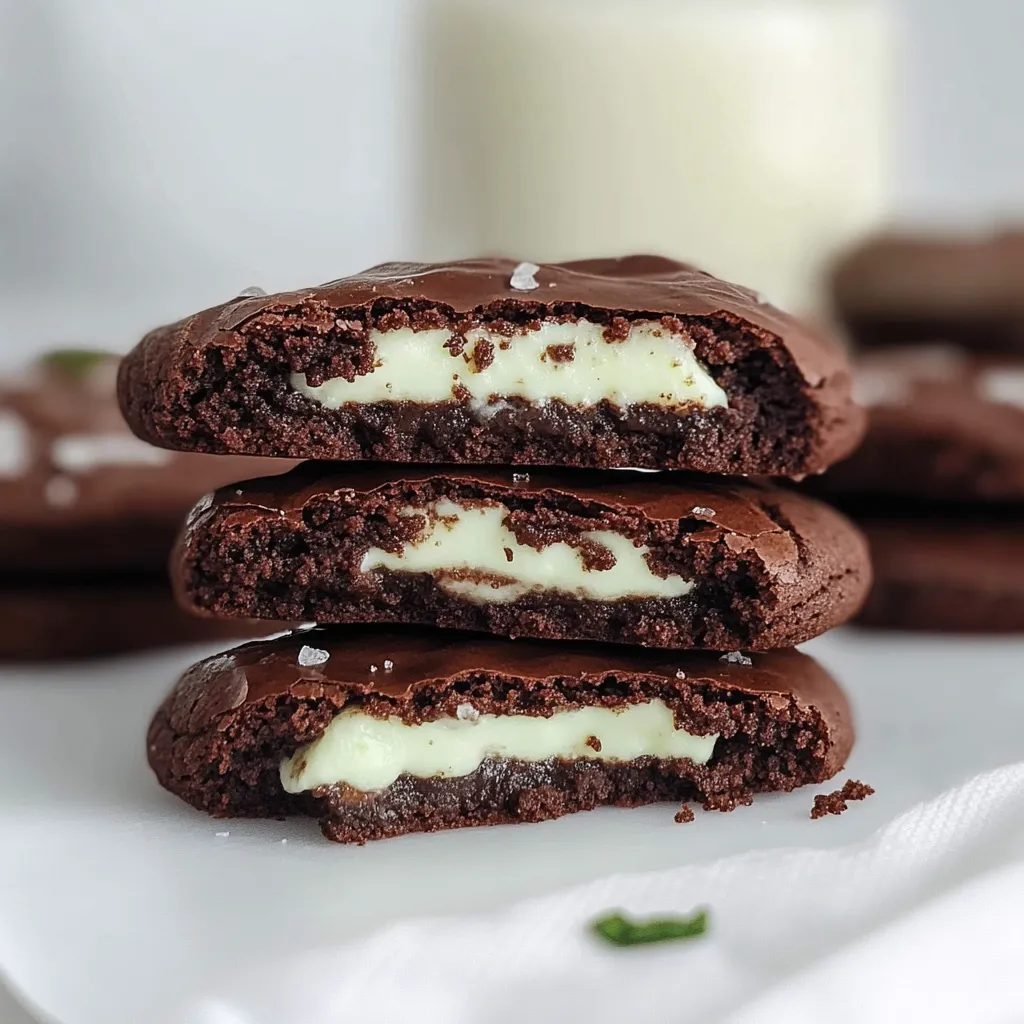
Is there anything better than the rich, chocolatey goodness of a brownie? Or the chewy, satisfying texture of a perfect cookie? What if I told you that you could have both, in one incredible, gluten-free bite that’s also bursting with cool mint flavor? These Gluten-Free Mint Brownie Cookies are the stuff of dreams, and they’re about to become your new favorite treat for everything from a busy weeknight pick-me-up to your holiday cookie tray.
I created this recipe on one of those days when I couldn’t decide between baking a batch of brownies or cookies. So, I did what any sensible person would do: I smashed them together. The result was pure magic—a cookie with a crackly top, a fudgy center, and a refreshing minty kick that makes it utterly irresistible. Best of all, they’re incredibly easy to make, so you can get your chocolate mint fix without any fuss.
Table of Contents
Table of Contents
Why You’ll Love These Gluten-Free Mint Brownie Cookies
- Quick & Easy: From bowl to cookie jar in under 30 minutes. No chilling required!
- Family-Friendly: A guaranteed crowd-pleaser that will have everyone begging for the recipe.
- Dietary Win: Gluten-free and easily adaptable to be dairy-free, so no one has to miss out.
- The Perfect Mashup: All the fudgy texture of a brownie in a portable, shareable cookie form.
Gathering Your Ingredients
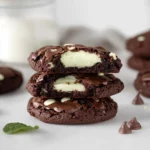
Printgluten-free mint brownie cookies
Choc mint GF brownie cookie recipe. Rich fudge tech & peppermint create irresist gluten-free cookies. Learn to bake now.
- Prep Time: 15 minutes
- Cook Time: 12 minutes
- Total Time: 27 minutes
- Yield: 24 cookies 1x
- Category: Dessert
- Cuisine: American
Ingredients
Instructions
Notes
A perfect dessert mashup combining the rich, fudgy texture of a brownie with a chewy cookie, featuring a refreshing mint flavor and made gluten-free. Quick, easy, and irresistibly delicious.
Nutrition
- Serving Size: 24 cookies
- Calories: 180 calories
- Sugar: 17 g
- Fat: 9 g
- Carbohydrates: 24 g
- Fiber: 2 g
- Protein: 2 g
This recipe uses simple, straightforward ingredients to create maximum flavor. Here’s what you’ll need:
- 1 ½ cups gluten-free 1:1 baking flour (I love Bob’s Red Mill)
- ½ cup unsweetened cocoa powder
- 1 tsp baking powder
- ½ tsp salt
- ½ cup unsalted butter, softened (or dairy-free alternative)
- ¾ cup granulated sugar
- ¾ cup brown sugar, packed
- 2 large eggs, room temperature
- 1 tsp vanilla extract
- 1 tsp peppermint extract
- 1 cup semi-sweet chocolate chips
- Optional: ½ cup Andes mint baking pieces for extra minty chunks
Let’s Make Some Cookie Magic!
Ready to bake? Let’s turn these simple ingredients into something spectacular. Here’s your easy, step-by-step guide:
- Preheat your oven to 350°F (175°C) and line two baking sheets with parchment paper. This prevents sticking and makes cleanup a breeze.
- In a medium bowl, whisk together your gluten-free flour, cocoa powder, baking powder, and salt. This ensures all those dry ingredients are evenly distributed, so you get a perfect cookie in every bite.
- In a large bowl, use a hand mixer or stand mixer to cream together the softened butter, granulated sugar, and brown sugar until the mixture is light and fluffy. This step is key for getting that perfect cookie texture!
- Beat in the eggs one at a time, followed by the vanilla and peppermint extracts. Mix until everything is just combined.
- Gradually add the dry flour mixture to the wet ingredients, mixing on low speed until a thick dough forms. Be careful not to overmix!
- Now for the best part: fold in the chocolate chips (and those optional mint pieces if you’re using them) with a spatula.
- Drop rounded tablespoons of dough onto your prepared baking sheets, leaving about 2 inches between each cookie for spreading.
- Bake for 10-12 minutes. The cookies will look soft in the center—that’s exactly what you want for that fudgy brownie-like texture! Let them cool on the baking sheet for 5 minutes before transferring them to a wire rack to cool completely.
My Favorite Kitchen Tools for This Recipe
You don’t need anything fancy, but a few trusty tools make the process even smoother:
- Stand Mixer or Hand Mixer: For creaming that butter and sugar to perfection.
- Parchment Paper: The ultimate secret for no-stick, easy-cleanup baking.
- Quality Baking Sheets: For even heating and perfect bakes every time.
Tips, Tricks, and Delicious Variations
Baking is an adventure, and every kitchen is a little different. Here’s how to make sure your cookies turn out perfectly.
- Don’t Overbake! The cookies will continue to set as they cool on the hot baking sheet. Taking them out when they look slightly underdone is the secret to a fudgy center.
- Room Temperature Matters: Using room temperature eggs and butter helps them emulsify with the sugar, creating a better texture. If you forgot to take your eggs out, just place them in a bowl of warm water for 5-10 minutes.
- Double the Mint: For an even more intense mint flavor, try adding a few drops of natural green food coloring to the dough and then drizzling the cooled cookies with a simple mint glaze.
- Make Them Dairy-Free: Simply use your favorite plant-based butter and ensure your chocolate chips are dairy-free. Enjoy Life brand is a great option.
The Perfect Way to Serve Them
These cookies are fantastic all on their own, still slightly warm from the oven with a glass of cold milk. But why stop there? For a truly decadent dessert, crumble one over a scoop of vanilla ice cream. The combination of warm cookie and cold ice cream is next-level delicious. They also make a gorgeous addition to any dessert platter or cookie swap party.
Storing Your Sweet Creations
To keep your cookies as fresh and chewy as the day you baked them, store them in an airtight container at room temperature. They’ll stay perfect for up to 4 days (if they last that long!). You can also freeze the baked cookies for up to 3 months. Or, freeze the dough balls on a baking sheet and then transfer them to a freezer bag. Then, you can bake a few off at a time whenever a cookie craving strikes!
Can I use a different type of flour?
I highly recommend a pre-mixed gluten-free 1:1 baking flour that contains xanthan gum for the best texture. If you’re not avoiding gluten, you can substitute an equal amount of all-purpose flour.
My cookies spread too much. What happened?
This usually means your butter was too warm. Next time, make sure your butter is softened but still cool to the touch. You can also try chilling the dough for 15-20 minutes before baking.
Can I make the dough ahead of time?
Absolutely! This cookie dough is a great make-ahead option. Simply prepare the dough, scoop it into balls, and store them in an airtight container in the fridge for up to 3 days. Let them sit at room temperature for 10 minutes before baking as directed.
Is the peppermint extract necessary?
It’s what gives these cookies their signature cool, refreshing flavor. If you’re not a mint fan, you can simply leave it out for a classic, fudgy gluten-free brownie cookie.
There you have it! A simple, foolproof recipe for Gluten-Free Mint Brownie Cookies that delivers on every promise: fudgy, chocolatey, minty, and utterly delicious. It’s the kind of recipe that reminds you why baking is so much fun—it’s about creating little moments of joy to share. I hope these cookies bring as much happiness to your kitchen as they have to mine. Happy baking!