
There’s something magical about the smell of toasted pecans and caramel wafting through the kitchen. It instantly transports me to cozy holiday gatherings and warm afternoons with a cup of coffee. If you thought you had to give up that experience to follow a gluten-free diet, I’m here to tell you that’s simply not true. This article is your ultimate guide to creating incredible gluten-free pecan bars that rival any traditional version. We’ll walk through the simple secrets of a perfect shortbread crust, explore the art of the gooey pecan topping, and share pro tips for flawless baking and storage. Get ready to fall in love with a dessert that’s both indulgent and inclusive.
Table of Contents
Table of Contents
The Irresistible Appeal of Gluten-Free Pecan Bars
I remember the first time I bit into a homemade gluten-free pecan bar. It was at a friend’s Thanksgiving potluck, and I had resigned myself to skipping dessert, assuming everything would be off-limits. Then my friend handed me a square of something that looked like pure heaven. The crust was buttery and firm, not crumbly or gritty like some gluten-free baked goods can be. The topping was a perfect symphony of crunchy, salty pecans swimming in a rich, sweet caramel. I was absolutely blown away. That one bite completely changed my perspective on what gluten-free baking could achieve.
Print
GlutenFree Pecan Bars Recipe Easy Irresistible Technique
- Total Time: 1 hour 0 minutes
- Yield: 16 bars 1x
Description
Easy irresistible glutenfree pecan bar recipe Made with simple ingredients for a delicious dessert or snack Perfect for any occasion Get the method now
Ingredients
Instructions
- Prep Time: 20 minutes
- Cook Time: 40 minutes
- Category: Dessert
- Cuisine: American
Nutrition
- Calories: 320 kcal
- Sugar: 20 g
- Fat: 22 g
- Carbohydrates: 28 g
- Fiber: 2 g
- Protein: 4 g
Why This Recipe Is a Game-Changer
What makes this particular recipe for gluten-free pecan bars so special is its foolproof nature. We use a blend of reliable gluten-free flours, like almond flour and a touch of oat flour, to create a crust that holds together beautifully. The filling requires no fancy ingredients—just pantry staples like brown sugar, butter, and eggs. The result is a dessert that feels luxurious but is surprisingly simple to make. Whether you’re baking for someone with celiac disease or simply exploring gluten-free options, this recipe delivers on every promise of taste and satisfaction.
A Treat for Every Occasion
Beyond being a safe option for those with gluten sensitivities, these bars are a crowd-pleaser for everyone. They are the perfect bake sale item, a stunning addition to a holiday cookie plate, or a sweet treat for your weekly meal prep. Their sturdy yet tender texture makes them easy to transport, and their rich flavor means a small square is deeply satisfying. You’ll find that this recipe quickly becomes a staple in your collection of favorite gluten-free desserts.
Crafting the Perfect Gluten-Free Shortbread Crust
The foundation of any great pecan bar is its crust. For our gluten-free version, we focus on achieving a crisp, buttery base that complements the gooey topping without becoming soggy. The key lies in selecting the right flour blend and understanding the role of fat. A good gluten-free all-purpose flour that includes xanthan gum works wonderfully here, as it provides the necessary structure that gluten would normally offer. Alternatively, a combination of superfine almond flour and a starchy flour like tapioca or coconut flour creates a deliciously tender shortbread-like crust.
Choosing Your Gluten-Free Flours
Not all gluten-free flours are created equal. For a neutral flavor and classic shortbread texture, a store-bought 1:1 all-purpose gluten-free flour blend is your best bet. Brands like Bob’s Red Mill or King Arthur Measure for Measure are reliable choices. If you prefer a nuttier, more robust flavor, almond flour is a fantastic option. Just remember that almond flour can brown more quickly, so keep an eye on your crust during the pre-baking step. Whichever flour you choose, ensure your ingredients are well-chilled for the best results.
The Secret to a Crust That Holds Together
The magic trick for a non-crumbly crust is two-fold: cold butter and a good binding agent. Cut your butter into small cubes and use a pastry cutter or your fingers to work it into the flour until the mixture resembles coarse crumbs. The small pieces of cold butter will melt during baking, creating steam pockets that result in a flaky texture. Press this mixture firmly and evenly into your baking pan. I mean really press it down! This compaction is crucial for creating a solid base that can support the heavy pecan filling without breaking apart when you cut the bars.
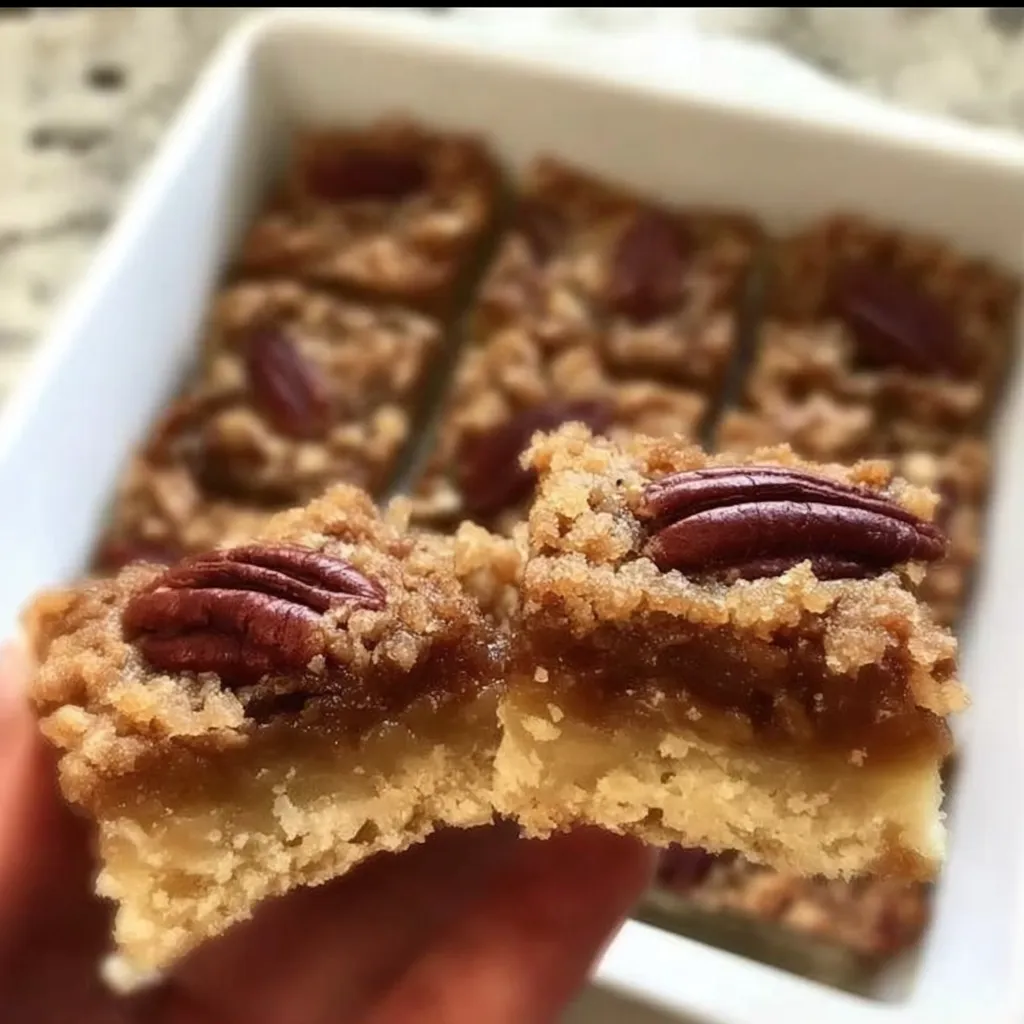
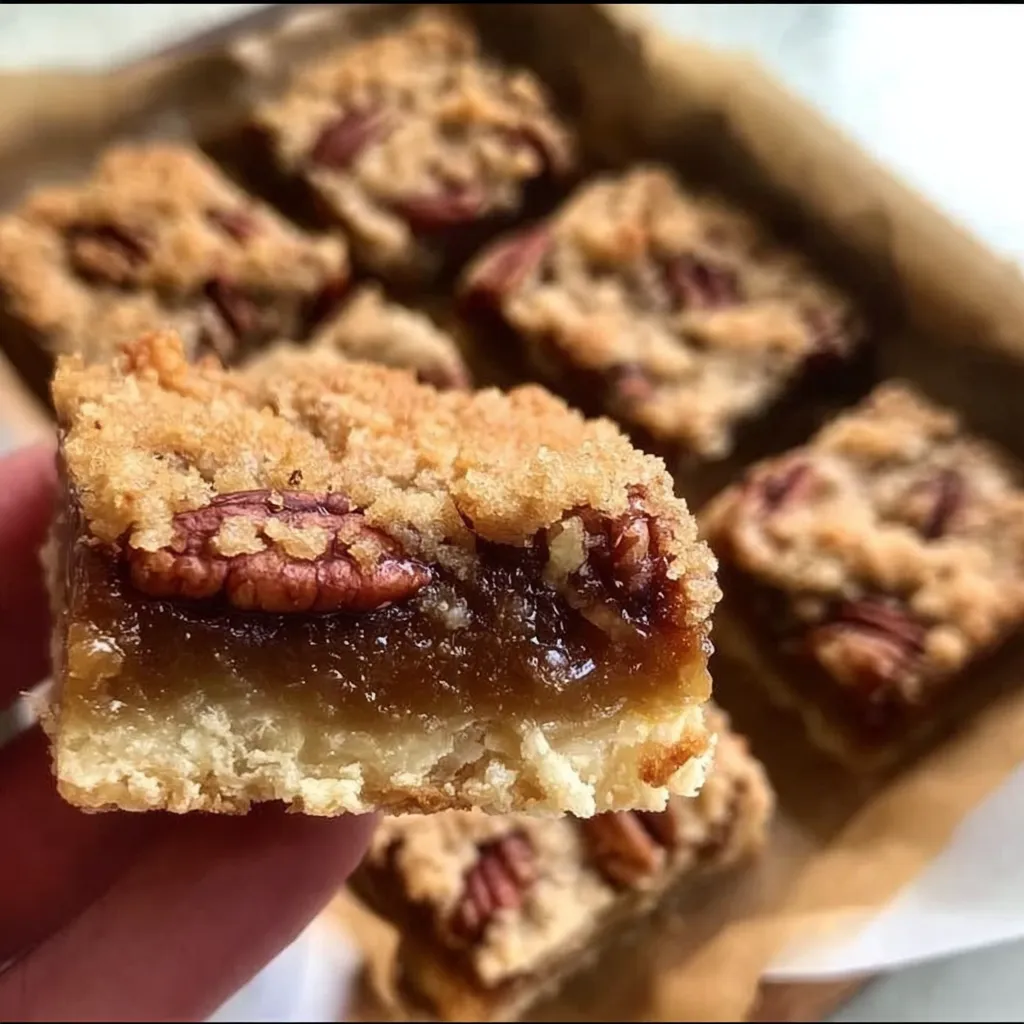
Mastering the Gooey, Nutty Pecan Topping
Now for the star of the show: the pecan topping. This is where the simple ingredients transform into something truly decadent. The goal is a filling that sets enough to be cut into neat bars but remains soft and chewy, with toasted pecans providing a satisfying crunch in every bite. The process is straightforward, but a few tips ensure perfection every time. First, gently toast your pecans beforehand to unlock their deepest, richest flavor. Secondly, avoid overmixing the filling to prevent incorporating too much air, which can lead to a bubbly, uneven texture.
Creating the perfect caramel-like consistency for your gluten-free baking projects is easier than you think. The combination of melted butter, brown sugar, and eggs creates a rich syrup that bubbles and thickens beautifully in the oven. For an extra layer of flavor, a splash of pure vanilla extract or a dash of bourbon works wonders. The pecans get folded into this mixture, ensuring every nut is thoroughly coated before being spread over the pre-baked crust.
Toasting Pecans for Maximum Flavor
Do not skip toasting your pecans! This simple step elevates your gluten-free pecan bars from good to extraordinary. Toasting deepens the nutty flavor and adds a crucial crunch that contrasts wonderfully with the soft filling. Spread the pecans in a single layer on a baking sheet and toast them in a 350°F oven for 5-7 minutes, or until they become fragrant. Watch them closely, as they can burn quickly. Let them cool slightly before adding them to the filling mixture.
Achieving the Perfect Set
The biggest challenge with any bar cookie is knowing when it’s done. You want the center to be set but still jiggle slightly when you gently shake the pan. Overbaking will result in a hard, crunchy filling instead of a soft, chewy one. The bars will continue to set as they cool. For the cleanest cuts, allow the pan to cool completely on a wire rack—patience is key! Once cool, you can chill the entire pan in the refrigerator for an hour to make slicing even easier. Then, use a sharp knife to cut them into perfect squares.

Baking, Storing, and Serving Your Masterpiece
You’ve mixed, poured, and baked. Now it’s time for the final, rewarding steps. Proper cooling and storage are essential for maintaining the perfect texture of your gluten-free pecan bars. Since they contain a moist filling, leaving them out at room temperature for too long can make them sticky. Conversely, storing them incorrectly can dry out the crust. The good news is that these bars are fantastic make-ahead treats. They actually taste better the next day, as the flavors have more time to meld together beautifully.
The Best Way to Cut Clean Bars
There’s nothing more frustrating than a beautiful pan of bars that crumbles when you try to cut them. To get those picture-perfect slices, follow these steps. First, ensure the bars are completely cool. Then, run a sharp, thin-bladed knife under hot water and wipe it dry. The warm knife will glide through the sticky topping and firm crust with ease, creating clean cuts. Wipe the blade clean and reheat it between each cut for the best results. This little trick makes all the difference in your final presentation.
Storing for Freshness and Flavor
To keep your gluten-free pecan bars fresh, store them in an airtight container. They will keep at room temperature for up to 2 days, but for longer storage, the refrigerator is your best friend. They will stay fresh and delicious in the fridge for up to a week. For longer-term storage, these bars freeze exceptionally well. Simply wrap individual bars tightly in plastic wrap and place them in a freezer-safe bag or container. They can be frozen for up to three months. Thaw overnight in the refrigerator or for a few hours at room temperature before serving. This makes them an ideal easy gluten-free recipe to prepare in advance for busy times.
Frequently Asked Questions
Can I make these gluten-free pecan bars dairy-free as well?
Absolutely! You can easily make these bars dairy-free by substituting the butter. For the crust, use a solid, plant-based butter substitute like Earth Balance Buttery Sticks. For the filling, use your favorite dairy-free butter alternative. The flavor and texture will be very similar to the original recipe, making it a great inclusive dessert option.
What’s the best gluten-free flour blend to use for the crust?
A store-bought 1:1 all-purpose gluten-free flour blend that includes xanthan gum is the most reliable choice for a traditional shortbread-like crust. If you prefer a grain-free option, superfine almond flour works beautifully, though it will produce a denser, more crumbly crust that is equally delicious. Always check that your oat flour is certified gluten-free if you use it, to avoid cross-contamination.
Why did my filling turn out grainy?
A grainy texture usually occurs if the sugar didn’t fully dissolve in the butter and egg mixture. To prevent this, ensure your butter is fully melted and slightly cooled before whisking in the brown sugar. Whisk vigorously until the sugar is completely dissolved and the mixture is smooth before adding the other ingredients. Using fresh, soft brown sugar also helps.
Can I use a different type of nut?
Yes, you can certainly experiment with other nuts. Walnuts are a classic substitute for pecans and will yield a similarly delicious bar. For a different flavor profile, try using macadamia nuts or a mix of almonds and hazelnuts. Just make sure to toast whatever nut you choose to maximize its flavor, following the same simple steps for perfect gluten-free snacks.