
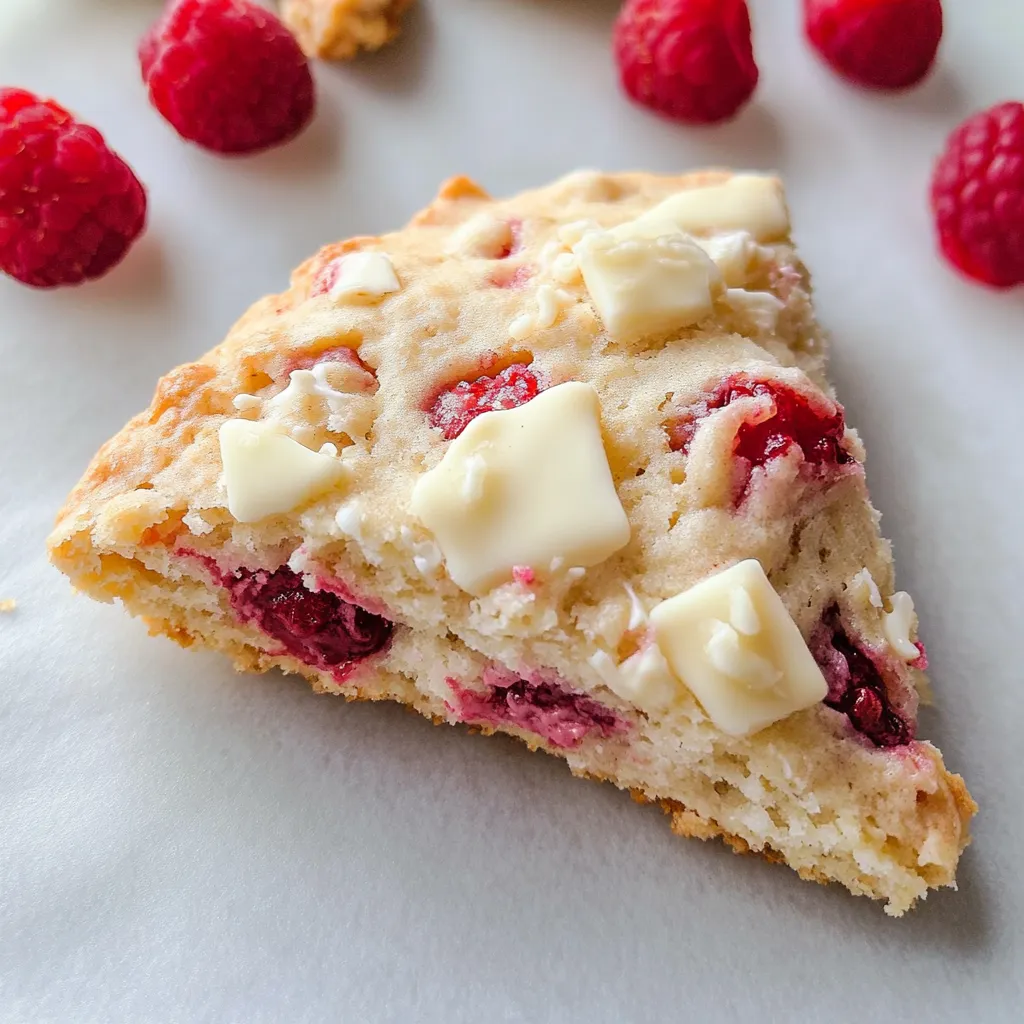
Oh, the humble scone. I think it often gets overshadowed by its flashier cousin, the cupcake. But let me tell you, a perfect scone—tender, flaky, and just sweet enough—is a little piece of breakfast (or tea-time) heaven. And when you add the dreamy combo of tart raspberries and creamy white chocolate? Well, you’ve got something truly special that’ll make your whole kitchen smell like a cozy bakery.
This recipe for White Chocolate Raspberry Scones is my go-to when I need a guaranteed smile. It’s the one I make for lazy weekend brunches with friends, for packing into lunchboxes as a sweet surprise, or just for a “because-I-deserve-it” Tuesday treat. It’s easier than you think, and the results taste like they came from a professional patisserie.
Table of Contents
Table of Contents
Why You’ll Love These White Chocolate Raspberry Scones
Let’s count the ways these buttery gems will win your heart:
- Impressively Easy: No fancy skills required! It’s a simple dough that comes together in minutes.
- Begs for a Cup of Coffee: The perfect partner for your morning brew or afternoon tea.
- Uses Frozen Berries: No need to wait for summer! Using frozen raspberries means you can make these year-round, and they prevent the dough from getting too soggy.
- Freezer-Friendly: Make a big batch and freeze the unbaked scones for a fresh-baked treat anytime the craving hits.
Ingredients You’ll Need
Gather these simple ingredients. I bet most are already in your pantry :
Print
White Chocolate Raspberry Scones
- Total Time: 35 minutes
- Yield: 8 scones 1x
Description
Raspberry & white chocolate scones. Easy baking tech yields scrumptious, bakery-worthy brunch pastry.
Ingredients
Instructions
Notes
A recipe for tender, flaky, and perfectly sweet White Chocolate Raspberry Scones. This easy-to-follow guide uses frozen raspberries for a year-round treat that’s ideal for breakfast or tea-time.
- Prep Time: 15 minutes
- Cook Time: 20 minutes
- Category: Dessert
- Cuisine: American
Nutrition
- Serving Size: 8 scones
- Calories: 320 calories
- Sugar: 16 g
- Fat: 17 g
- Carbohydrates: 38 g
- Fiber: 1 g
- Protein: 5 g
- 2 cups all-purpose flour
- ⅓ cup granulated sugar
- 1 tablespoon baking powder
- ½ teaspoon salt
- 6 tablespoons cold unsalted butter, cubed
- ½ cup heavy cream (plus extra for brushing)
- 1 large egg
- 1 teaspoon vanilla extract
- ¾ cup frozen raspberries (do not thaw)
- ¾ cup white chocolate chips or chunks
- Coarse sugar, for sprinkling (optional)
How to Make White Chocolate Raspberry Scones
Prep and Mix Dry Ingredients
Preheat your oven to 400°F (200°C) and line a baking sheet with parchment paper. In a large bowl, whisk together the flour, sugar, baking powder, and salt.
Cut in the Butter
Add the cold, cubed butter. Using a pastry cutter, two forks, or your fingertips, work the butter into the flour mixture until it resembles coarse crumbs with a few pea-sized bits of butter remaining. This is the secret to a flaky texture!
Combine Wet Ingredients
In a separate small bowl or measuring cup, whisk together the heavy cream, egg, and vanilla extract until smooth.
Bring the Dough Together
Pour the wet ingredients into the dry mixture. Gently stir with a fork until just combined and a shaggy dough forms. It will look a bit dry in places—that’s okay! Now, carefully fold in the frozen raspberries and white chocolate chips. Try not to overmix and smash the berries.
Shape and Cut
Turn the dough out onto a lightly floured surface. Gently pat it into a 7-inch circle, about 1-inch thick. Use a sharp knife or bench scraper to cut the circle into 8 equal wedges, like a pizza.
Bake to Golden Perfection
Place the scone wedges on your prepared baking sheet, leaving about 2 inches between them. Brush the tops lightly with a little extra heavy cream and sprinkle with coarse sugar, if using. Bake for 18-22 minutes, or until the tops are golden brown and a toothpick inserted into the center comes out clean. Let them cool on the pan for 5 minutes before transferring to a wire rack.
My Go-To Tips for Scone Success
After making more batches of these than I can count, I’ve picked up a few tricks. First, keep everything cold! I even pop my measured flour bowl in the freezer for 10 minutes on a warm day. Those little bits of cold butter create steam in the oven, leading to those coveted flaky layers. Second, don’t fear the shaggy dough. The second you see no more dry flour streaks, stop mixing. Overworking is the enemy of a tender scone. And third, if you love a lemon twist, add a tablespoon of fresh lemon zest to the dry ingredients—it brightens up the whole flavor profile beautifully!
This recipe actually reminds me of the first time I served these to my book club. I was nervous, thinking they might be too simple. But one bite in, the room went quiet except for the sound of happy munching. Now they’re a requested staple. It’s proof that the best dishes are often the ones made with a little love (and good butter).
How to Serve and Store Your Scones
These scones are fantastic warm from the oven, when the white chocolate is still a little melty. I love them just as they are, but a pat of good salted butter or a drizzle of simple powdered sugar glaze takes them over the top. They’re the perfect centerpiece for a weekend brunch spread alongside some Savory Smoked Salmon Frittata to balance the sweetness.
To store, let them cool completely, then keep them in an airtight container at room temperature for up to 2 days. For longer storage, freeze the baked and cooled scones in a freezer bag for up to 3 months. You can also freeze the unbaked, shaped scones on a tray before popping them into a bag; just add a few extra minutes when baking from frozen.
Nutrition Information (Per Scone)
Calories: ~320 | Carbohydrates: 38g | Protein: 5g | Fat: 17g | Saturated Fat: 10g | Cholesterol: 55mg | Sodium: 250mg | Fiber: 1g | Sugar: 16g
So there you have it—your new favorite treat. These White Chocolate Raspberry Scones are more than just a recipe; they’re a little moment of joy you can bake for yourself and the people you love. They prove that with a few simple ingredients and about 30 minutes, you can create something truly wonderful. Now, go preheat that oven. Your perfect, flaky, fruity scone adventure awaits.
Your White Chocolate Raspberry Scone Questions, Answered
Can I use fresh raspberries instead of frozen?
I highly recommend sticking with frozen! Fresh raspberries are very delicate and can turn to mush when mixed into the dough, creating a wet, pink batter instead of distinct berry pockets. Frozen berries hold their shape better during mixing and baking.
My dough seems really wet. What did I do wrong?
Don’t panic! A wet dough usually means the butter got too warm or the berries released a bit of juice. Just sprinkle a little extra flour (a tablespoon at a time) onto your work surface and your hands while shaping. Handle it gently, and they’ll still bake up beautifully. Remember, a slightly sticky dough is better than an overworked, tough one.
How can I make these scones ahead of time?
You have two great options! For the best fresh-baked taste, prepare the dough, shape it into the circle, and cut the wedges. Place the whole baking sheet in the freezer until the scones are solid, then transfer them to a freezer bag. Bake from frozen, adding 3-5 extra minutes. You can also bake them a day ahead and gently re-warm them in a 300°F oven for 5-10 minutes.
What can I use instead of white chocolate?
Absolutely! Dark or milk chocolate chips are a delicious swap. For a different twist, try dried cranberries or chopped pecans. If you’re looking for another decadent baked good with different flavors, you might love my recipe for Chocolate Hazelnut Babka. It’s a fantastic project for when you have a little more time.
Why is it important to use cold butter?
This is the golden rule of flaky pastries and scones! When those small, cold bits of butter hit the hot oven, they steam and create little pockets of air. This is what gives you that light, layered, tender crumb instead of a dense, biscuit-like texture. For more on this essential technique, check out this great guide from King Arthur Baking on pastry basics.