Oh, the humble potsticker. That perfect little package of savory filling wrapped in a delicate, crispy-chewy dough. If you thought saying goodbye to gluten meant giving up on these beloved dumplings, I’m so excited to prove you wrong. My kitchen has seen its fair share of gluten-free experiments, but this recipe for Gluten Free Potstickers? It’s a total game-changer. It’s the answer to that craving for takeout that’s both satisfying to make and safe to eat. Whether it’s a fun weekend project with the kids or a impressive appetizer for guests, these potstickers bring everyone to the table with a smile.
Why You’ll Love These Gluten Free Potstickers
Let’s be real, gluten-free cooking can sometimes feel like a compromise. But not here! This recipe is designed to deliver on every front.
- Surprisingly Simple: Don’t let the idea of making dumpling dough from scratch scare you. The process is straightforward and oh-so-rewarding.
- Incredibly Customizable: Swap the pork for ground chicken, turkey, or even a fantastic veggie filling. It’s your kitchen, your rules!
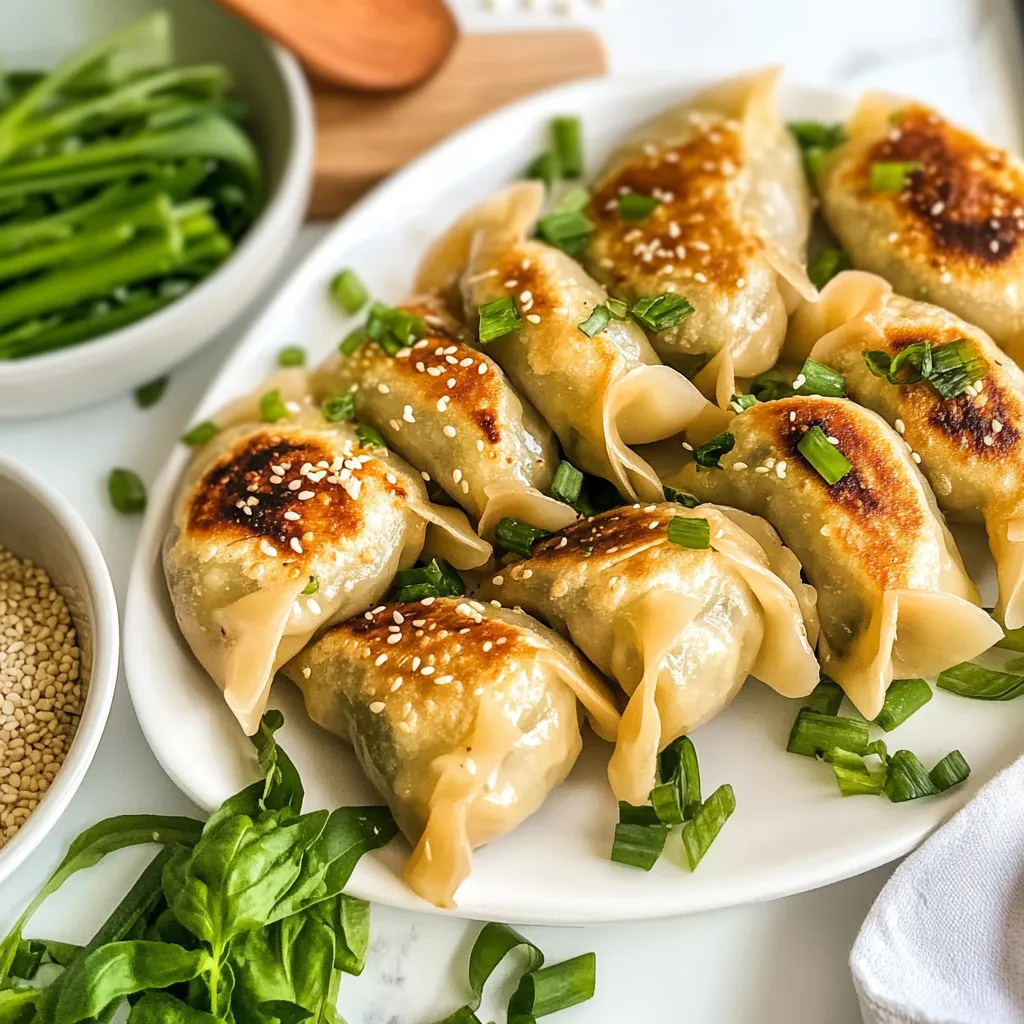
- Crispy Perfection: We achieve that iconic golden-brown, crispy bottom that makes potstickers so irresistible. No sogginess allowed!
- Freezer-Friendly Hero: Make a big batch and freeze them for a future busy weeknight. A homemade, gourmet-quality meal is just minutes away.
Ingredients You’ll Need
Gathering your ingredients is the first step to dumpling success. Here’s what you’ll need to create these little pockets of joy.
PrintGluten Free Potstickers

Make gluten free potstickers at home. Our simple recipe & pro cooking tech for delicious, crispy dumplings everyone will love. Perfect GF appetizer. (155 chars)
- Prep Time: 45 minutes
- Cook Time: 20 minutes
- Total Time: 1 hour 5 minutes
- Yield: 20–24 potstickers 1x
- Category: Main Course
- Cuisine: Asian
Ingredients
- For the Gluten-Free Dumpling Wrappers:
- 1 ½ cups gluten-free all-purpose flour blend (with xanthan gum)
- ½ cup tapioca flour
- ½ tsp salt
- ¾ cup hot water
- For the Filling:
- ½ lb ground pork
- 1 cup finely shredded napa cabbage
- 2 green onions, finely chopped
- 1 clove garlic, minced
- 1 tsp fresh ginger, grated
- 1 tbsp tamari or gluten-free soy sauce
- 1 tsp sesame oil
- For Cooking and Serving:
- 2–3 tbsp avocado oil or other high-heat oil
- ½ cup water
- Additional tamari for dipping
Instructions
- In a medium bowl, whisk together the gluten-free flour, tapioca flour, and salt. Gradually add the hot water, stirring with a wooden spoon until a shaggy dough forms. Turn the dough out onto a clean surface lightly dusted with gluten-free flour and knead for 3-4 minutes until smooth and pliable. Place the dough back in the bowl, cover with a damp cloth, and let it rest for 30 minutes.
- In a mixing bowl, combine the ground pork, shredded cabbage, green onions, garlic, ginger, tamari, and sesame oil. Mix everything together thoroughly using your hands or a fork.
- After the dough has rested, divide it into two equal portions. Roll one portion into a log about 1-inch in diameter. Cut the log into 10-12 equal pieces. Roll each piece into a ball, then use a rolling pin to roll it out into a thin circle, about 3-3.5 inches in diameter. Place a heaping teaspoon of filling in the center of each wrapper.
- Fold the wrapper over the filling to create a half-moon shape. Pinch the edges tightly to seal, pleating the edges if desired. Ensure there are no holes. Place the finished potsticker on a parchment-lined baking sheet.
- Heat a tablespoon of oil in a large non-stick skillet with a lid over medium-high heat. Arrange a batch of potstickers in the skillet, flat side down. Cook for 2-3 minutes until the bottoms are golden brown. Carefully pour ¼ cup of water into the skillet, and immediately cover with the lid. Reduce the heat to medium and steam for 5-6 minutes. Remove the lid and let any remaining water cook off. Repeat with the remaining potstickers.
Notes
Learn how to make perfect Gluten Free Potstickers with a crispy bottom and savory filling. This simple recipe is a game-changer for a satisfying, freezer-friendly meal that’s easy to customize.
Nutrition
- Serving Size: 20-24 potstickers
- Calories: 45 kcal
- Sugar: 0.2 g
- Fat: 2 g
- Carbohydrates: 5 g
- Fiber: 0.5 g
- Protein: 2 g
For the Gluten-Free Dumpling Wrappers:
- 1 ½ cups gluten-free all-purpose flour blend (with xanthan gum)
- ½ cup tapioca flour
- ½ tsp salt
- ¾ cup hot water
For the Filling:
- ½ lb ground pork
- 1 cup finely shredded napa cabbage
- 2 green onions, finely chopped
- 1 clove garlic, minced
- 1 tsp fresh ginger, grated
- 1 tbsp tamari or gluten-free soy sauce
- 1 tsp sesame oil
For Cooking and Serving:
- 2-3 tbsp avocado oil or other high-heat oil
- ½ cup water
- Additional tamari for dipping
Step-by-Step Instructions
Ready to dive in? Follow these steps for perfect potstickers every single time.
Step 1: Make the Dough
In a medium bowl, whisk together the gluten-free flour, tapioca flour, and salt. Gradually add the hot water, stirring with a wooden spoon until a shaggy dough forms. Turn the dough out onto a clean surface lightly dusted with gluten-free flour and knead for 3-4 minutes until smooth and pliable. Place the dough back in the bowl, cover with a damp cloth, and let it rest for 30 minutes.
Step 2: Prepare the Filling
While the dough rests, let’s make the filling. In a mixing bowl, combine the ground pork, shredded cabbage, green onions, garlic, ginger, tamari, and sesame oil. Mix everything together thoroughly using your hands or a fork. I find using my hands is the best way to make sure every bit of flavor is evenly distributed!
Step 3: Roll and Fill the Wrappers
After the dough has rested, divide it into two equal portions. Roll one portion into a log about 1-inch in diameter. Cut the log into 10-12 equal pieces. Roll each piece into a ball, then use a rolling pin to roll it out into a thin circle, about 3-3.5 inches in diameter. Keep the other dough balls covered to prevent them from drying out. Place a heaping teaspoon of filling in the center of each wrapper.
Step 4: Fold and Seal the Potstickers
This is the fun part! Fold the wrapper over the filling to create a half-moon shape. Pinch the edges tightly to seal, pleating the edges if you’re feeling fancy. The most important thing is to make sure there are no holes for the filling to escape during cooking. Place the finished potsticker on a parchment-lined baking sheet.
Step 5: Cook to Perfection
Heat a tablespoon of oil in a large non-stick skillet with a lid over medium-high heat. Arrange a batch of potstickers in the skillet, flat side down, without crowding them. Cook for 2-3 minutes until the bottoms are golden brown. Carefully pour ¼ cup of water into the skillet (it will sizzle and steam!), and immediately cover with the lid. Reduce the heat to medium and let them steam for 5-6 minutes, or until most of the water has evaporated and the filling is cooked through. Remove the lid and let any remaining water cook off. Repeat with the remaining potstickers.
My Top Tips for Potsticker Success
A little insider knowledge goes a long way. Here are my secrets for flawless gluten-free potstickers:
- Don’t Skip the Rest: Letting the dough rest is non-negotiable. It allows the flours to fully hydrate, making the dough much easier to roll out without cracking.
- Keep it Covered: Gluten-free dough dries out faster than traditional dough. Keep your unused dough balls and rolled-out wrappers under a damp cloth while you work.
- Seal Tightly: Use a little water on your fingertip to moisten the edge of the wrapper before sealing if you’re having trouble getting a good seal. A tight seal is the key to preventing leaks.
- Don’t Peek! Once you add the water and put the lid on, resist the urge to peek! Let the steam do its magic to cook the filling perfectly.
What to Serve With Your Potstickers
These potstickers are fantastic on their own with a simple dipping sauce of tamari and a dash of rice vinegar. But if you’re making a whole meal out of it, they pair beautifully with a light Asian Cucumber Salad for a refreshing crunch. For a more substantial feast, serve them alongside a bowl of Quick Ramen Stir-Fry.
Storing and Reheating Your Leftovers
These potstickers are perfect for meal prep! To store cooked leftovers, let them cool completely and keep them in an airtight container in the fridge for up to 3 days. Reheat them in a skillet over medium heat with a tiny splash of water to re-steam them, or until they’re hot and crispy again.
To freeze, place uncooked potstickers in a single layer on a parchment-lined baking sheet and freeze until solid. Then, transfer them to a freezer bag. You can cook them straight from frozen—just add an extra minute or two to the steaming time. It’s like having your favorite takeout on standby!
Frequently Asked Questions
Can I make these potstickers vegan?
Absolutely! For a vegan version, simply substitute the ground pork with crumbled firm tofu, finely chopped mushrooms, or a plant-based ground “meat.” The cooking method remains exactly the same.
My dough is cracking when I roll it out. What should I do?
This usually means the dough is a bit too dry. Don’t worry! Knead a teaspoon of warm water into the dough until it becomes smooth again. If it’s too sticky, add a tiny bit more gluten-free flour. The texture should be similar to Play-Doh.
What’s the best gluten-free flour blend to use for the wrappers?
I recommend a quality blend that includes xanthan gum, like Bob’s Red Mill 1-to-1 Baking Flour. These blends are formulated to mimic the texture of wheat flour and give the best results for pliable wrappers.
Can I bake these instead of pan-frying?
You can, though you won’t get the same crispy texture. To bake, brush the potstickers with oil and place them on a parchment-lined baking sheet. Bake at 400°F (200°C) for about 15-20 minutes, or until golden brown.
There you have it—the secret to delicious, homemade Gluten Free Potstickers that rival your favorite restaurant. This recipe is a testament to the fact that dietary restrictions don’t have to mean missing out on the foods you love. So, roll up your sleeves, put on some music, and get ready to create a meal that’s as fun to make as it is to eat. I can’t wait for you to experience the joy of that first crispy, savory bite!