Is there any dish that whispers “celebration” quite like a platter of perfect deviled eggs? They’re the undisputed MVP of potlucks, the star of spring brunches, and a guaranteed crowd-pleaser at any family gathering. But let’s be honest: we’ve all encountered a sad deviled egg—the rubbery white, the bland filling, the whole disappointing affair. Well, my friends, those days are over.
Today, I’m sharing my absolute go-to recipe for the BEST deviled eggs. This isn’t just a recipe; it’s my secret handshake for creating creamy, tangy, utterly irresistible bites that disappear from the plate in minutes. It’s the result of many family Easters and countless picnics, perfected to ensure you get a flawless result every single time. Whether you’re a seasoned cook or just starting out, this method is simple, reliable, and oh-so-delicious.
Why You’ll Love These BEST Deviled Eggs
- Foolproof & Easy: My simple tips guarantee easy-peeling eggs and a perfectly smooth filling every time.
- Incredibly Creamy: The secret to the silkiest texture? I’m spilling the beans (or should I say, yolks?) right here.
- Totally Customizable: This is the perfect base recipe. I’ll give you tons of ideas for jazzing them up to suit your taste.
- Always a Hit: These are the deviled eggs that will have your guests asking for the recipe. Promise.
Ingredients You’ll Need
Simplicity is key here! You probably have most of these staples in your kitchen already.
PrintBEST DEVILED EGGS

Discover the secret ingredient & perfect technique for the best deviled eggs. Learn essential tips for creamy filling & flavor.
- Prep Time: 15 minutes
- Cook Time: 12 minutes
- Total Time: 27 minutes
- Yield: 12 deviled egg halves 1x
- Category: Appetizer
- Cuisine: American
Ingredients
Instructions
Notes
A foolproof recipe for the creamiest, most flavorful deviled eggs. This easy method guarantees perfect hard-boiled eggs and a smooth, tangy filling every time.
Nutrition
- Serving Size: 12 deviled egg halves
- Calories: 78 kcal
- Sugar: 0.5 g
- Fat: 6.7 g
- Carbohydrates: 0.6 g
- Fiber: 0 g
- Protein: 3.2 g
- 6 large eggs
- 3 tablespoons mayonnaise
- 1 teaspoon yellow mustard
- 1 tablespoon sweet pickle relish
- 1/4 teaspoon white vinegar
- 1/8 teaspoon salt, or to taste
- Pinch of black pepper
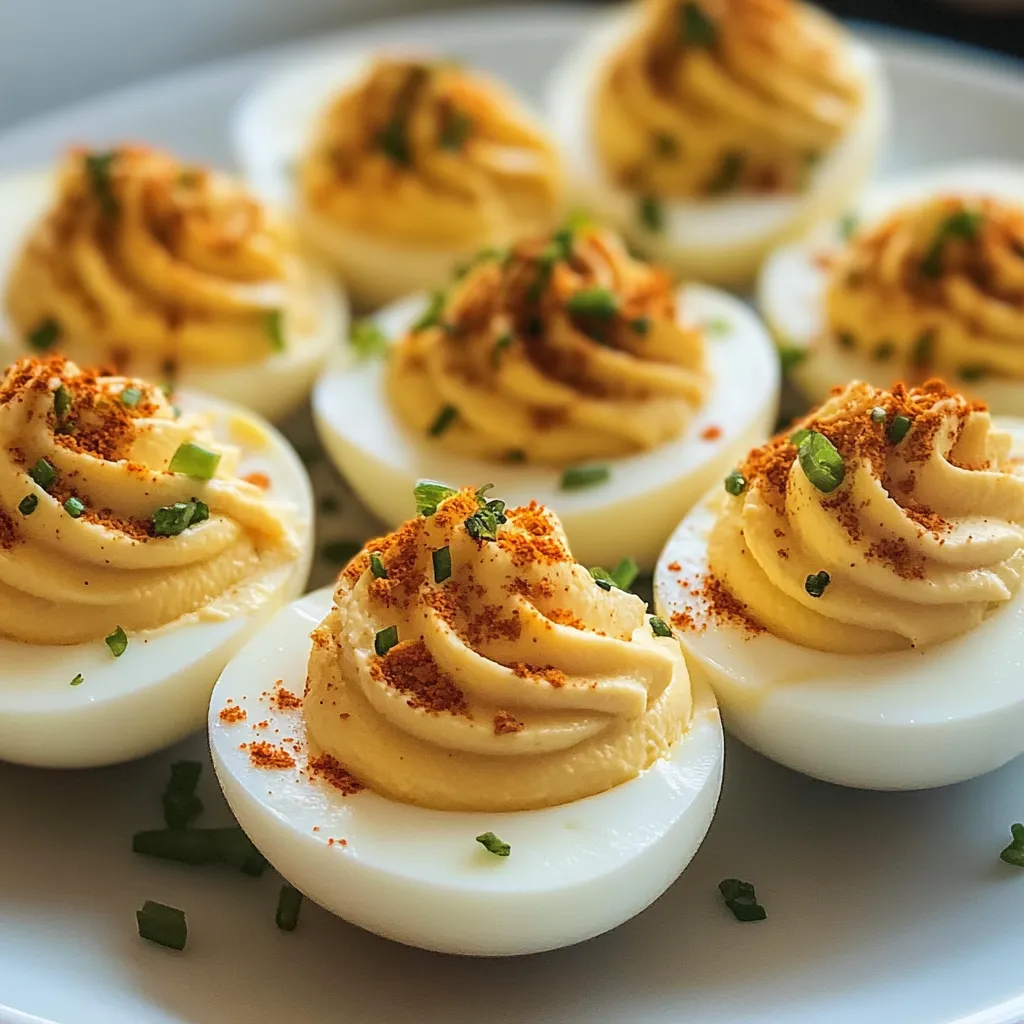
- Paprika, for garnish
- Fresh chives, chopped, for garnish
How to Make the BEST Deviled Eggs
Follow these easy steps for deviled egg perfection. It’s easier than you think!
Step 1: Perfect Hard-Boiled Eggs
Place your eggs in a single layer in a saucepan and cover with cold water by about an inch. Bring the water to a rolling boil over high heat. Once boiling, immediately cover the pan and remove it from the heat. Let the eggs sit in the hot water for 10-12 minutes. This gentle cooking method is my secret to preventing that nasty green ring around the yolk!
Step 2: The Ice Bath is Non-Negotiable
While the eggs are cooking, prepare a bowl of ice water. After the 10-12 minutes are up, use a slotted spoon to transfer the eggs directly into the ice bath. Let them cool completely. This shock stops the cooking process and, most importantly, makes the eggs a dream to peel.
Step 3: Peel and Halve
Once cool, gently tap each egg on the counter and roll it lightly to crackle the shell. Peel under cool running water to help remove any stubborn bits. Slice each egg in half lengthwise.
Step 4: Create the Filling
Carefully pop the yolks out into a medium bowl. Arrange the empty egg white halves on a serving platter. Mash the yolks with a fork until they form fine crumbs. Add the mayonnaise, mustard, relish, vinegar, salt, and pepper. Mix vigorously until the filling is completely smooth and creamy.
Step 5: Fill and Garnish
You can spoon the filling into the egg white cups, but for a fancy touch, spoon the mixture into a zip-top bag, snip off a corner, and pipe it in. This makes them look absolutely professional! Sprinkle with a dash of paprika and some fresh chives for that classic, beautiful finish.
My Best Tips for Deviled Egg Success
A few simple tricks can make all the difference between good deviled eggs and the BEST deviled eggs.
- Older Eggs are Easier to Peel: If you can plan ahead, eggs that are a week or two old peel much more easily than super fresh ones.
- Get Silky Smooth: For an ultra-creamy filling, push the yolk mixture through a fine-mesh sieve before adding the other ingredients. It’s a tiny extra step that delivers a luxurious texture.
- Taste as You Go! Before you fill all the whites, taste the yolk mixture. You might want a touch more salt, vinegar for tang, or mayo for creaminess. Adjust to your liking!
- Make-Ahead Magic: You can hard-boil the eggs up to 2 days in advance. Keep them peeled and stored in an airtight container in the fridge. You can also make the filling a day ahead—just store it separately and assemble an hour or two before serving.
Fun and Flavorful Variations
Once you’ve mastered the classic, the world is your oyster… or deviled egg! Here are a few family-favorite twists:
- Spicy Sriracha: Swap the yellow mustard for a teaspoon (or more!) of sriracha and garnish with a tiny slice of jalapeño.
- Everything Bagel: Mix a teaspoon of everything bagel seasoning into the filling and sprinkle more on top.
- Bacon & Cheddar: Fold in 2 tablespoons of finely shredded sharp cheddar and 1 tablespoon of cooked, crumbled bacon.
- Herb Garden: Use dill pickle relish instead of sweet and add a tablespoon of fresh chopped dill.
What to Serve With Your Deviled Eggs
These creamy delights are the perfect partner for so many meals! They’re a natural fit for a spread of easy Easter brunch ideas, but don’t save them just for holidays. They add a protein-packed punch to a simple weeknight dinner like my favorite weeknight meatloaf or a big, crisp green salad. They also disappear quickly at summer barbecues and picnics.
How to Store Leftovers
Cover the platter tightly with plastic wrap or transfer the eggs to an airtight container. They’ll keep well in the refrigerator for up to 2 days. Note that the whites might get a tiny bit softer, but they’ll still taste fantastic!

FAQs About Making Deviled Eggs
Can I use Miracle Whip instead of mayonnaise?
You absolutely can! Miracle Whip will give the filling a tangier, slightly sweeter flavor. It’s a matter of personal preference. My household is divided on this very issue, so you’re in good company either way.
How far in advance can I make these?
For the best texture, I recommend assembling them the day you plan to serve them. However, you can get a serious head start by boiling and peeling the eggs up to 2 days ahead and making the filling 1 day ahead. Store them separately and assemble a few hours before your event.
My yolk mixture is a bit dry. What should I do?
No problem! This can happen depending on the size of your egg yolks. Simply add more mayonnaise, a teaspoon at a time, and mix until it reaches your desired creamy consistency.
What’s the best way to transport deviled eggs?
Use a deviled egg carrier if you have one—they’re genius! Otherwise, place the filled eggs snugly on a plate or in a container and cover the top with plastic wrap, gently pressing it onto the surface of the eggs to keep them from sliding around. Keep them cool in a cooler or refrigerator until serving.
There you have it! My tried-and-true path to creating the BEST deviled eggs that are sure to become a requested recipe in your home too. The beauty of this dish is in its simplicity and its power to bring smiles to the table. I hope this recipe brings as much joy to your kitchen as it has to mine. Now, go forth and devil those eggs!