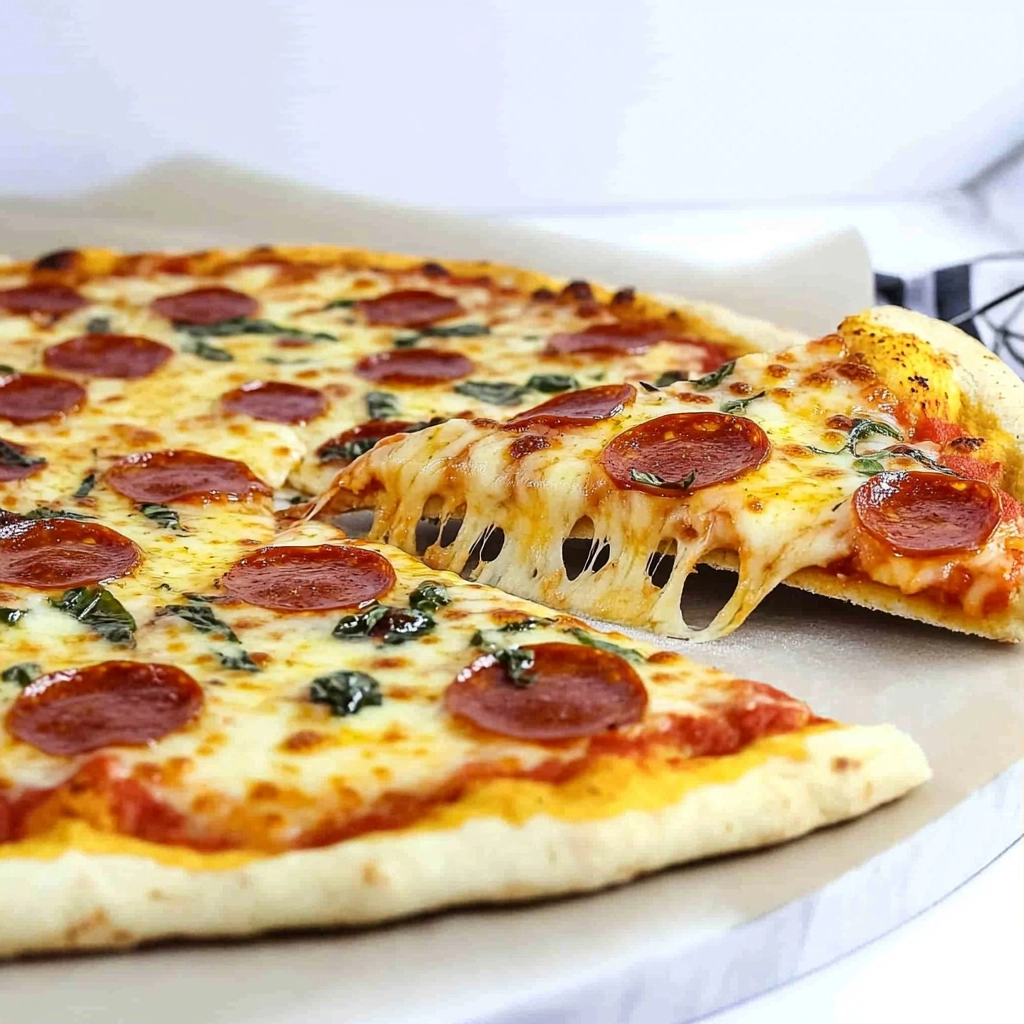
This gluten free pizza crust recipe delivers a satisfyingly crisp base for all your favorite pizza creations. It is a 100% gluten-free recipe, perfect for those with celiac disease or gluten sensitivities. Anyone can achieve a delicious, wheat-free pizza using these simple steps. This recipe ensures you don’t miss out on pizza night.
Recipe Overview
| Prep Time | 15 minutes |
|---|---|
| Cook Time | 12-15 minutes |
| Total Time | 27-30 minutes |
| Servings | 1 large pizza (approx. 6-8 slices) |
| Difficulty | Easy |
| Cuisine | Italian-Inspired |
| Gluten-Free | Yes – certified gluten-free ingredients recommended. |
Why This Gluten-Free Recipe Works
Achieving a perfect gluten-free pizza crust often comes down to the right flour blend and proper hydration. This recipe utilizes a 1-to-1 gluten-free flour blend, which is specifically designed to mimic the properties of wheat flour in baking. The combination of yeast and warm water creates the necessary rise, while the single rise before baking keeps the crust light and airy without becoming gummy. This method ensures a delightful chew and crispness that rivals traditional pizza crusts.
The simplicity of pressing the dough directly onto parchment paper eliminates the need for complex kneading or handling, which can be tricky with gluten-free doughs. This technique ensures the dough is evenly distributed and results in a consistently thin crust with a slightly raised edge. It’s a forgiving process that yields excellent results every time, making it a go-to for busy weeknights or casual entertaining.
Ingredients
PrintGluten Free Pizza Crust Perfection
A crisp, 100% gluten-free pizza crust perfect for celiac and sensitive diets. Achieve a restaurant-style crust with a light, airy texture and golden finish using this easy, no-knead method.
- Prep Time: 15
- Cook Time: 15
- Total Time: 30
- Yield: 1 large pizza (6-8 slices) 1x
- Category: Gluten-Free
- Method: Baking
- Cuisine: Italian-Inspired
- Diet: Gluten-Free
Ingredients
1 cup warm water (110°F)
2 ¼ teaspoon active dry yeast
1 teaspoon sugar
1 tablespoon olive oil
2 ½ cups Bob’s Red Mill Gluten Free 1 to 1 Baking Flour
1 teaspoon salt
Instructions
In a large bowl, combine warm water, yeast, and sugar. Let sit 5 minutes until foamy.
Add olive oil, then gradually stir in flour and salt until dough forms.
Press dough directly onto parchment paper to shape the crust, forming a border for edges.
Let rise 5-7 minutes at room temperature.
Preheat oven to 475°F (245°C). Bake 12-15 minutes until golden and crispy.
Notes
Use certified gluten-free ingredients for celiac safety
Add ½ teaspoon xanthan gum if using flour without it
Parchment paper prevents sticking and aids transfer to oven
Optional: Lightly oil parchment paper for extra crispiness
Nutrition
- Serving Size: 1 slice
- Calories: 240
- Sugar: 1g
- Sodium: 400mg
- Fat: 12g
- Saturated Fat: 2g
- Carbohydrates: 30g
- Fiber: 2g
- Protein: 5g
- Cholesterol: 0mg
| Ingredient | Quantity | Notes |
|---|---|---|
| Warm Water (110 degrees F) | 1 cup | Crucial for activating yeast; ensure it’s not too hot or cold. |
| Active Dry Yeast | 2 ¼ teaspoon (or 1 packet) | Ensure yeast is fresh for proper activation. Certified gluten-free if necessary. |
| Sugar | 1 teaspoon | Feeds the yeast. Any granulated sugar is fine. |
| Olive Oil | 1 tablespoon | Adds richness and helps with a tender crust. Use extra virgin for best flavor. |
| Bob’s Red Mill Gluten Free 1 to 1 Baking Flour | 2 ½ cups | This blend contains xanthan gum. If using a different blend, check if it includes xanthan gum and add ½ teaspoon if not. Always use certified gluten-free if baking for celiac needs. |
| Salt | 1 teaspoon | Enhances flavor and controls yeast activity. |
Step-by-Step Instructions

Gluten-Free Cross-Contamination Tip: Ensure all utensils, bowls, and work surfaces are thoroughly cleaned and free of any gluten-containing flour dust before beginning preparation. This is vital for a celiac-safe meal.
Yeast Activation
Stir together the warm water, active dry yeast, sugar, and olive oil in a measuring cup. Allow to rest for 8 to 10 minutes until the mixture is foamy and the yeast has bloomed. Discard if no foam appears, indicating inactive yeast.
Dry Ingredient Combination
While the yeast is activating, whisk together the Bob’s Red Mill Gluten Free 1 to 1 Baking Flour and salt in a large mixing bowl. This ensures even distribution of ingredients.
Dough Formation
Pour the activated yeast mixture into the bowl with the dry ingredients. Stir using a rubber spatula or wooden spoon until a cohesive dough forms. It will be sticky.
Shaping the Crust
Turn the sticky dough out onto a piece of parchment paper. Form it into a ball. Gently press the dough outwards with your hands, rotating the pan as you go, into a large, flat disc approximately 12-16 inches in diameter. Create a slightly thicker edge for the crust. Perfection isn’t necessary; an rustic look is charming.
Preheating Oven and Pan
Preheat your oven to 425°F (220°C). Line a pizza pan or baking sheet with parchment paper and set aside. Ensure the oven rack is in the center position.
Topping the Pizza
Once the dough is shaped, spread your favorite pizza sauce evenly over the crust, leaving the edge clear. Add your chosen toppings and cheese.
Baking the Pizza
Carefully transfer the parchment paper with the pizza onto the preheated pizza pan or baking sheet. Bake for 10 to 12 minutes, or longer for a crisper crust, until the crust is golden brown and the cheese is bubbly and melted.
Chef Tips for Perfect Gluten-Free Results
-
Always use certified gluten-free ingredients for baking, especially flours and yeast, to avoid cross-contamination for celiac-safe pizzas.
-
Ensure your water temperature is precisely 110°F (43°C) for optimal yeast activation. Too hot kills the yeast, too cold hinders its activity.
-
Do not overwork the gluten-free dough. Stirring until just combined is sufficient; overmixing can lead to a tough crust.
-
For a crispier gluten-free crust, pre-bake the dough for 5-7 minutes before adding toppings. This helps dry out the dough further.
-
Use parchment paper for easy transfer and to prevent sticking. This is essential for delicate gluten-free doughs.
Common Mistakes to Avoid
-
Mistake: Using regular all-purpose flour instead of a gluten-free blend. Why: Wheat flour contains gluten, which is essential for structure and elasticity in traditional doughs. Its absence in gluten-free baking requires specific flour blends. Fix: Always use a dedicated gluten-free flour blend that is formulated for baking. Use certified gluten-free ingredients for celiac safety.
-
Mistake: Incorrect water temperature for yeast. Why: Water that is too hot will kill the yeast, preventing the dough from rising. Water that is too cool will significantly slow down or prevent activation. Fix: Use a thermometer to ensure water is between 105-115°F (40-46°C), ideally around 110°F (43°C).
-
Mistake: Over-handling or over-kneading the dough. Why: Gluten-free flours do not form elastic gluten strands like wheat flour. Overworking can lead to a dense, gummy texture. Fix: Mix only until the ingredients are just combined. The dough should be sticky, not elastic.
-
Mistake: Not using parchment paper. Why: Gluten-free dough can be very sticky and prone to tearing or sticking to the pan, making transfer difficult. Fix: Always shape and bake your gluten-free pizza crust on parchment paper for easy handling.
-
Mistake: Using non-certified gluten-free ingredients when baking for someone with celiac disease. Why: Even trace amounts of gluten can cause a severe reaction in individuals with celiac disease. Fix: Always look for ‘certified gluten-free’ labels on all ingredients when preparing food for celiac individuals to ensure it is celiac-safe.
Variations and Substitutions
| Ingredient | Gluten-Free Substitution | Impact on Flavor |
|---|---|---|
| Bob’s Red Mill Gluten Free 1 to 1 Baking Flour | A reputable brand of 1-to-1 gluten-free baking flour blend (e.g., King Arthur Baking Gluten-Free Measure for Measure Flour) | Minimal. Ensure the blend contains xanthan gum. |
| Olive Oil | Melted coconut oil or a neutral oil like avocado oil | Slightly less richness with neutral oil; a very subtle coconut note with coconut oil. |
| Active Dry Yeast | Instant Yeast (use same amount) | No significant impact, but instant yeast can often be mixed directly with dry ingredients without pre-activation if your recipe allows. This recipe benefits from blooming active dry yeast. |
Serving Suggestions and Pairings
Serve this gluten-free pizza crust piping hot, fresh from the oven. It pairs wonderfully with a vibrant green salad dressed with a vinaigrette. Consider a side of roasted vegetables like broccoli or bell peppers. For a complete Italian-inspired meal, serve with a gluten-free pasta salad. Ensure all accompanying dishes and toppings are verified gluten-free for a safe and enjoyable dining experience. This pizza is perfect for casual family dinners, movie nights, or game day celebrations.
Storage and Reheating
| Method | Duration | Instructions |
|---|---|---|
| Room Temperature (cooked pizza) | 1-2 hours | Allow pizza to cool completely. Cover loosely with foil or in an airtight container. Best eaten fresh. |
| Refrigerator (cooked pizza) | 3-4 days | Store in an airtight container, ensuring no gluten contamination. Place parchment paper between slices for easier separation. |
| Freezer (cooked pizza) | 1-2 months | Wrap individual slices tightly in plastic wrap, then aluminum foil or place in a freezer-safe bag. Ensure freezer is clean to avoid cross-contamination. |
| Reheating (oven) | N/A | Place slices on a baking sheet in a preheated oven at 350°F (175°C) for 5-10 minutes until heated through and crust is crisp. |
| Reheating (air fryer) | N/A | Reheat slices at 350°F (175°C) for 3-5 minutes, checking frequently for desired crispness. Ensure air fryer is clean. |
Nutritional Information
| Nutrient | Amount per Serving (approximate, of crust only) |
|---|---|
| Calories | 150-180 |
| Protein | 3-5g |
| Fat | 2-4g |
| Carbohydrates | 25-30g |
| Fiber | 1-2g |
| Sugar | 1-2g |
| Sodium | 200-300mg |
Approximate values. This recipe is gluten-free.
Frequently Asked Questions
What is the best gluten-free flour for pizza crust?
A high-quality 1-to-1 gluten-free baking flour blend is ideal for this pizza crust recipe. These blends are formulated to mimic wheat flour’s properties and typically contain xanthan gum for binding. Ensure your chosen blend is certified gluten-free for celiac safety.
How do I know when my gluten-free pizza crust is fully cooked?
The gluten-free pizza crust is fully cooked when the edges are golden brown and firm to the touch. The center should appear set and no longer look wet or gummy. Ensure toppings are also cooked through.
What are essential steps for preventing cross-contamination with gluten-free pizza?
Thoroughly clean all kitchen surfaces, utensils, and hands before preparing gluten-free pizza. Use dedicated cutting boards and serving dishes. Always store gluten-free ingredients separately from gluten-containing ones to maintain a celiac-safe environment.
Can I prepare gluten-free pizza dough ahead of time for easier meal prep?
This specific dough is best used immediately after mixing due to the nature of gluten-free ingredients. However, you can mix the dry ingredients and wet ingredients separately ahead of time and combine them just before shaping and baking for a slightly more streamlined process.
What are the best ways to serve gluten-free pizza crust to keep it warm?
Serve your gluten-free pizza crust immediately after it finishes baking for optimal warmth and texture. Consider using a pizza stone in the oven to keep it warm for longer, or quickly reheating individual slices in a warm oven before serving.
This reliable gluten-free pizza crust recipe is your ticket to delicious, homemade pizza night again. Forget bland, crumbly bases; this recipe yields a wonderfully crisp and satisfying crust every time. It’s designed for ease of preparation, ensuring even novice bakers can achieve exceptional results. Enjoy the simple pleasure of a perfect slice, made safely and deliciously gluten-free. You’ll wonder why you ever relied on store-bought options.