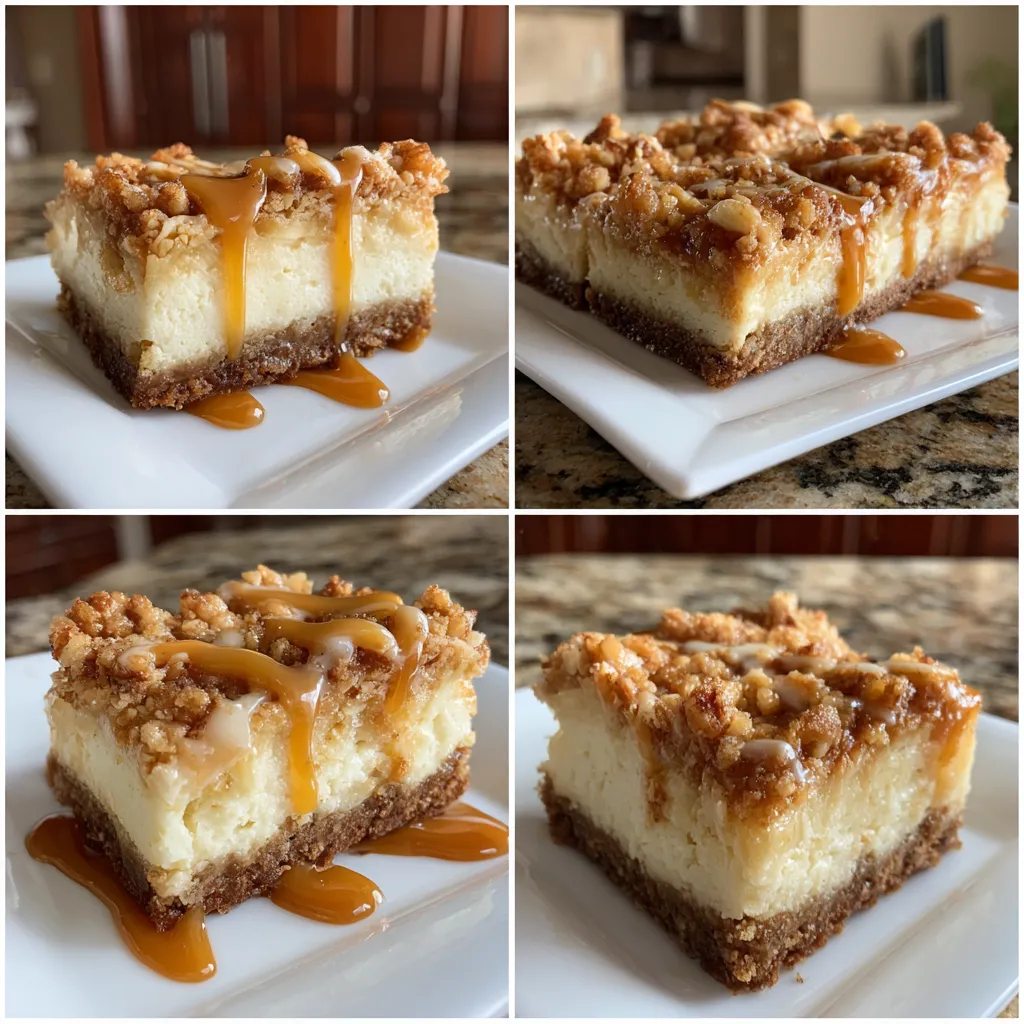
Imagine the cozy flavors of autumn all wrapped up in one irresistible dessert. That’s exactly what you get with caramel apple cheesecake bars. This recipe combines a buttery crust, a rich and creamy cheesecake layer, sweet spiced apples, and a decadent caramel drizzle. It’s a celebration of fall in every single bite. We’re going to walk through everything you need to know, from gathering the perfect ingredients to mastering the bake. Get ready to create a treat that will have everyone asking for the recipe.
Why Caramel Apple Cheesecake Bars Captivate Us
I’ll never forget the first time I brought a pan of these bars to a family potluck. It was a crisp October afternoon, and the table was already overflowing with hearty dishes. But the moment I unveiled my dessert, something magical happened. The rich aroma of cinnamon and baked apples filled the room, and a hush fell over the crowd. They disappeared in minutes, with my uncle famously asking if I’d hidden the rest for myself. That’s the power of a truly great dessert. It creates a moment, a memory. These caramel apple cheesecake bars do just that.
PrintIrresistible Caramel Apple Cheesecake Bars Recipe EASY

Delicious caramel apple cheesecake bars recipe Easy nobake dessert with a graham cracker crust Perfect homemade fall treat for parties
- Prep Time: 30 minutes
- Chilling Time: 4 hours
- Cook Time: 50 minutes
- Total Time: 5 hours 30 minutes
- Yield: 16
- Category: Dessert
- Cuisine: American
Ingredients
Instructions
Nutrition
- Calories: 380 calories
- Sugar: 30 g
- Fat: 22 g
- Carbohydrates: 42 g
- Fiber: 2 g
- Protein: 5 g
Gathering Your Ingredients for Success
Using high-quality ingredients is the first secret to amazing caramel apple cheesecake bars. Let’s start with the apples. You want a variety that holds its shape when baked. Granny Smith apples are the top choice for their tartness, which balances the sweetness of the caramel and cheesecake. However, Honeycrisp or Fuji apples also work beautifully for a sweeter profile. For the crust, cold butter is non-negotiable. It creates that delightful, flaky texture we all love.
The Equipment You’ll Need
You don’t need any fancy equipment to make these bars, but a few key tools make the process much smoother. A stand mixer or a good hand mixer is essential for creating a perfectly smooth and lump-free cheesecake filling. You’ll also need a 9×13 inch baking pan. Lining the pan with parchment paper is a lifesaver—it allows you to lift the entire batch out for easy slicing after it chills. A sharp knife and a sturdy pastry blender or food processor for the crust will also be your best friends in the kitchen. For more essential baking tools, check out our baking tools guide to ensure you’re fully prepared.
Crafting the Perfect Base and Filling
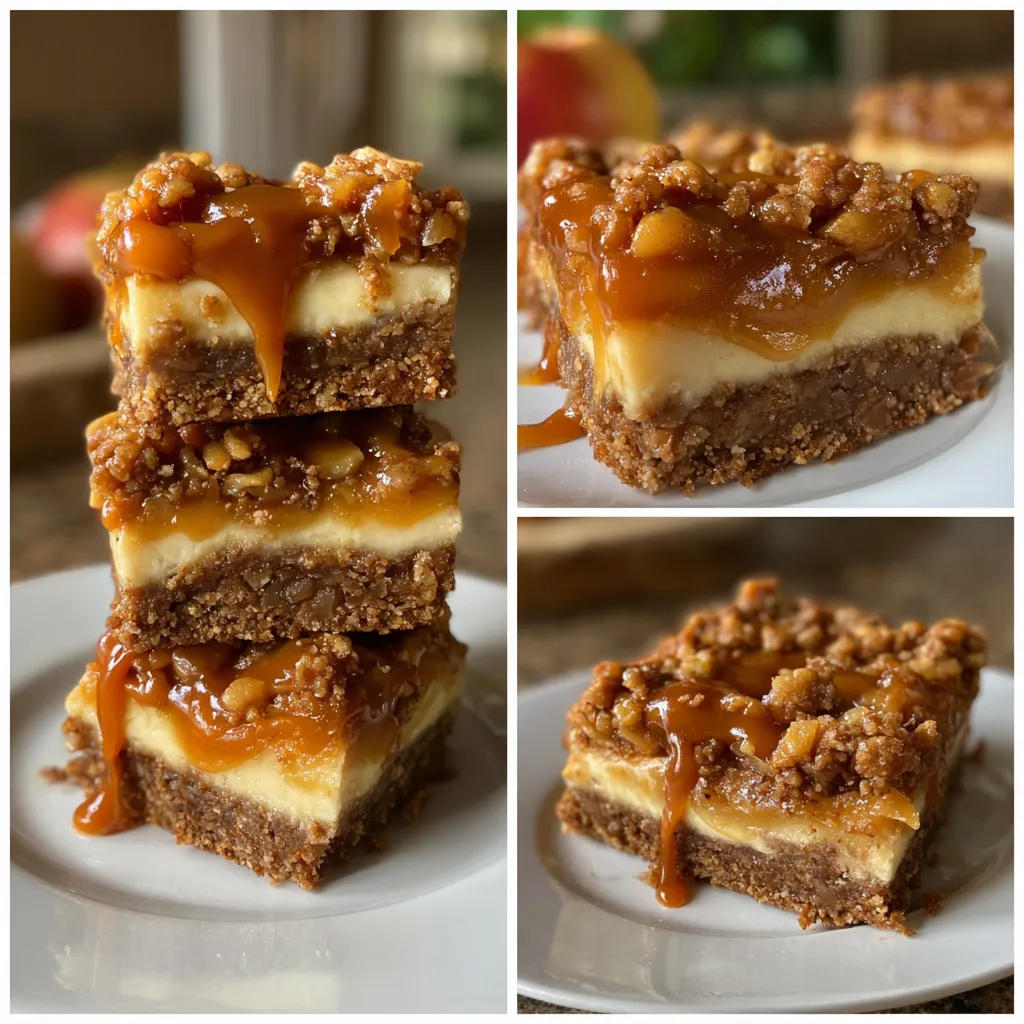
The foundation of any great bar dessert is a sturdy, flavorful crust. For these caramel apple cheesecake bars, we use a simple graham cracker crust that comes together in minutes. Start by pulsing the graham crackers in a food processor until you have fine crumbs. Alternatively, you can place them in a sealed bag and crush them with a rolling pin. Then, mix the crumbs with melted butter and a bit of sugar. The mixture should resemble wet sand. Press it firmly and evenly into the bottom of your prepared pan. This compact layer is what gives the bars their structure, so take your time here.
Preparing the Spiced Apple Topping
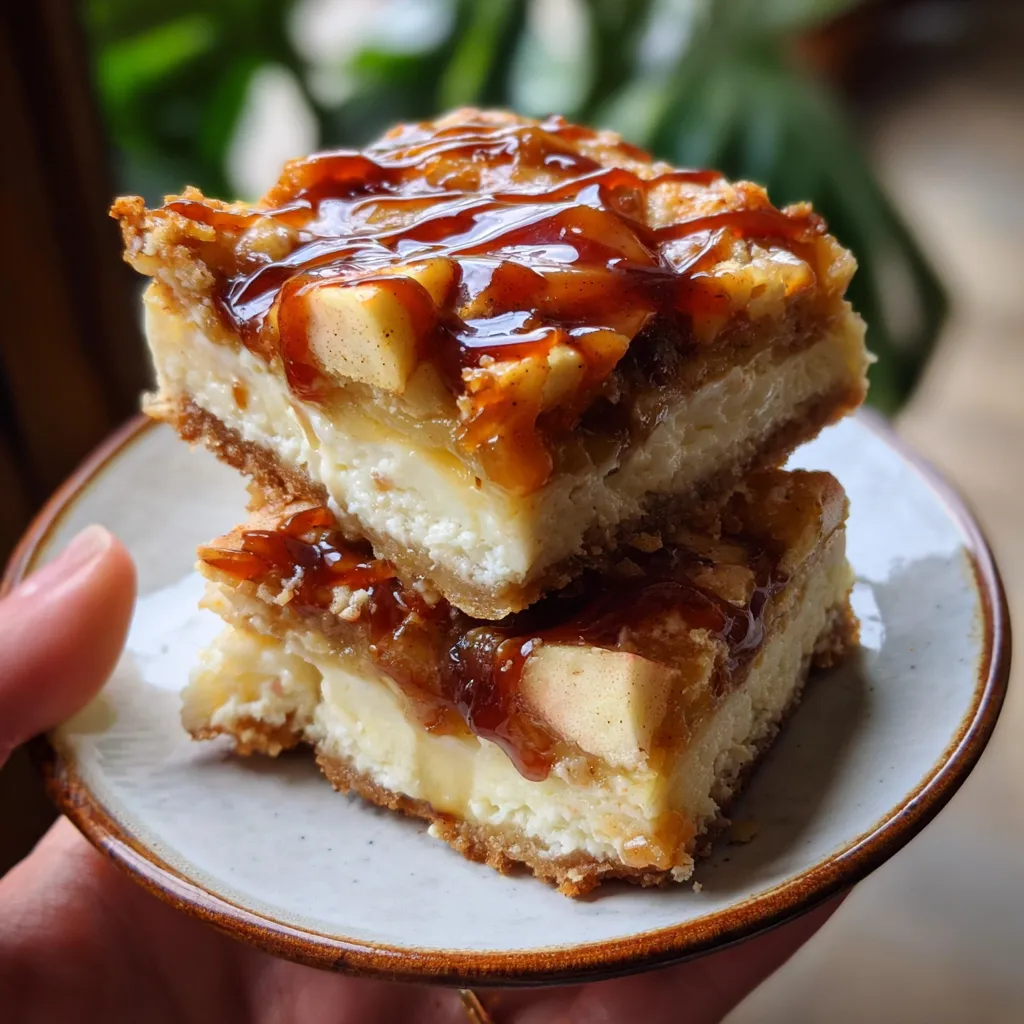
The spiced apple layer is what gives these bars their unmistakable fall character. Peel and chop your apples into small, bite-sized pieces to ensure they cook through and are easy to eat. In a separate bowl, toss the apple pieces with brown sugar, flour, cinnamon, and a pinch of nutmeg. The flour helps absorb any juices the apples release during baking, preventing the filling from becoming too watery. This spiced apple mixture gets scattered evenly over the unbaked cheesecake layer. As the bars bake, the apples will soften and the spices will perfume the entire dessert. It’s a simple step that delivers immense flavor.
Layering and Baking to Perfection
With your layers assembled—crust, cheesecake, and apples—it’s time to bake. The oven should be preheated to 350°F (175°C). Bake the bars for about 45 to 50 minutes. You’ll know they are done when the edges of the cheesecake layer are set but the center still has a slight jiggle. This jiggle is crucial; it means the bars will set perfectly as they cool without overbaking. Overbaking is the main cause of a cracked and rubbery cheesecake texture. Once out of the oven, let the pan cool completely on a wire rack. This gradual cooling is the next critical step for that ideal creamy texture.
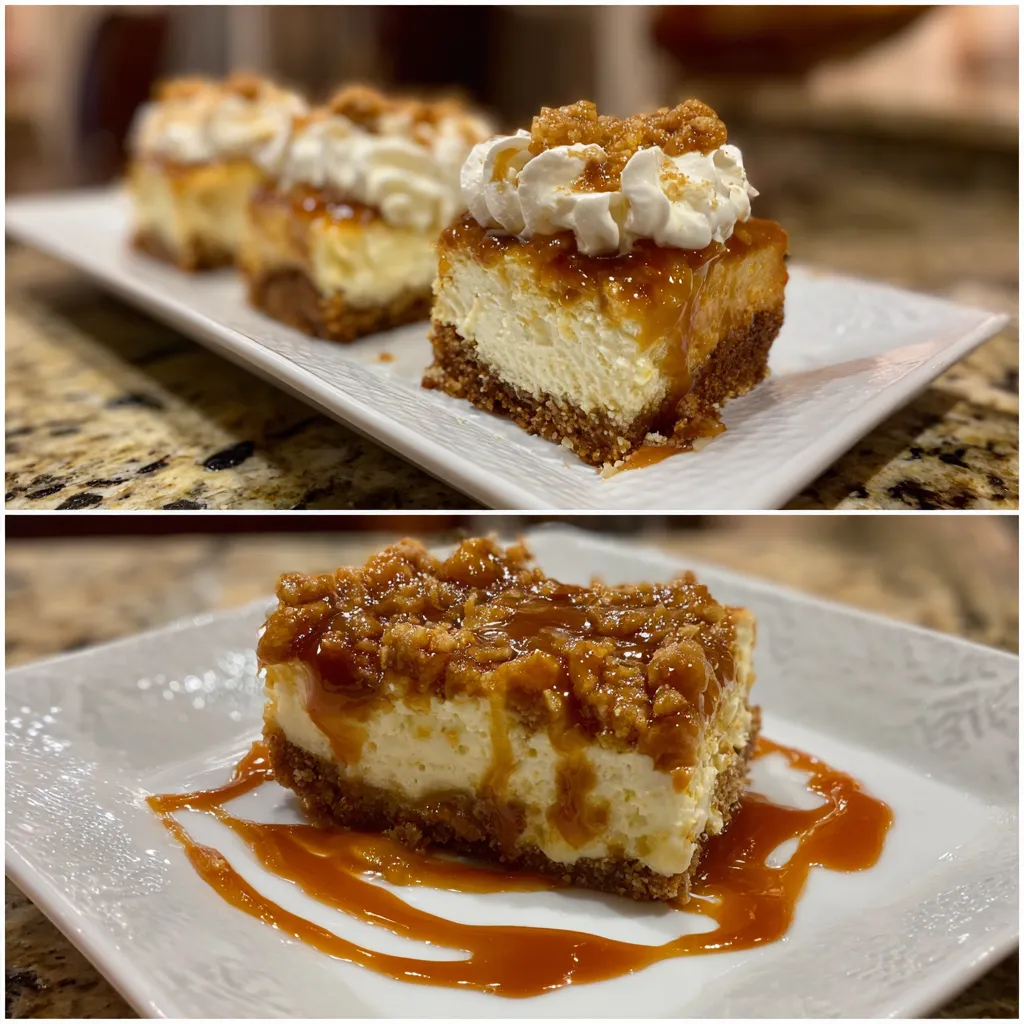
The Finishing Touches and Serving Suggestions
After the pan has cooled to room temperature, it’s not yet time to slice. You must refrigerate the caramel apple cheesecake bars for at least 4 hours, though overnight is ideal. This chilling time allows the cheesecake layer to fully set, making it firm enough to cut into clean, beautiful bars. Trying to cut them before they are cold will result in a messy, gooey disappointment. Patience is your final ingredient. Once they are thoroughly chilled, use the parchment paper to lift the entire block out of the pan and onto a cutting board.
Storing and Keeping Your Bars Fresh
Because these bars contain dairy and fresh fruit, proper storage is key. Always keep them refrigerated in an airtight container. They will stay fresh and delicious for up to 5 days. The crust may soften slightly over time, but the flavors will remain amazing. You can also freeze these bars for longer storage. Place the cooled and chilled bars (without the caramel drizzle) on a baking sheet to freeze individually before wrapping them tightly in plastic wrap and foil. They can be frozen for up to 3 months. Thaw them overnight in the refrigerator and add the caramel drizzle just before serving.
Perfect for Any Autumn Gathering
Caramel apple cheesecake bars are the ultimate portable dessert for fall events. They are a fantastic addition to a Halloween party spread, a standout dessert at Thanksgiving, or the perfect treat for a tailgate or harvest festival. Their individual portion size makes them easy to serve and eat without utensils. They offer all the beloved flavor of a traditional apple pie or a slice of cheesecake but in a much more convenient form. If you’re looking for more festive fall recipes, our collection of fall dessert ideas is full of inspiration. Baking a batch is a wonderful way to celebrate the season and share something made with love.
Mastering the Recipe: Tips and Troubleshooting
Even the most straightforward recipes can have hiccups. One common issue is a soggy crust. This almost always happens if the crust isn’t pre-baked or if the apple topping has too much moisture. To avoid this, make sure to pre-bake your crust and toss your apples thoroughly with flour, which acts as a thickening agent. Another frequent concern is cracking on the surface of the cheesecake layer. This occurs from overmixing the batter (which incorporates air) or from a drastic temperature change. To prevent cracks, avoid overmixing after adding the eggs and allow the bars to cool gradually in the turned-off oven with the door cracked open if necessary.
Making It Your Own: Variations on a Theme
The beauty of this recipe is its adaptability. For a nuttier flavor, you can replace half of the graham cracker crumbs with finely ground pecans or ginger snaps for a spicier kick. If you’re not a fan of caramel, a simple dusting of powdered sugar is elegant and delicious. You can even swap the apples for pears for a different twist on the fruit element. For those with dietary restrictions, use a gluten-free flour blend in the apple topping and gluten-free graham crackers for the crust. The possibilities are endless, allowing you to create a dessert that perfectly suits your taste.
Why This Recipe Beats the Bakery
There’s something incredibly satisfying about making a dessert this impressive at home. Not only do you get the incredible aroma filling your kitchen, but you also control the quality of every ingredient. You can use real butter, fresh apples, and high-quality cream cheese without any preservatives. The cost of making a full 9×13 pan is often a fraction of what you’d pay for a few slices at a bakery. Plus, the pride that comes with serving something homemade is unbeatable.
Frequently Asked Questions
Can I use pre-made caramel ice cream topping?
Absolutely. A good-quality store-bought caramel sauce works perfectly well for drizzling over the finished bars. For the best flavor, look for brands with simple ingredients. However, if you have the time, making a simple homemade caramel sauce can take these bars to an extraordinary level.
What are the best apples to use for baking?
You want an apple that holds its shape and offers a balance of sweet and tart. Granny Smith is the classic choice for its firm texture and tangy flavor, which cuts through the sweetness. Other excellent options include Honeycrisp, Braeburn, or Fuji apples.
How do I know when the bars are done baking?
The bars are done when the edges are fully set and appear puffed, but the center still has a slight jiggle when you gently shake the pan. This jiggle will firm up as the bars cool and chill. Overbaking is the most common mistake, so err on the side of slightly underdone.
Why did my cheesecake layer crack?
Cracking usually happens due to overmixing the batter (which adds too much air) or a sudden temperature change. Always mix on low speed just until ingredients are combined, and allow the bars to cool gradually at room temperature before refrigerating.
Can I freeze caramel apple cheesecake bars?
Yes, you can freeze them for up to three months. Freeze the bars (without the caramel drizzle) on a parchment-lined baking sheet until solid, then wrap them tightly. Thaw in the refrigerator overnight and add caramel right before serving.