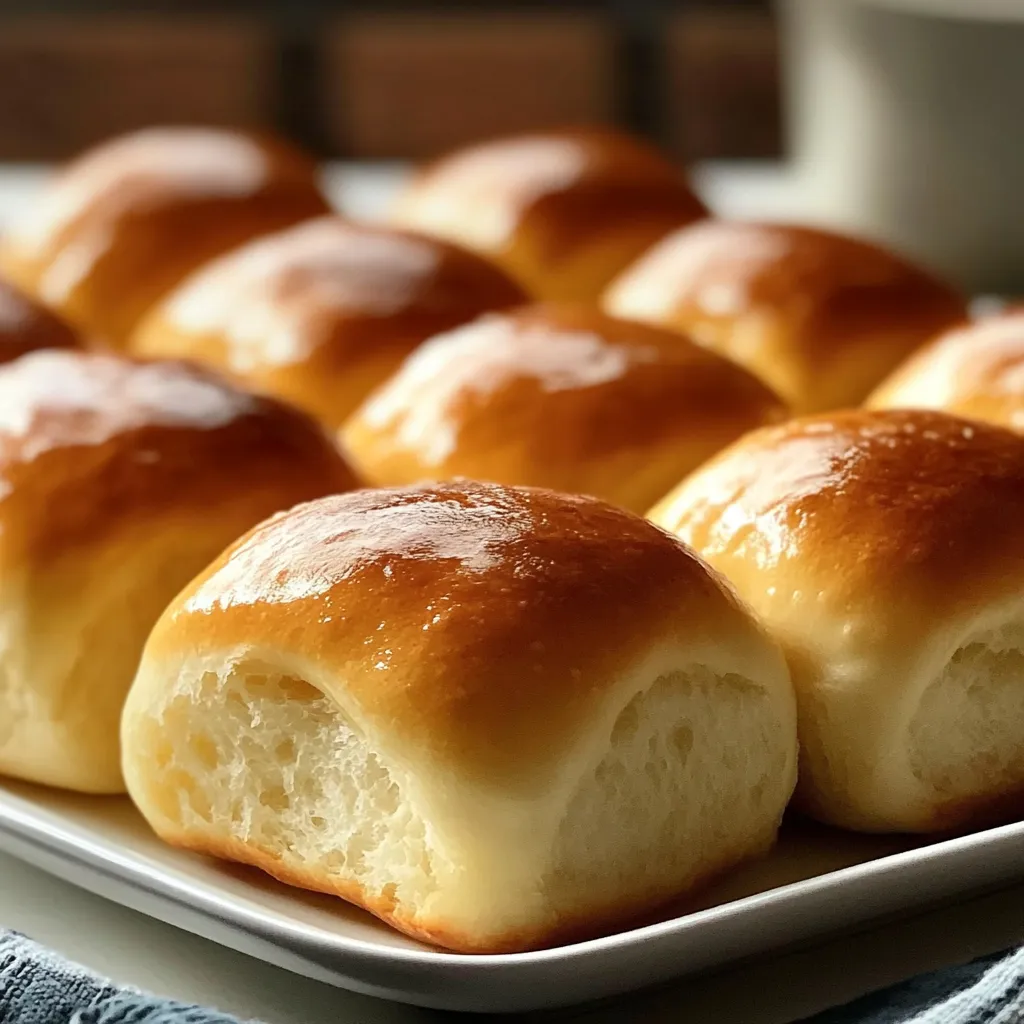
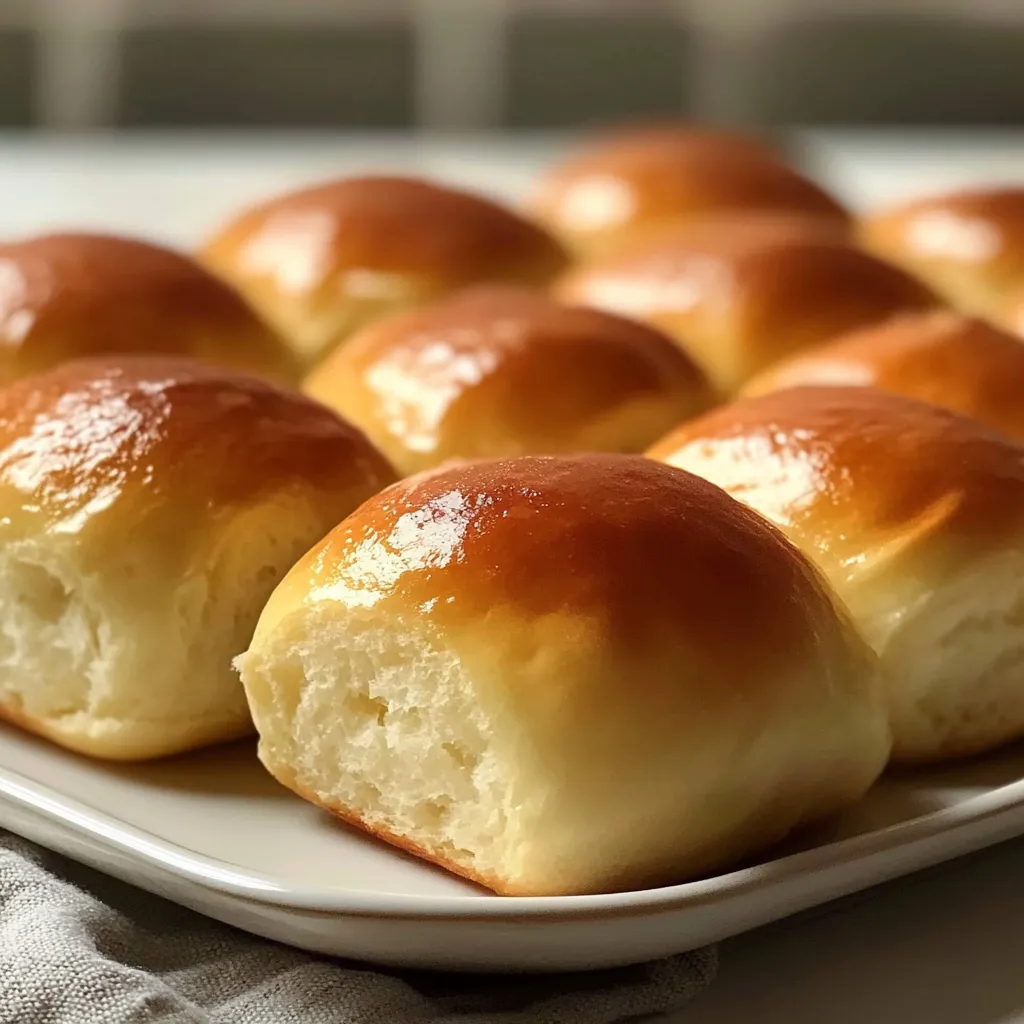
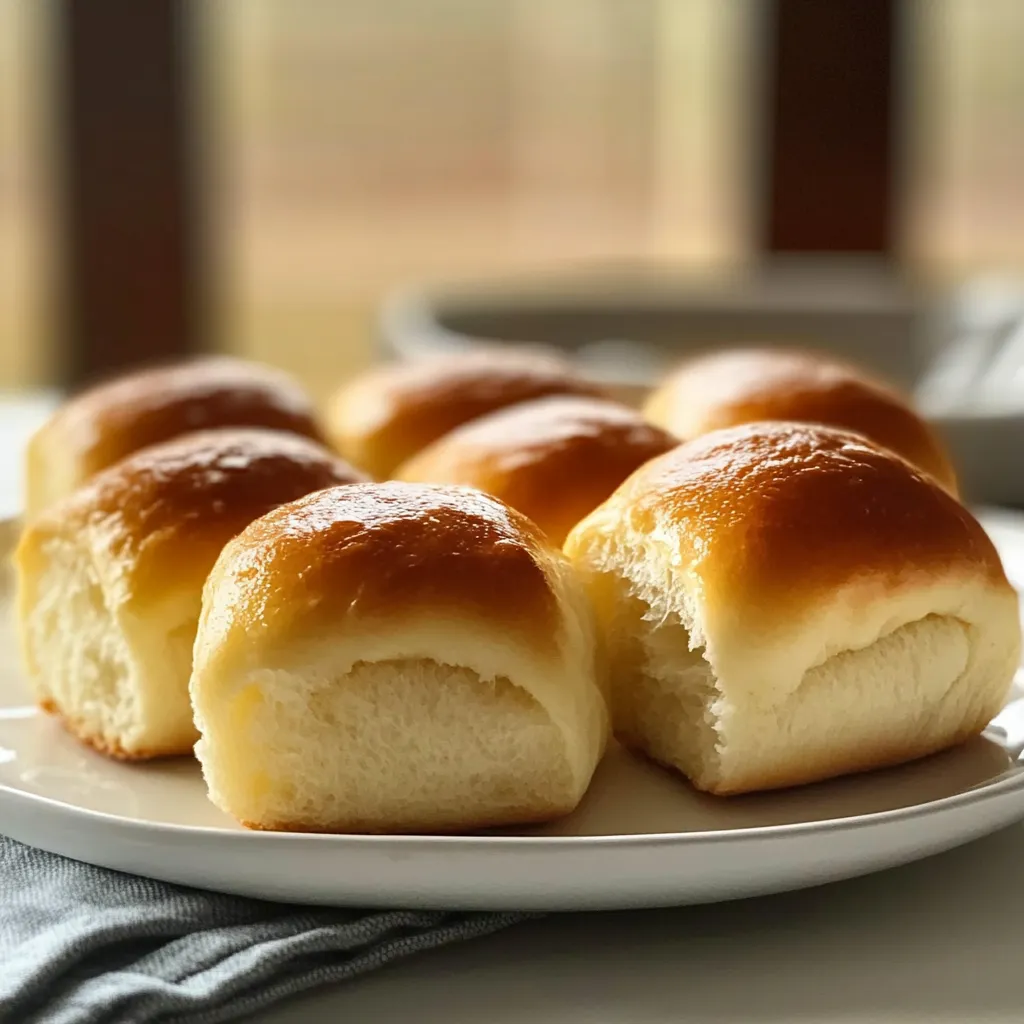
Imagine this: the sweet, buttery aroma of freshly baked bread filling your kitchen, the soft, pillowy texture of a warm roll melting in your mouth, and the happy, satisfied sighs around your dinner table. Now, imagine achieving that bliss completely gluten-free. If you thought that was a distant dream, my friend, I’m here to tell you it’s absolutely within your reach. These Gluten-Free Hawaiian Rolls have become a staple in my home, and I’m so excited to share them with you. They’re the perfect blend of sweet and savory, incredibly soft, and so simple to make, you might just do a happy dance right there by the oven.
Like many of you, I understand the struggle of wanting classic comfort foods without the gluten. As someone who loves bringing people together around the table, finding a foolproof, delicious gluten-free roll recipe felt like hitting the jackpot. This one is a game-changer for weeknight dinners, holiday feasts, or just because you deserve homemade bread.
Table of Contents
Table of Contents
Why You’ll Love This Gluten-Free Hawaiian Roll Recipe
If you’re still on the fence, let me give you the quick scoop on why this recipe is about to become your new best friend.
- Surprisingly Simple: No fancy techniques required! If you can stir and let dough rise, you’re golden.
- Crowd-Pleasing Flavor: The hint of pineapple and sweetness makes these rolls irresistible to everyone, gluten-free or not. They’re always the first thing to disappear at our family potlucks.
- Perfectly Pillowy Texture: Say goodbye to dense, crumbly gluten-free bread. These rolls are light, soft, and have that perfect pull-apart quality.
- Meal-Prep Friendly: Bake a batch on Sunday and enjoy fluffy rolls all week long. They freeze beautifully, too!
Gather Your Ingredients
Here’s what you’ll need to create this little bit of paradise. I find that using a good quality 1:1 gluten-free flour blend is the key to success here.
Print
Buttery Gluten-Free Hawaiian Rolls Recipe
- Total Time: 2 hours 45 minutes
- Yield: 9 rolls 1x
Description
Soft sweet buttery Gluten-Free Hawaiian Rolls recipe Discover our easy gluten-free baking technique for perfect fluffy homemade rolls
Ingredients
- 2 ½ cups (350g) gluten-free 1:1 baking flour (with xanthan gum)
- 1 packet (2 ¼ tsp) instant yeast
- ¼ cup (50g) granulated sugar
- 1 tsp salt
- ¾ cup warm whole milk (about 110°F)
- ⅓ cup pineapple juice, at room temperature
- 3 tbsp unsalted butter, melted + extra for brushing
- 1 large egg, at room temperature
Instructions
- In the bowl of a stand mixer, whisk together the warm milk, pineapple juice, and a teaspoon of the sugar. Sprinkle the yeast over the top and give it a gentle stir. Let it sit for 5-7 minutes until it becomes foamy.
- Add the remaining sugar, melted butter, and egg to the yeast mixture. Use the paddle attachment to mix on low until just combined. Next, add the gluten-free flour and salt. Mix on low until a sticky dough forms.
- Scrape down the sides of the bowl, cover it, and place it in a warm, draft-free spot. Let the dough rise for 60-90 minutes, or until it has nearly doubled in size.
- Grease an 8×8 inch baking pan. Punch down the dough. Using a greased scoop or your oiled hands, portion the dough into 9 equal pieces. Gently roll each piece into a ball and place it in the prepared pan.
- Cover the pan again and let the shaped rolls rise for another 30-45 minutes. Meanwhile, preheat your oven to 350°F (175°C).
- Once the rolls have puffed up nicely, bake them for 20-25 minutes, or until the tops are a beautiful golden brown. As soon as they come out of the oven, brush the tops with a little extra melted butter.
Notes
Incredibly soft and sweet Gluten-Free Hawaiian Rolls that are surprisingly simple to make. Perfectly pillowy and crowd-pleasing for any dinner table.
- Prep Time: 30 minutes
- Cook Time: 25 minutes
- Category: Side Dish
- Cuisine: Hawaiian-American
Nutrition
- Serving Size: 9 rolls
- Calories: 190 kcal
- Sugar: 9 g
- Fat: 6 g
- Carbohydrates: 32 g
- Fiber: 2 g
- Protein: 4 g
- 2 ½ cups (350g) gluten-free 1:1 baking flour (with xanthan gum)
- 1 packet (2 ¼ tsp) instant yeast
- ¼ cup (50g) granulated sugar
- 1 tsp salt
- ¾ cup warm whole milk (about 110°F)
- ⅓ cup pineapple juice, at room temperature
- 3 tbsp unsalted butter, melted + extra for brushing
- 1 large egg, at room temperature
Step-by-Step Instructions
Ready to bake? Let’s get our hands (or our mixer) busy! This process is straightforward, but I’ll walk you through every step.
1. Activate the Yeast
In the bowl of a stand mixer, whisk together the warm milk, pineapple juice, and a teaspoon of the sugar. Sprinkle the yeast over the top and give it a gentle stir. Let it sit for 5-7 minutes until it becomes foamy. This little frothy cloud is your sign that the yeast is alive and ready to make your rolls rise!
2. Combine the Dough
Add the remaining sugar, melted butter, and egg to the yeast mixture. Use the paddle attachment to mix on low until just combined. Next, add the gluten-free flour and salt. Mix on low until a sticky dough forms. It will look more like a thick cake batter than a traditional bread dough, and that’s exactly what you want!
3. Let the Dough Rise
Scrape down the sides of the bowl, cover it with a clean kitchen towel or plastic wrap, and place it in a warm, draft-free spot. Let the dough rise for 60-90 minutes, or until it has nearly doubled in size. My favorite spot is in my oven with just the light on.
4. Shape the Rolls
Grease an 8×8 inch baking pan. Punch down the dough—it will be soft and airy. Using a greased scoop or your oiled hands, portion the dough into 9 equal pieces. Gently roll each piece into a ball and place it in the prepared pan.
5. Second Rise
Cover the pan again and let the shaped rolls rise for another 30-45 minutes. Meanwhile, preheat your oven to 350°F (175°C).
6. Bake to Golden Perfection
Once the rolls have puffed up nicely, bake them for 20-25 minutes, or until the tops are a beautiful golden brown. As soon as they come out of the oven, brush the tops with a little extra melted butter. This gives them that gorgeous, glossy finish and extra flavor.
My Go-To Gluten-Free Baking Tips
Gluten-free baking can feel tricky, but a few simple tips make all the difference. First, don’t skip the pineapple juice! It’s the secret to that authentic Hawaiian roll flavor and tenderness. Second, resist the urge to add more flour. The dough is meant to be sticky—this is what creates a soft, not dense, crumb. Finally, make sure your milk isn’t too hot, or it will upset the yeast. Think warm bath temperature, not scalding hot.
I learned this lesson the hard way early on in my gluten-free journey. I was so impatient to get the dough rising that I used milk that was a little too warm, and my rolls didn’t rise as much as I’d hoped. Patience is truly a virtue in baking!
Delicious Variations & Serving Suggestions
The beauty of these rolls is how versatile they are. Want to make them dairy-free? Simply swap the milk for a non-dairy alternative like almond or oat milk, and use vegan butter. You can even add a hint of orange zest for a citrusy twist.
These rolls are phenomenal served warm alongside a cozy bowl of creamy chicken soup. They also make the most incredible sliders—pile them high with ham and Swiss cheese for a crowd-pleasing appetizer. And honestly, there’s nothing better than tearing into one, still warm from the oven, with just a pat of butter.
How to Store and Reheat Your Rolls
To keep your rolls soft, store them in an airtight container at room temperature for up to 2 days. For longer storage, they freeze exceptionally well. Just place them in a freezer-safe bag for up to 3 months. To reheat, wrap them in foil and warm in a 300°F oven for about 10 minutes, or pop them in the microwave for 15-20 seconds.
Your Gluten-Free Hawaiian Roll Questions, Answered
Can I make these rolls dairy-free?
Absolutely! You can use your favorite unsweetened non-dairy milk (almond and oat work great) and a plant-based butter substitute. The flavor and texture will still be wonderful.
Why is my dough so sticky? Did I do something wrong?
Not at all! Gluten-free dough is typically much stickier than traditional wheat dough. Trust the process. Using wet or oiled hands or a scoop to portion the dough will make handling it much easier.
Can I use active dry yeast instead of instant yeast?
You can, but the process is slightly different. Proof the active dry yeast in the warm milk and pineapple juice with the teaspoon of sugar first, as directed. It might take a few minutes longer to become foamy. Then, proceed with the recipe as written.
How do I know when the rolls are fully baked?
The best test is the visual and touch test. The tops should be a rich golden brown, and if you tap the top of a roll lightly, it should sound hollow. An instant-read thermometer inserted into the center of a roll should read between 190-200°F.

Ready to Bake Some Joy?
I truly hope you fall in love with these Gluten-Free Hawaiian Rolls as much as my family has. They prove that going gluten-free doesn’t mean giving up on the warm, comforting foods you adore. Baking should be a joy, and sharing the results is even better. So, grab your favorite mixing bowl and get ready to fill your home with the incredible smell of freshly baked bread. I can’t wait for you to try them!
And if you’re looking for another gluten-free side dish to complete your meal, you have to try these fluffy gluten-free biscuits. Happy baking!