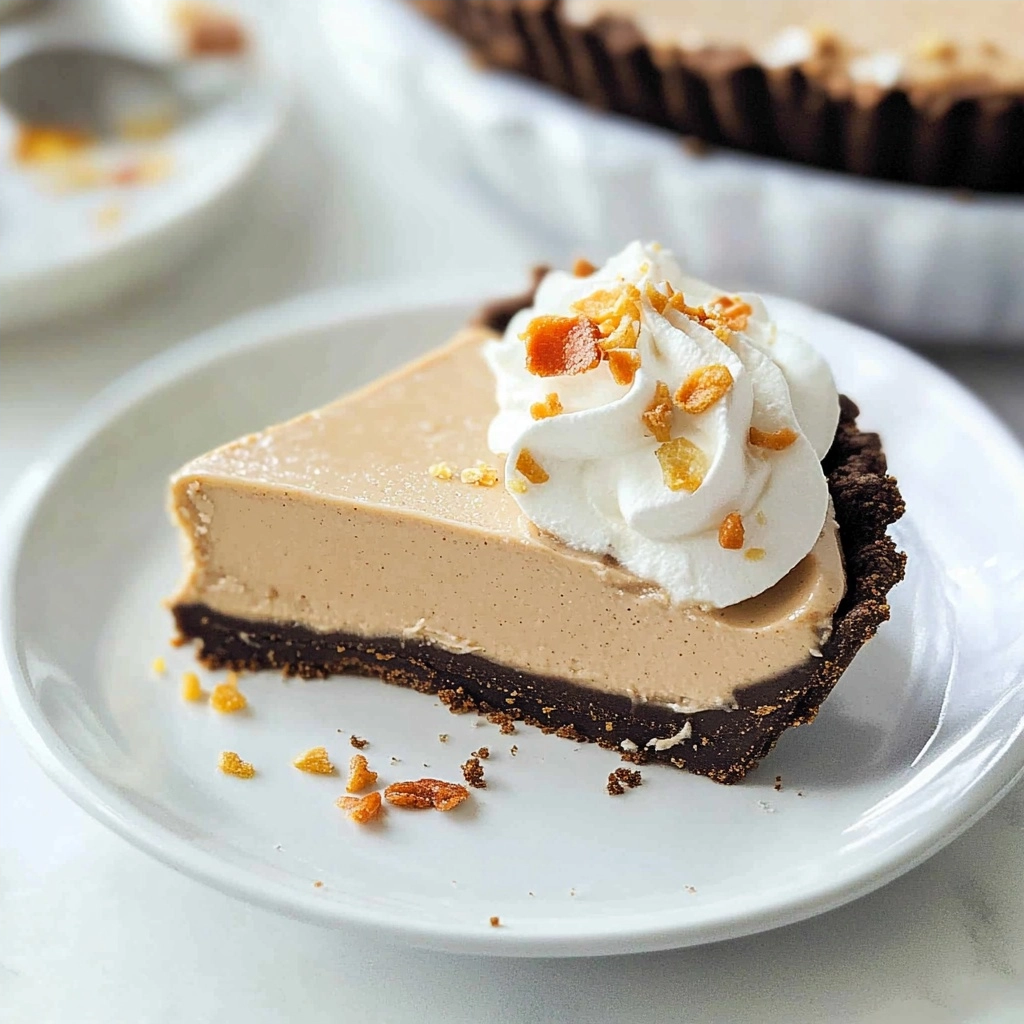
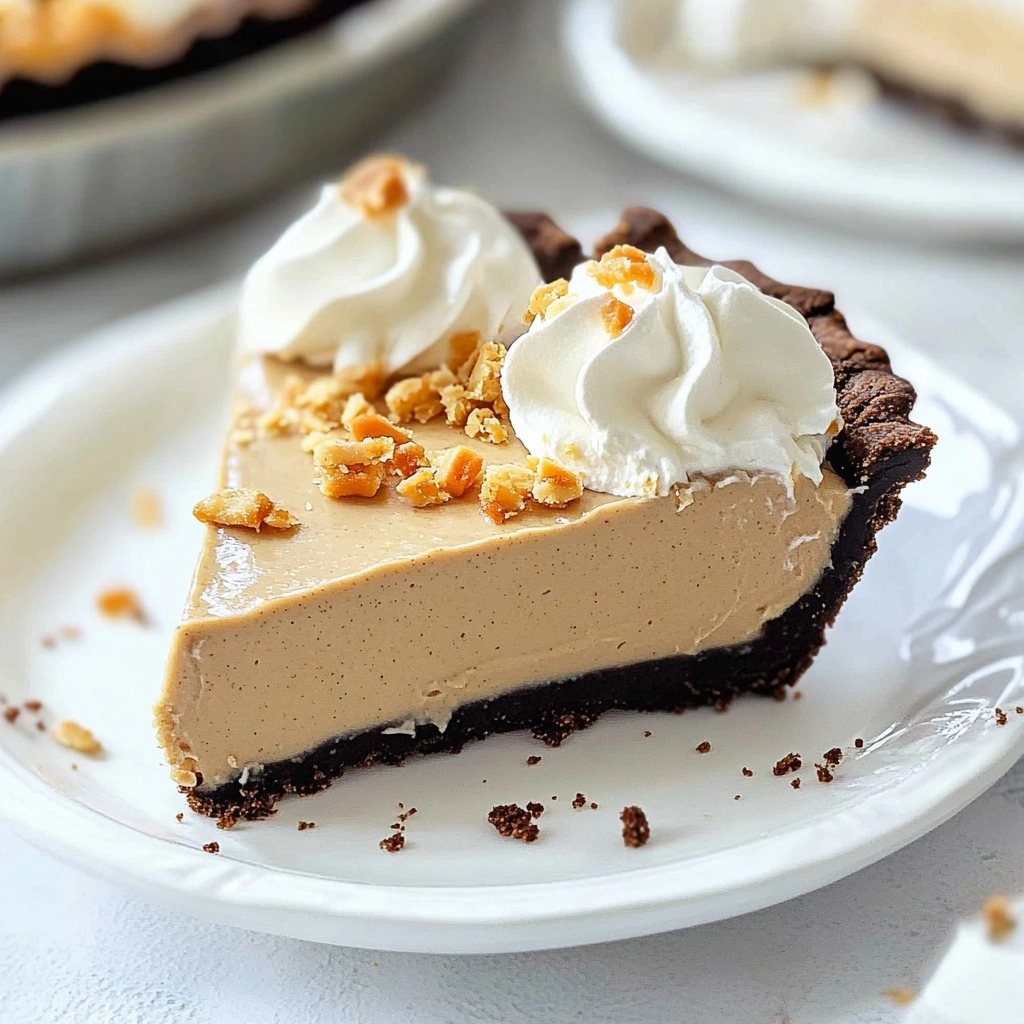
Hey there, fellow food lovers! If you’re anything like me, you’re always on the hunt for a dessert that’s both show-stopping and simple to throw together. Well, look no further! This Gluten-Free Peanut Butter Pie is the answer to all your sweet tooth cravings. It’s rich, creamy, and totally satisfying, making it the perfect treat for a weeknight indulgence or a special gathering. The best part? It’s surprisingly easy to make, even if you’re a beginner in the kitchen.
This recipe came about because my family and I are big peanut butter fans. After many failed attempts to make a killer pie, one of my daughters and I changed the recipe until it was perfect. Now, it’s one of my *go-to* recipes.
Why You’ll Love This Gluten-Free Peanut Butter Pie
Quick and Easy: Minimal prep time, maximum flavor!
Family-Friendly: A guaranteed crowd-pleaser for both kids and adults.
No-Bake Delight: No oven required. Perfect for warm days!
Gluten-Free: Delicious and accessible for everyone.
Customizable: Add your favorite toppings for a personal touch.
Ingredients
Here’s what you’ll need to create this dreamy Gluten-Free Peanut Butter Pie:
PrintDecadent Gluten-Free Peanut Butter Pie: Easy Recipe for Any Occasion
This Gluten-Free Peanut Butter Pie is a rich, creamy, and easy no-bake dessert perfect for any occasion. It features a gluten-free Oreo crust and a delicious peanut butter filling, topped with whipped cream for an extra touch of decadence.
- Prep Time: 20
- Total Time: 20
- Yield: 8 slices 1x
- Category: Gluten-Free
- Method: No-Bake
- Cuisine: American
- Diet: Vegetarian
Ingredients
24 gluten-free Oreos
4 Tablespoons butter, melted
12 oz cream cheese
1 1/2 cups creamy peanut butter
1 3/4 cups powdered sugar
1 teaspoon vanilla extract
1 1/2 cups heavy cream, for filling
Crushed Reese’s Pieces (optional)
1 cup heavy cream, for topping
1/4 cup powdered sugar, for topping
1/2 teaspoon vanilla extract, for topping
Instructions
Make the Crust: In a food processor, crush the gluten-free Oreos until you have fine crumbs. Combine the crumbs with the melted butter in a bowl and mix well. Press the mixture firmly into the bottom of a 9-inch pie pan. Place in the freezer while you make the filling.
Make the Peanut Butter Filling: In a large bowl, beat the cream cheese and peanut butter together until smooth. Add the powdered sugar and vanilla extract, mixing until everything is well combined and creamy.
Whip the Cream: In a separate bowl, whip the heavy cream until soft peaks form. Gently fold the whipped cream into the peanut butter mixture until it’s fully incorporated.
Assemble the Pie: Pour the peanut butter filling into the Oreo crust, spreading it evenly. If desired, sprinkle some crushed Reese’s Pieces over the top for extra decadence.
Chill: Cover the pie and refrigerate it for at least 4 hours, or preferably overnight, to allow it to set completely.
Make the Whipped Cream Topping: In a clean bowl, whip the heavy cream, powdered sugar, and vanilla extract until stiff peaks form. Spread or pipe the whipped cream over the chilled pie before serving.
Notes
For best flavor and texture, allow the pie to chill overnight. You can customize the topping with your favorite candies or nuts. Store the pie in an airtight container in the refrigerator for up to 3 days.
Nutrition
- Serving Size: 1 slice
- Calories: 580
- Sugar: 30g
- Sodium: 200mg
- Fat: 35g
- Saturated Fat: 18g
- Carbohydrates: 60g
- Fiber: 1.5g
- Protein: 15g
- Cholesterol: 70mg
For the Crust:
24 gluten-free Oreos
4 Tablespoons butter, melted
For the Peanut Butter Filling:
12 oz cream cheese (the brick kind in the foil wrapper)
1 1/2 cups creamy peanut butter
1 3/4 cups powdered sugar
1 teaspoon vanilla extract
1 1/2 cups heavy cream
Crushed Reese’s Pieces (optional)
For the Whipped Cream Topping:
1 cup heavy cream
1/4 cup powdered sugar
1/2 teaspoon vanilla extract
Step-by-Step Instructions
Make the Crust: In a food processor, crush the gluten-free Oreos until you have fine crumbs. Combine the crumbs with the melted butter in a bowl and mix well. Press the mixture firmly into the bottom of a 9-inch pie pan. Place it in the freezer while you make the filling.
Make the Peanut Butter Filling: In a large bowl, beat the cream cheese and peanut butter together until smooth. Add the powdered sugar and vanilla extract, mixing until everything is well combined and creamy.
Whip the Cream: In a separate bowl, whip the heavy cream until soft peaks form. Gently fold the whipped cream into the peanut butter mixture until it’s fully incorporated.
Assemble the Pie: Pour the peanut butter filling into the Oreo crust, spreading it evenly. If desired, sprinkle some crushed Reese’s Pieces over the top for extra decadence.
Chill: Cover the pie and refrigerate it for at least 4 hours, or preferably overnight, to allow it to set completely.
Make the Whipped Cream Topping: In a clean bowl, whip heavy cream with powdered sugar and vanilla extract until stiff peaks form.
Serve: Top the pie with the whipped cream just before serving.
Equipment
9-inch pie pan
Food processor (optional, for the crust)
Large mixing bowls
Electric mixer (handheld or stand mixer)
Rubber spatula
Tips & Variations
Here are a few tips to make your Gluten-Free Peanut Butter Pie experience even better:
Crust Options: If you’re short on time, you can also use a store-bought gluten-free Oreo crust.
Peanut Butter: Experiment with different brands of peanut butter for varying flavor profiles. Natural peanut butter can work, but you may need to adjust the sweetness.
Sweetness: Adjust the amount of powdered sugar to your preference. If you like things less sweet, start with a little less, taste, and add more as needed.
Storage: Store leftover pie in the refrigerator, covered, for up to 3 days.
Serving Suggestions
This Gluten-Free Peanut Butter Pie is delicious on its own, but here are some ways to elevate your dessert experience:
Presentation: Serve individual slices on a plate with a dollop of whipped cream and a sprinkle of chocolate shavings or chopped peanuts.
Pairing: Enjoy with a cup of coffee or a glass of cold milk.
Nutrition Facts
While I cannot provide exact nutritional facts, keep in mind that this is a dessert, so enjoy it in moderation. The calorie count will vary depending on the ingredients used, but it’s safe to say this pie is a treat!
Conclusion
There you have it—a simple, show-stopping Gluten-Free Peanut Butter Pie that’s perfect for any occasion! Whether you’re entertaining guests or simply craving something sweet, this pie is sure to impress. Don’t be shy; give this recipe a try and let me know what you think. And if you like this recipe, be sure to check out some of my other dessert recipes on Share your baking adventures with me; I love hearing about them. Happy baking!
FAQ
Here are some frequently asked questions to help you perfect your pie making:
Can I substitute regular Oreos in this recipe?
Absolutely! If you don’t need a gluten-free pie, feel free to use regular Oreos. All other instructions remain the same.
Can I make this pie ahead of time?
Yes, you can make the pie at least a day in advance. Store it covered in the refrigerator. Add the whipped cream topping just before serving.
What if I don’t have a food processor?
You can crush the Oreos by placing them in a Ziploc bag and crushing them with a rolling pin or even a heavy pan. It works just fine!
Can I use a different type of crust?
You can use a graham cracker crust in place of the Oreo crust. It also would taste great!
How long will this pie last in the fridge?
The pie will last in the refrigerator for up to 4 days, stored in an airtight container.