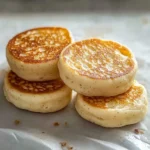
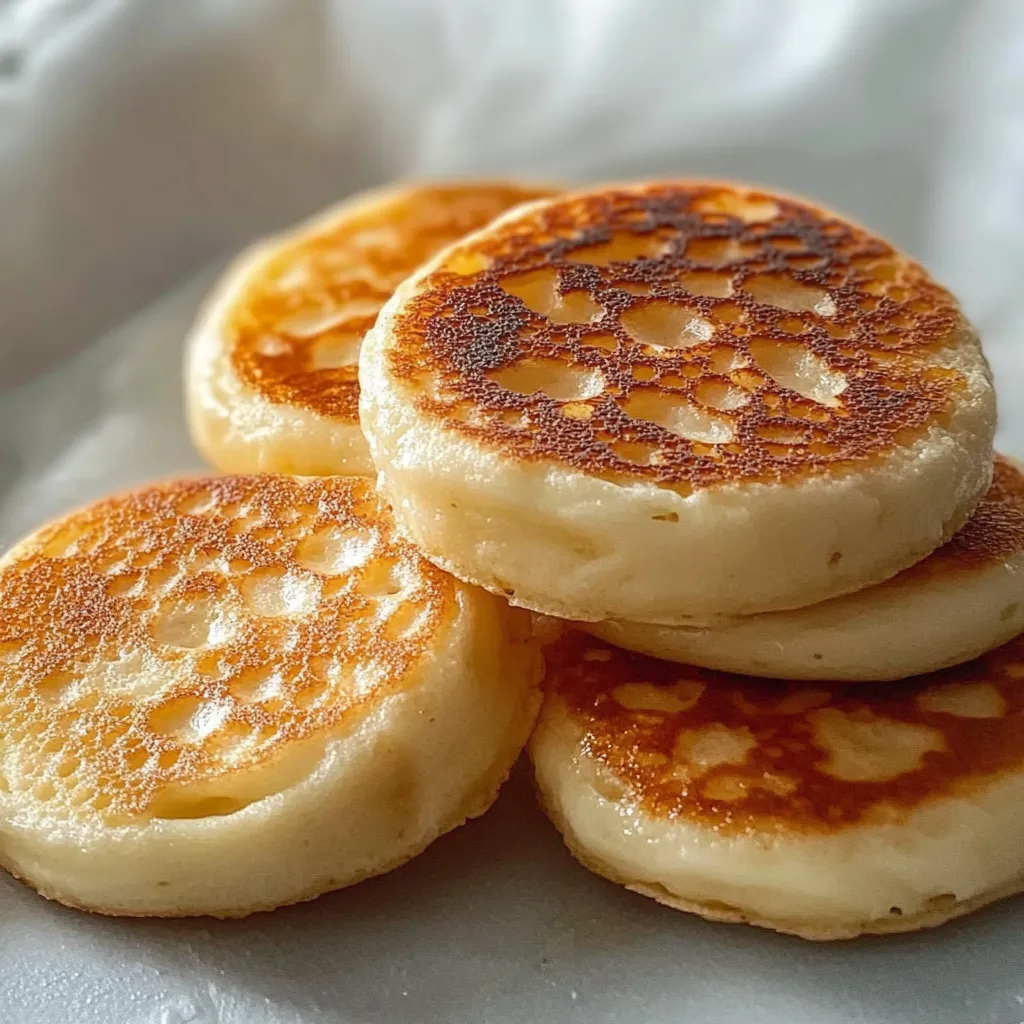
There’s something incredibly comforting about a warm crumpet, slathered in butter that melts into all those little nooks and crannies. But if you’ve been missing out because of gluten, my friend, those days are over. These Gluten Free Crumpets are about to become your new weekend ritual. They’re delightfully chewy, perfectly golden, and surprisingly simple to whip up. Whether you’re catering to dietary needs or just curious, this recipe is a total game-changer for a cozy, homemade breakfast that feels like a hug on a plate.
Why You’ll Love This Gluten Free Crumpets Recipe
Honestly, what’s not to love? This recipe is the answer to your crumpet cravings.
- Surprisingly Simple: No fancy techniques here! If you can make pancakes, you can make these.
- Naturally Gluten-Free: Made with a simple blend of gluten-free flours, so everyone can enjoy them.
- That Classic Texture: We achieve those iconic holes and chewy texture, proving gluten-free doesn’t mean flavor- or fun-free.
- Perfect for Meal Prepping: Make a batch, freeze them, and have a delicious breakfast ready in minutes all week long.
Ingredients
Let’s gather our simple, wholesome ingredients. You likely have most of these in your pantry already
PrintGluten Free Crumpets Recipe
Try this simple gluten-free recipe for fluffy, delicious crumpets. Perfect for a quick, homemade breakfast or teatime treat. Easy-to-follow method.
- Prep Time: 1 hour
- Cook Time: 20 minutes
- Total Time: 1 hour 20 minutes
- Yield: 10 crumpets 1x
- Category: Breakfast
- Cuisine: British
Ingredients
Instructions
Notes
These Gluten Free Crumpets are delightfully chewy, perfectly golden, and surprisingly simple to whip up. A total game-changer for a cozy, homemade breakfast that feels like a hug on a plate.
Nutrition
- Serving Size: 10 crumpets
- Calories: 95 kcal
- Sugar: 1 g
- Fat: 1 g
- Carbohydrates: 20 g
- Fiber: 2 g
- Protein: 2 g
- 2 cups gluten-free all-purpose flour blend (I recommend one with xanthan gum included, like Bob’s Red Mill 1-to-1)
- 2 tsp instant yeast
- 1 tsp granulated sugar
- 1 tsp salt
- 1 ½ cups warm water (around 110°F)
- ½ tsp baking soda
- ¼ cup warm milk (dairy or non-dairy both work)
- Butter or oil, for greasing the rings and pan
Equipment You’ll Need
No need for any special equipment! You’ll just need a few basics:
- Large mixing bowl
- Whisk
- Non-stick skillet or griddle
- Crumpet rings or sturdy 3-inch wide metal cookie cutters (This is the key to getting that perfect shape!)
- Spoon or ladle
Step-by-Step Instructions
Let’s turn these simple ingredients into glorious, hole-y crumpets. You’ve got this!
Step 1: Activate the Yeast
In your large mixing bowl, whisk together the warm water, sugar, and instant yeast. Let it sit for about 5-10 minutes until it becomes frothy. This little science experiment means your yeast is alive and ready to make your crumpets puff up beautifully.
Step 2: Make the Batter
Whisk the gluten-free flour and salt into the yeast mixture until you have a smooth, thick batter. It will be thicker than pancake batter but thinner than dough. Cover the bowl with a clean kitchen towel and let it rest in a warm place for about 45 minutes to an hour. You’ll see it rise and get bubbly—that’s exactly what we want!
Step 3: Get Your Pan Ready
While the batter is resting, grease your crumpet rings and your non-stick skillet or griddle generously with butter or oil. Place the greased rings onto the cold skillet. We’ll be cooking these over a low-medium heat to allow the centers to cook through without burning the bottoms.
Step 4: The Final Batter Mix
Once the batter has rested, stir the baking soda into the warm milk until dissolved. Gently whisk this mixture into your bubbly batter. It will deflate a little—that’s normal! You’ve just given it one last boost for those perfect holes.

Step 5: Cook to Perfection
Heat your skillet with the rings over low-medium heat. Once hot, spoon the batter into each ring, filling them about ⅔ of the way full. Let them cook for about 8-10 minutes. You’ll know they’re ready to flip when the tops are set and covered in bubbles, and the bottoms are a deep golden brown. Carefully remove the rings (tongs help!), flip the crumpets, and cook for another 2-3 minutes to golden the top.
Tips & Variations for the Best Gluten Free Crumpets
This recipe is wonderfully forgiving, but a few tips can make you a crumpet master on the first try!
- Patience is a Virtue: Don’t rush the cooking process. Low and slow heat is the secret to achieving a cooked center without a burnt bottom.
- Ring Around the Crumpet: If you don’t have crumpet rings, you can try using the outer rings of mason jar lids for a similar effect.
- Get Cheesy: For a savory twist, sprinkle a little shredded cheese onto the crumpets right after you pour the batter into the rings.
- Storage: Let leftover crumpets cool completely, then store them in an airtight container at room temp for 2 days or freeze for up to 2 months. Pop them straight in the toaster from frozen!
Serving Suggestions
The classic way is, of course, with a generous slathering of butter and a drizzle of honey or your favorite jam. But don’t stop there! These crumpets are a fantastic base for both sweet and savory toppings. Try them with smashed avocado and a poached egg for a weekend brunch masterpiece, or with almond butter and banana slices for a quick, protein-packed breakfast. They’re the perfect vehicle for just about anything, much like my favorite Gluten Free Banana Bread is.
Nutrition Facts (per crumpet)
Providing a general estimate can be helpful, but always check your specific ingredients for accuracy. A typical crumpet from this recipe contains approximately:
- Calories: 95
- Carbohydrates: 20g
- Protein: 2g
- Fat: 1g
- Fiber: 2g
Finding delicious gluten-free breakfast options can be a journey, but it’s one worth taking. This recipe for Gluten Free Crumpets proves that you don’t have to give up the foods you love. They’re a testament to the fact that the best cooking comes from the heart and a willingness to experiment. I love hearing about your kitchen adventures, so when you make these, be sure to share your results! For another fantastic gluten-free breakfast idea, check out these Fluffy Gluten-Free Pancakes.
Your Gluten Free Crumpets Questions, Answered
Can I make the batter ahead of time?
You can! Prepare the batter through the first rise (Step 2), cover it tightly, and store it in the it sit on the counter for 30 minutes to take the chill off, then proceed with adding the baking soda/milk mixture and cooking.
My crumpets didn’t get many holes. What happened?
This usually means your heat was a bit too high. The outside cooked too quickly before the bubbles had a chance to form and set. Next time, try lowering the heat a touch and be patient—good holes are worth the wait! The batter thickness can also affect this, so make sure you’re not adding extra flour.
Can I use a different type of gluten-free flour?
I highly recommend a good all-purpose 1:1 baking blend that includes xanthan gum for the best texture. Using a single flour, like just almond or coconut flour, will not yield the same results. For more on the science of gluten-free flours, Bob’s Red Mill has a great guide.
How do I get the crumpets out of the rings easily?
Greasing the rings very well is key! I use a pastry brush to get butter or oil into every corner. After the first flip, the crumpets should be released from the ring, making it easy to lift the ring off. A small pair of kitchen tongs is super helpful for handling the hot rings.