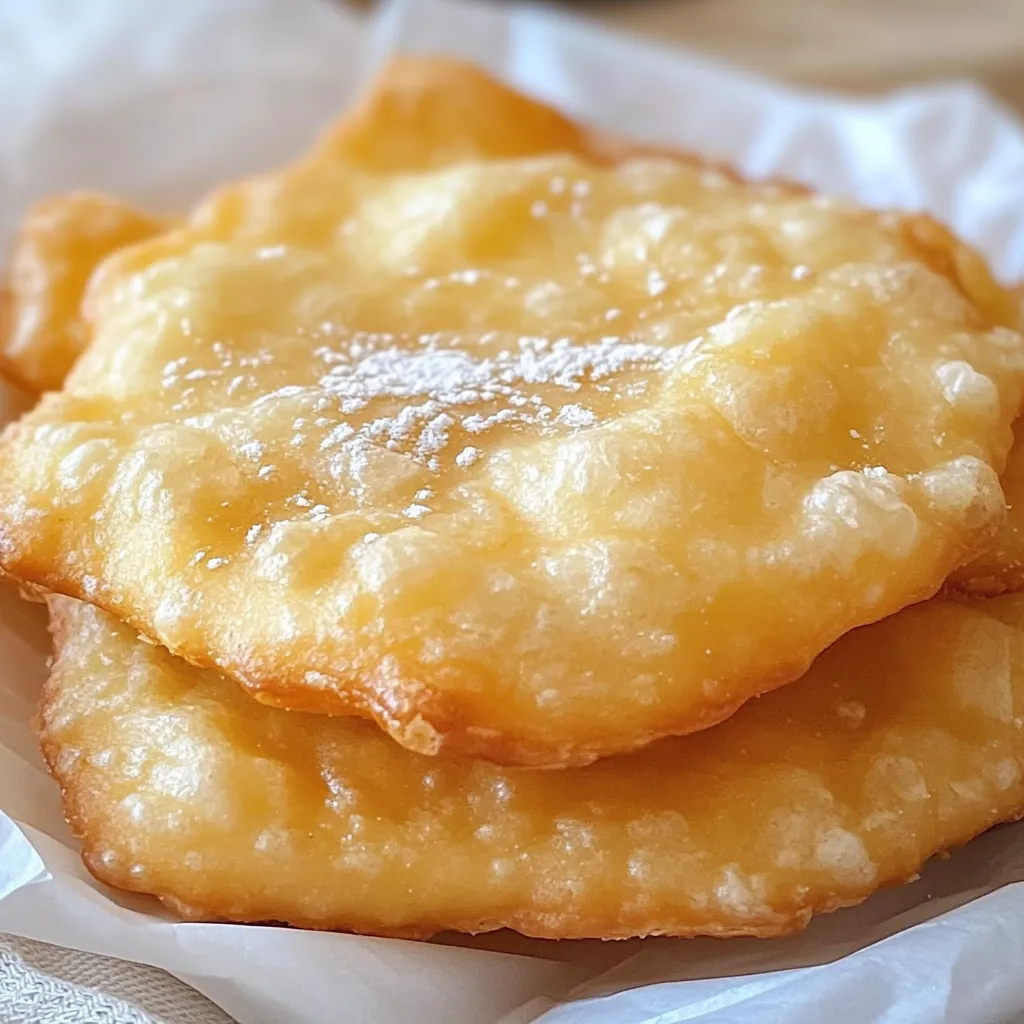
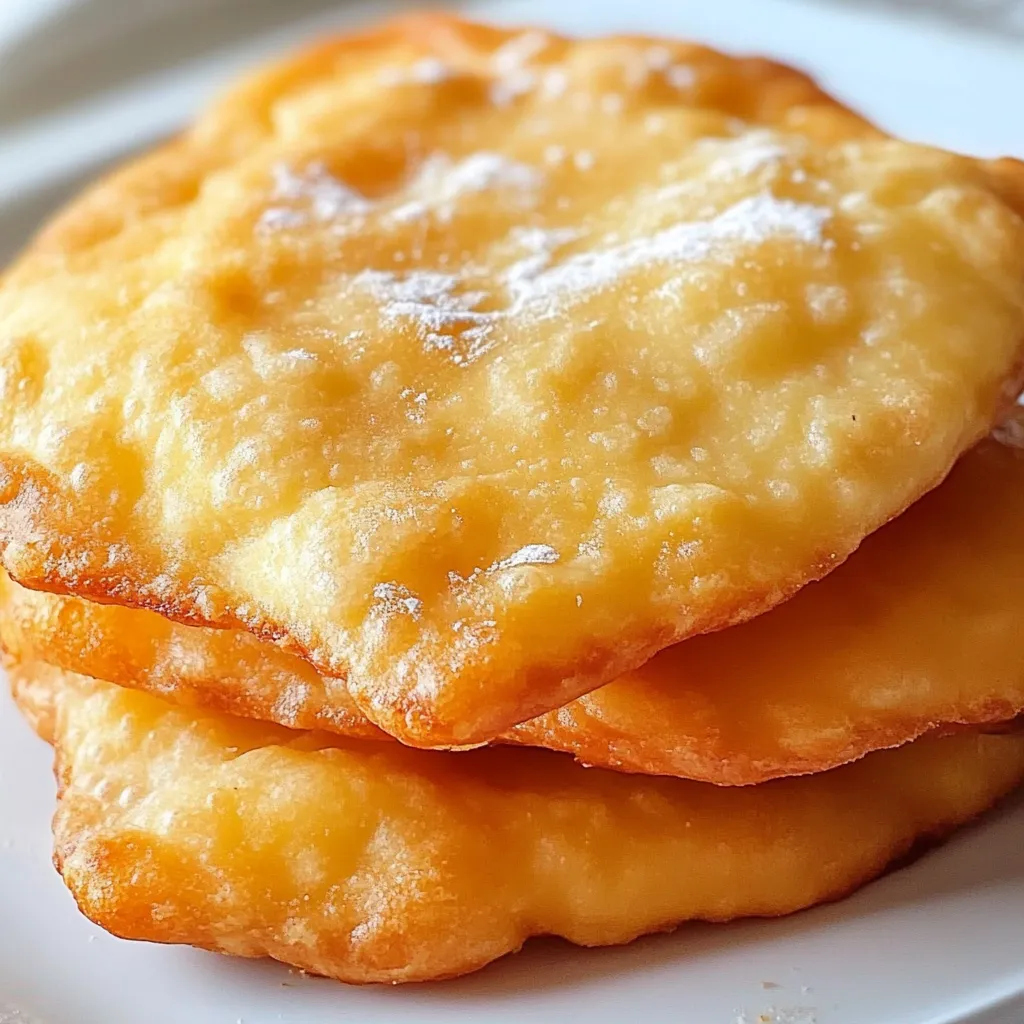
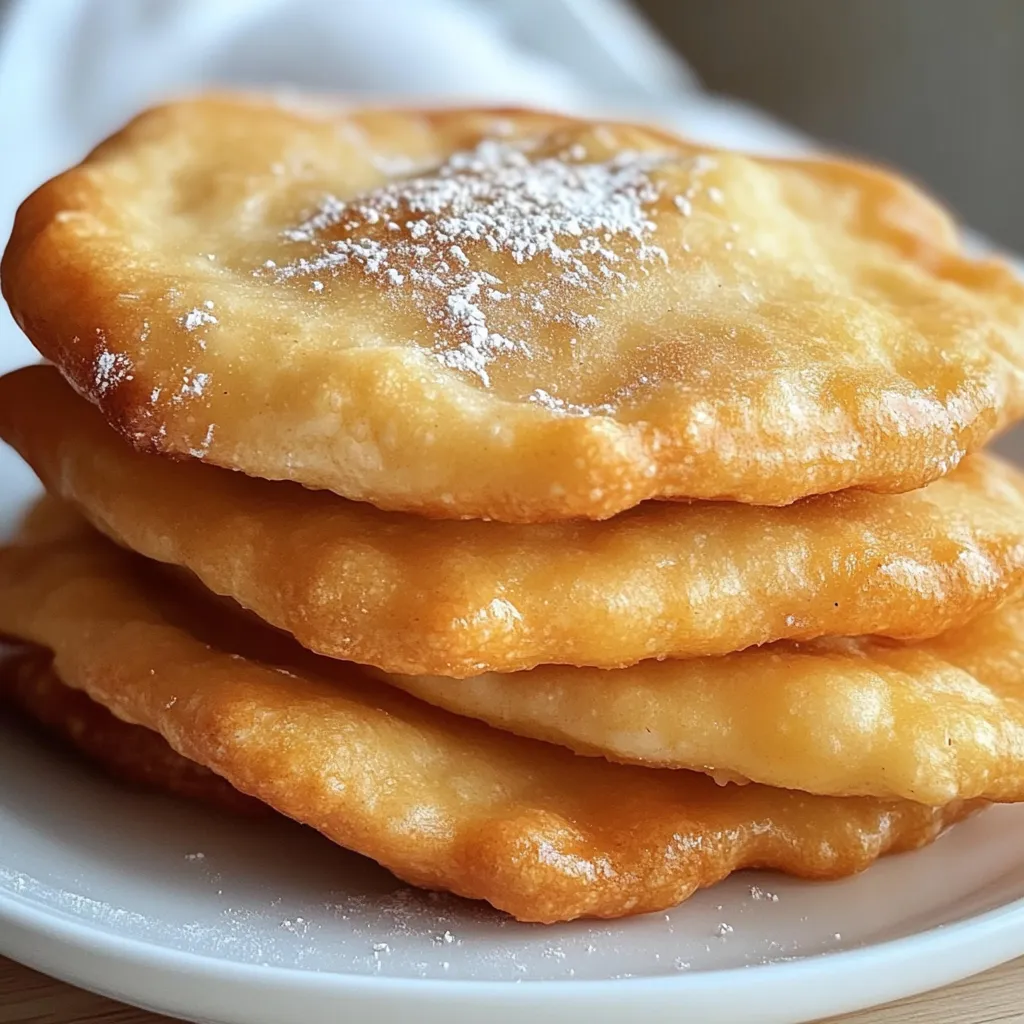
Picture this: a golden-brown, pillowy piece of bread, fresh from the skillet, ready to be piled high with savory taco toppings or dusted with a sweet cloud of powdered sugar. That’s the magic of Native American-Style Gluten Free Fry Bread. This isn’t just a recipe; it’s a piece of culinary heritage transformed into a delicious, accessible treat for today’s kitchens. Whether you’re avoiding gluten or simply love a good, versatile bread, this recipe is about to become your new favorite. It’s surprisingly simple to make, and the result is a wonderfully chewy, satisfying bread that’s perfect for a fun family dinner or a unique appetizer for guests. I promise, your kitchen will smell absolutely incredible.
Table of Contents
Table of Contents
Why You’ll Love This Gluten Free Fry Bread
This recipe is a game-changer for anyone looking for a gluten-free alternative that doesn’t skimp on flavor or texture. Here’s why it’s a winner:
- Simple & Fast: With just a handful of ingredients and a quick fry time, you can have warm bread on the table in under 30 minutes.
- Incredibly Versatile: Go savory with chili and cheese or sweet with honey and berries. It’s the ultimate customizable canvas for your cravings.
- Family-Friendly Fun: Get the kids involved in shaping the dough—it’s a fun, hands-on cooking project everyone will enjoy.
- Surprisingly Forgiving: Don’t stress about perfect circles! The rustic, hand-shaped look is part of its homemade charm.
Ingredients You’ll Need
Gathering your ingredients is the first step to fry bread success. You’ll be amazed at how simple the list is.
Print
Native American-Style Gluten Free Fry Bread
- Total Time: 25 minutes
- Yield: 6 pieces 1x
Description
Discover a gluten free fry bread recipe inspired by Native American cooking This easy delicious bread is perfect for savory or sweet toppings
Ingredients
- 2 cups gluten-free all-purpose flour
- 1 tablespoon baking powder
- 1/2 teaspoon salt
- 1 cup warm water
- 1–2 cups avocado oil
Instructions
- Combine Dry Ingredients: In a large mixing bowl, whisk together the gluten-free flour, baking powder, and salt.
- Add Water & Mix: Create a well in the center of the dry ingredients and pour in the warm water. Mix until a shaggy dough forms.
- Knead the Dough: Lightly flour a surface and knead the dough gently for 2-3 minutes until smooth.
- Rest the Dough: Form the dough into a ball, place it back in the bowl, cover, and let it rest for 10-15 minutes.
- Heat the Oil: Pour oil into a heavy-bottomed skillet to a depth of 1/2 inch. Heat to 350-375°F (175-190°C).
- Shape the Dough: Divide the dough into 6-8 equal pieces. Stretch or roll each piece into a circle about 1/4-inch thick.
- Fry to Perfection: Carefully place dough rounds into the hot oil. Fry for 2-3 minutes per side until golden brown.
- Drain and Serve: Transfer the finished fry bread to a plate lined with paper towels to drain. Serve immediately.
Notes
A golden-brown, pillowy gluten-free fry bread, perfect for savory tacos or sweet treats. This simple recipe delivers a chewy, satisfying bread in under 30 minutes.
- Prep Time: 15 minutes
- Cook Time: 10 minutes
- Category: Bread
- Cuisine: Native American
Nutrition
- Serving Size: 6 pieces
- Calories: 220 kcal
- Sugar: 1 g
- Fat: 8 g
- Carbohydrates: 35 g
- Fiber: 2 g
- Protein: 4 g
- 2 cups gluten-free all-purpose flour (I recommend a blend with xanthan gum already included)
- 1 tablespoon baking powder
- 1/2 teaspoon salt
- 1 cup warm water (plus a tablespoon or two more if needed)
- Avocado oil or another high-heat oil, for frying (about 1-2 cups)
Notes on Ingredients
If your gluten-free flour blend doesn’t contain xanthan gum, add 1 teaspoon to the dry ingredients. This helps give the dough the elasticity and structure it needs. For a richer flavor, you can substitute 1/2 cup of the water with milk or a non-dairy alternative.
Step-by-Step Instructions
Ready to create some magic? Let’s get frying! The process is straightforward, but a few key tips will guarantee perfect results.
- Combine Dry Ingredients: In a large mixing bowl, whisk together the gluten-free flour, baking powder, and salt. This ensures the leavening is evenly distributed for a consistent rise.
- Add Water & Mix: Create a well in the center of the dry ingredients and pour in the warm water. Using a wooden spoon or your hands, mix until a shaggy dough forms. The dough should be soft but not overly sticky. If it’s too dry, add another tablespoon of water.
- Knead the Dough: Lightly flour your hands and a clean surface with a bit more gluten-free flour. Turn the dough out and knead it gently for about 2-3 minutes until it becomes smooth. Be careful not to over-knead.
- Rest the Dough: Form the dough into a ball, place it back in the bowl, and cover it with a damp kitchen towel. Let it rest for 10-15 minutes. This allows the flour to fully hydrate and makes the dough easier to shape.
- Heat the Oil: While the dough rests, pour oil into a heavy-bottomed skillet (like a cast-iron skillet) to a depth of about 1/2 inch. Heat over medium-high heat until it reaches approximately 350-375°F (175-190°C). A small piece of dough should sizzle immediately when dropped in.
- Shape the Dough: Divide the dough into 6-8 equal pieces. On a floured surface, gently stretch or roll each piece into a circle about 1/4-inch thick. Don’t worry about perfection—rustic is beautiful! Use your thumb to press a small hole in the center of each round; this helps the bread cook evenly.
- Fry to Perfection: Carefully place one or two dough rounds into the hot oil. Fry for 2-3 minutes per side, until puffed up and beautifully golden brown. Flip once during cooking.
- Drain and Serve: Use a slotted spoon or tongs to transfer the finished fry bread to a plate lined with paper towels to drain any excess oil. Serve immediately while they’re warm and delicious!
Essential Equipment
- Large Mixing Bowl
- Heavy-bottomed Skillet (cast-iron is ideal)
- Slotted Spoon or Tongs
- Paper Towels
Tips & Variations for the Best Fry Bread
This recipe is wonderfully adaptable. Here are a few ways to make it your own:
- Perfect Oil Temperature: This is the secret to success! If the oil is too cool, the bread will be greasy. If it’s too hot, the outside will burn before the inside cooks. A kitchen thermometer is helpful, but the sizzle test is a great guide. For more on mastering frying temperatures, check out this guide from Serious Eats.
- Savory Twist: Add a teaspoon of garlic powder or dried herbs like oregano to the dry ingredients for a savory base perfect for gluten-free taco night.
- Sweet Version: Mix a tablespoon of sugar into the dry ingredients and serve the finished bread with a dusting of powdered sugar, honey, or cinnamon sugar.
- Storage: Fry bread is best enjoyed fresh. However, you can store leftovers in an airtight container at room temperature for a day. Reheat in a toaster oven or a dry skillet to bring back the crispness.
I’ll never forget the first time I made this for a family gathering. My nephew, who is usually skeptical of “gluten-free” versions of anything, devoured three pieces loaded with toppings before asking if we could make it again next week. It’s a memory that always makes me smile.
Serving Suggestions
The fun truly begins when you start topping your fry bread! Here are some classic ideas:
- Indian Tacos (Navajo Tacos): Top with seasoned ground beef, shredded lettuce, diced tomatoes, sour cream, and salsa.
- Sweet Treat: Drizzle with honey or maple syrup and sprinkle with fresh berries for a simple dessert.
- Appetizer Platter: Serve alongside a bowl of hearty gluten-free soup or a vibrant salad for a complete meal.
Nutritional Information
The following is an estimate per serving (assuming recipe makes 6 pieces) and will vary based on specific ingredients and oil absorption.
- Calories: ~220
- Carbohydrates: 35g
- Protein: 4g
- Fat: 8g
This Native American-Style Gluten Free Fry Bread is more than just a recipe—it’s an invitation to get creative in the kitchen. It proves that eating gluten-free doesn’t mean missing out on comforting, delicious foods. So, heat up that oil, grab your favorite toppings, and get ready to enjoy a truly special homemade bread that’s sure to bring everyone to the table.
Frequently Asked Questions
Can I make this fry bread ahead of time?
You can prepare the dough ahead of time! After kneading, wrap it tightly in plastic wrap and store it in the refrigerator for up to 24 hours. Let it come to room temperature for about 30 minutes before dividing and shaping. I don’t recommend frying them ahead, as they are truly best served fresh and warm.
What’s the best gluten-free flour to use?
A good all-purpose blend that includes xanthan gum works best. Brands like Bob’s Red Mill 1-to-1 or King Arthur Measure for Measure are reliable choices because they are designed to mimic the behavior of regular wheat flour in recipes like this.
My dough is very sticky. What should I do?
Gluten-free flours can vary in absorbency. If your dough is too sticky to handle, simply add a little more flour, one tablespoon at a time, until it becomes manageable. It should be soft but not stick to your hands.
Can I bake this instead of frying?
While frying gives you the authentic texture and flavor, you can bake it for a lighter version. Preheat your oven to 400°F (200°C), brush the shaped dough rounds with a little oil, and bake on a parchment-lined sheet for 12-15 minutes, flipping halfway through, until golden. The texture will be more like a flatbread.