
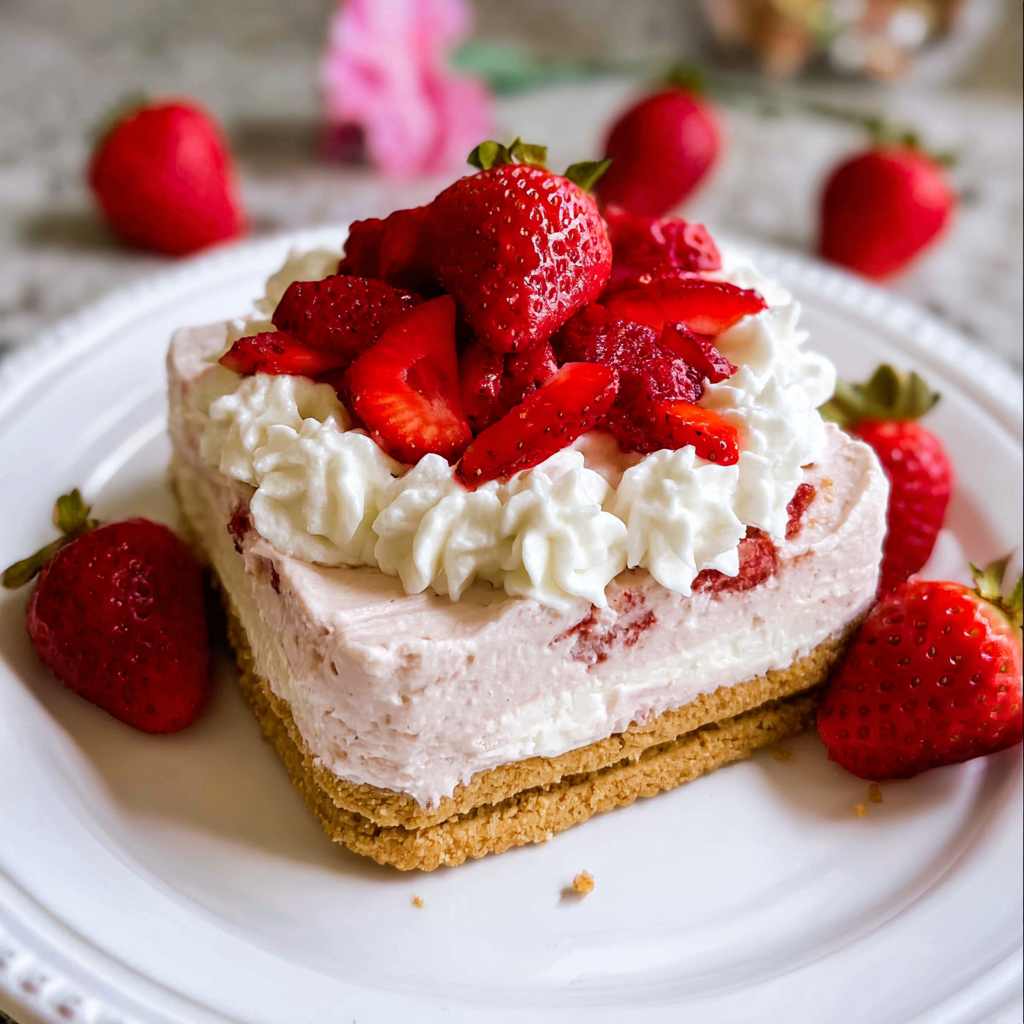
Hello, fellow food lovers! If you’re anything like me, you’re always on the lookout for a dessert that’s easy to make, utterly delicious, and puts a smile on everyone’s face. Well, you’ve hit the jackpot! These Gluten-Free Strawberry Cheesecake Bars are precisely that. Imagine a buttery, crunchy crust, a creamy, dreamy strawberry cheesecake filling, all in one perfect bite. Trust me, these bars are the ultimate crowd-pleaser and are surprisingly simple to whip up. As the cook and food lover behind bestdisheasy.com, I can tell you these are a game-changer for any occasion – from a weeknight treat to a special gathering with friends and family.
Why You’ll Love This Recipe
- Quick and Easy: Ready in under an hour (plus chilling time)!
- Family-Friendly: Both kids and adults adore it.
- Gluten-Free: Perfect for those with dietary restrictions.
- Delicious Flavor: The combination of sweet strawberries and creamy cheesecake is a match made in heaven.
- Make-Ahead: Great for entertaining, as you can prepare them in advance.
Ingredients
PrintDecadent Gluten-Free Strawberry Cheesecake Bars: A Simple Delight
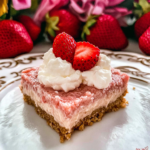
Buttery Gluten-Free Strawberry Cheesecake Bars filling. Easy, crowd-pleasing dessert, perfectly chilled and sliced for a matchmade-in-heaven sweet treat.
- Prep Time: 15
- Cook Time: 35
- Total Time: 50
- Yield: 16 bars 1x
- Category: Gluten-Free
- Method: Baking
- Cuisine: American
- Diet: Vegetarian, Gluten-Free
Ingredients
22 gluten-free Golden Oreos
4 tablespoons non-dairy butter, melted
16 oz non-dairy cream cheese
1/2 cup + 2 tablespoons coconut cream
1 teaspoon vanilla extract
1 cup fresh strawberries
3/4 cup sugar (or sugar substitute)
Instructions
Preheat oven to 350°F (175°C) and line an 8×8 inch pan with parchment paper
Grind gluten-free Oreos in a food processor until finely crumbly
Mix in melted non-dairy butter until resembles wet sand
Press crust firmly into prepared pan
In a blender, combine cream cheese, coconut cream, vanilla extract, strawberries, and sugar (or substitute)
Blend until smooth and creamy
Pour filling over crust, spreading evenly
Bake for 37-39 minutes until center slightly jiggles
Let cool completely at room temperature
Chill for at least 4 hours
Slice and serve chilled
Notes
Use a silicone spatula for easy cleanup
Chill for up to 24 hours in advance
Kite Hill brand non-dairy cream cheese is recommended
For softer crust, avoid over-mixing crumbs with butter
Nutrition
- Serving Size: 1 bar
- Calories: 280
- Sugar: 15g
- Sodium: 120mg
- Fat: 18g
- Saturated Fat: 9g
- Carbohydrates: 24g
- Fiber: 2g
- Protein: 4g
- Cholesterol: 0mg
For the Crust:
- 22 gluten-free Golden Oreos
- 4 tablespoons non-dairy butter, melted
For the Strawberry Cheesecake Filling:
- 16 oz non-dairy cream cheese (I love the Kite Hill brand!)
- ½ cup + 2 tablespoons coconut cream
- 1 teaspoon vanilla extract
- 1 cup fresh strawberries
- ¾ cup sugar (can use a sugar substitute!)
Step-by-Step Instructions
- Prepare the Crust: Preheat your oven to 350°F (175°C) and line an 8×8 inch pan with parchment paper. This makes it super easy to lift the bars out later!
- Crush the Cookies: In a food processor, grind the gluten-free Oreos until they are finely ground. It should resemble coarse crumbs.
- Combine Crust Ingredients: Add the melted vegan butter to the Oreo crumbs and pulse until everything is well combined. The mixture should feel like wet sand.
- Press the Crust: Press this mixture firmly into the prepared pan. This will be the base of your amazing bars!
- Make the Filling: In a blender, combine all of your filling ingredients: non-dairy cream cheese, coconut cream, vanilla extract, fresh strawberries, and sugar (or your preferred sugar substitute). Blend until the mixture is completely smooth and creamy.
- Pour and Bake: Pour the cheesecake filling over the crust. Spread it evenly to make sure you get a consistent texture throughout the bars. Bake for about 37-39 minutes, or until the edges are set and the center has a slight jiggle.
- Chill and Serve: Let the bars cool completely in the fridge for at least 4 hours. This is crucial for achieving that perfect cheesecake texture. Once chilled, slice and enjoy!
And there you have it – a dessert that looks impressive but is secretly super easy. Remember, cooking should be fun. Don’t worry if your kitchen gets a little messy; it’s all part of the joy.
Equipment
- 8×8 inch baking pan
- Parchment paper
- Food processor or blender
- Mixing bowls
Tips & Variations
- Swap Out the Strawberries: Feel free to use other berries like raspberries or blueberries. It’s all about experimenting with what you love!
- Sugar Substitutions: If you prefer less sugar, use your favorite sugar substitute. Adjust the amount to taste.
- Storage: Store leftover bars in the freezer for up to a month. Thaw in the refrigerator before enjoying.
- Don’t Rush the Chill: The chilling time is essential for the bars to set properly, so don’t skip this step!
Serving Suggestions
These Gluten-Free Strawberry Cheesecake Bars are delicious on their own, but here are a few serving suggestions to elevate the experience:
- Dust with Powdered Sugar: A light dusting of powdered sugar adds an elegant touch.
- Serve with Fresh Berries: Extra fresh strawberries or a mixed berry compote make it even more irresistible.
- Pair with Coffee or Tea: These bars are a perfect accompaniment to your favorite hot beverage.
Nutrition Facts
(Note: Nutrition facts can vary based on specific ingredients and brands. I recommend using a nutrition calculator for the most accurate information. These are estimates)
- Calories: 350-400 per serving
- Carbohydrates: 30-35g
- Protein: 4-6g
- Fat: 25-30g
Conclusion
There you have it—a simple, yet stunning dessert that’s perfect for any occasion! These Gluten-Free Strawberry Cheesecake Bars have become my go-to treat, and I hope they become one of yours too. From busy weeknights to special celebrations, these bars are guaranteed to bring a smile to everyone’s face. So, gather your ingredients, turn on your oven, and let’s make some magic in the kitchen. Don’t forget to share your creations with me! (and check out other recipes from bestdisheasy.com for more culinary inspiration!) Happy baking!
FAQ Section
Can I freeze this recipe?
Absolutely! These bars freeze beautifully. Wrap them tightly in plastic wrap and then in foil. They can last in the freezer for up to a month. Just thaw them in the refrigerator before serving.
How to make it ahead?
You can make the bars 1-2 days ahead. Just store them covered in the refrigerator. This gives the flavors even more time to meld together.
Can I use a different type of cream cheese?
Yes, you can substitute the non-dairy cream cheese with your favorite brand or even regular cream cheese if you don’t need the recipe to be dairy-free.